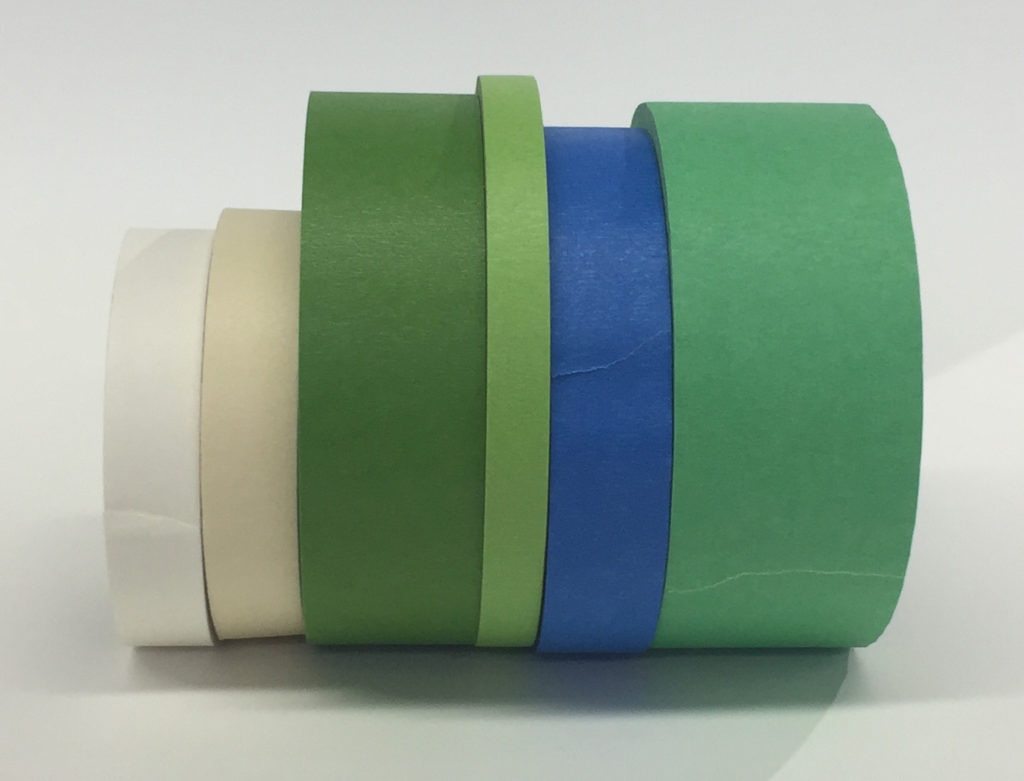
Painter’s tapes are ubiquitous, ranging from traditional masking tapes to newer yellow, blue, and green ones that tout different levels of tack and easy release, or highlight new technologies to tightly lock down an edge. For many of us, they have also become part of the common materials found in our studios. And what’s not to love? Whether to help with hard edges, or create a clean border around a work on paper, few would think twice about anything going awry. After all, most have been made and marketed with paint in mind, and by and large fine art painters have used them routinely with success. But a few years ago we also happened to stumble, quite by chance, on some curiosities that can happen when using these with oil paints and wanted to share those with you, along with some additional testing and recommendations.
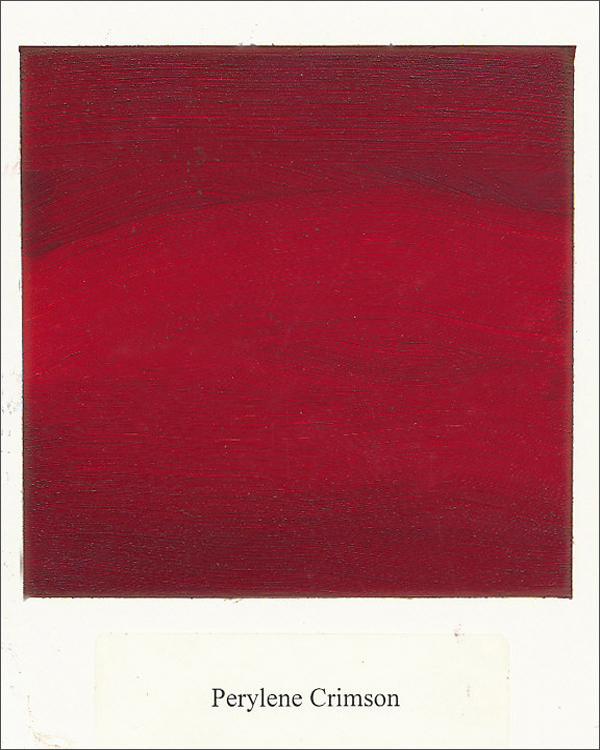
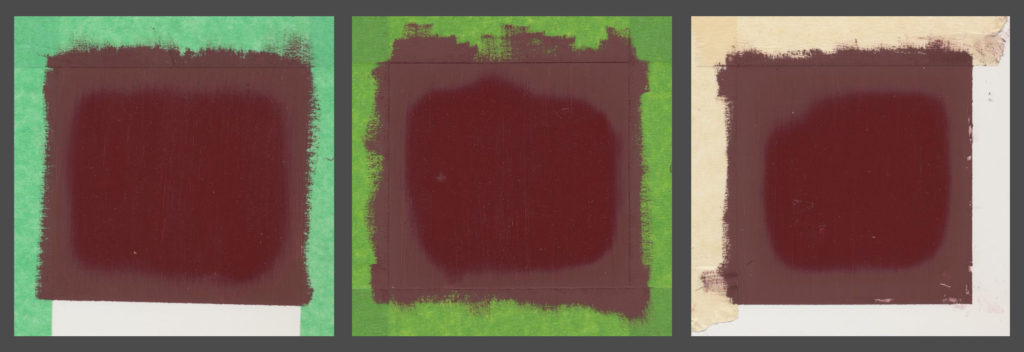
We first noticed something was strange while creating a series of paint-outs using Williamsburg Oils where we masked off an area on a lacquered card with tape, painted, then pulled the tape to produce a nice crisp square (Image 1):
So far so good. However, one group that was done late on a Friday was left out to dry over the weekend, with the tape intact, and when we came back we found that the colors had dried with a noticeable matte ‘halo’ running along the inside edge of the tape (Image 2):
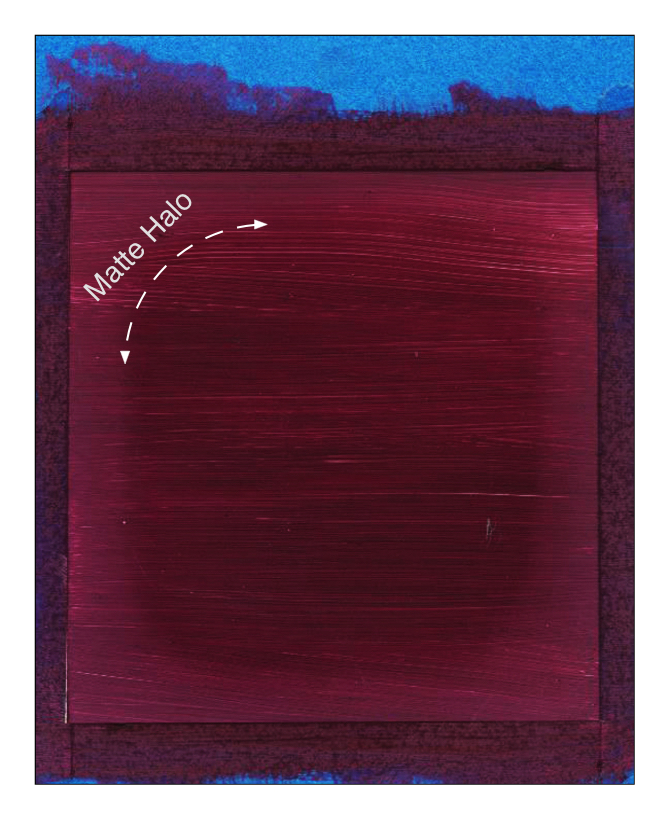
Initially thought of as an anomaly, we subsequently found that we could easily reproduce the effect, and not simply with the original blue tape, but with a wide range of tapes made for masking off areas. And there things stood for many years – an isolated curiosity we would highlight and show whenever giving a presentation to conservation students, using it as an example of something clearly in need of explanation. While no one has ever taken up that specific challenge, we recently decided to revisit the issue ourselves and carry out some additional testing. We share those results below.
Types of Tapes
We tested as many painter’s tapes as we could find at a large building supply store, plus a clear packing tape and a special low-tack one made for graphic arts, making a total of 10 altogether. We included both premium brands that touted the latest innovations and the more generic ones, down to your classic rolls of beige masking tape. The results we got were not uniform across all types of tape. Some, like the packing tape, or a plastic painter’s tape made explicitly for outdoor use, had no impact whatsoever. However, both were difficult to remove and would be problematic for most artwork. Of the rest, there was really no easy pattern that could guide you. Low end and high could both display problems, while some tapes that performed poorly in the past appeared to do better in this most current round. Unfortunately, this means there is no easy recommendation we can make in terms of a specific brand or type of tape, and one will need to do some testing on their own since changing formulations and constant updates make this whole field a moving target.
Absorbency
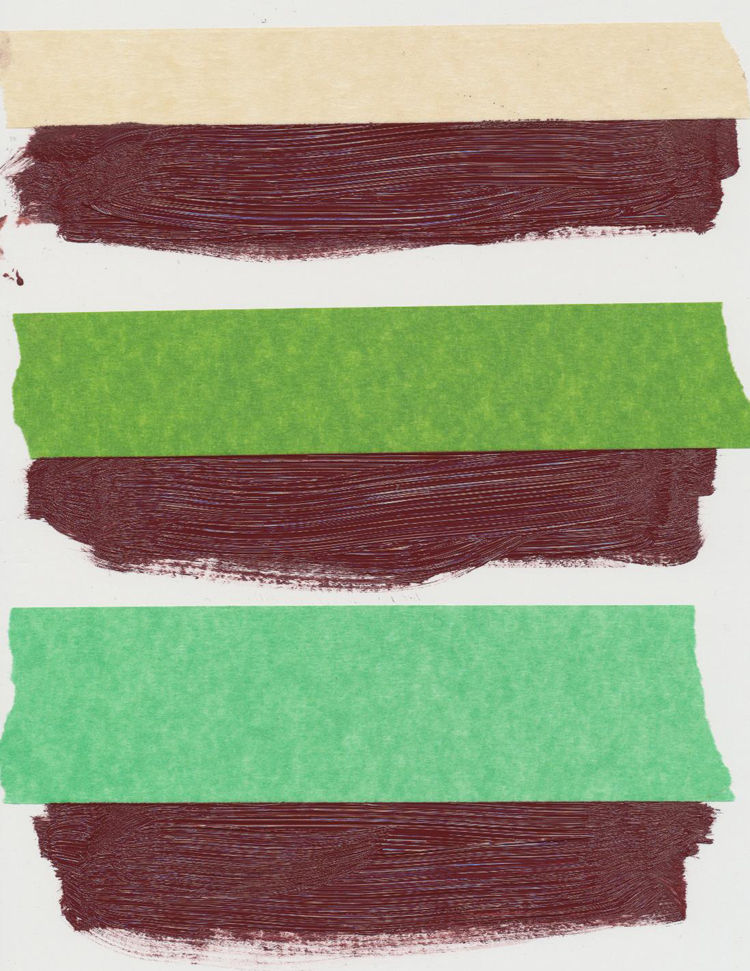
The first and most obvious explanation people gravitate to is that the tape must simply be wicking away enough oil to leave the paint matte and underbound. But none of the tapes ever showed visible signs of oil being absorbed, even when viewed under a microscope or checked for telltale signs of fluorescence under a UV light. There were never any oil stains or rings, or a noticeable change in the feel or texture of the tape itself. We even tried running a piece of highly absorbent tissue just inside the edge of the tape to capture any signs of oil seepage – and yet, this tissue remained clear and clean (Image 3):
Where the Paint and Tape Meet
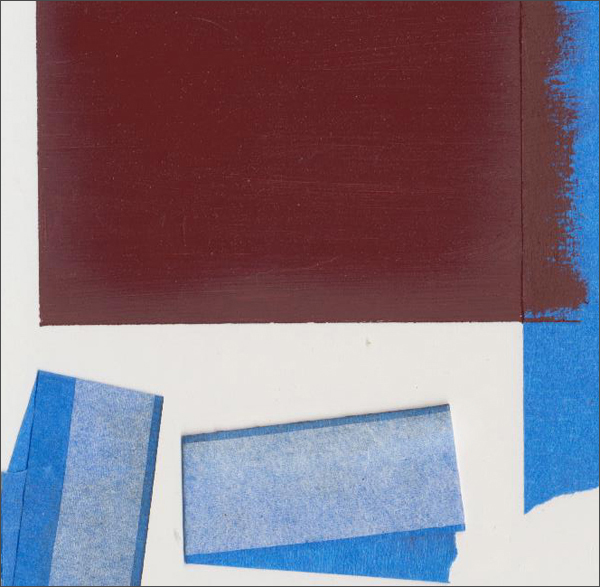
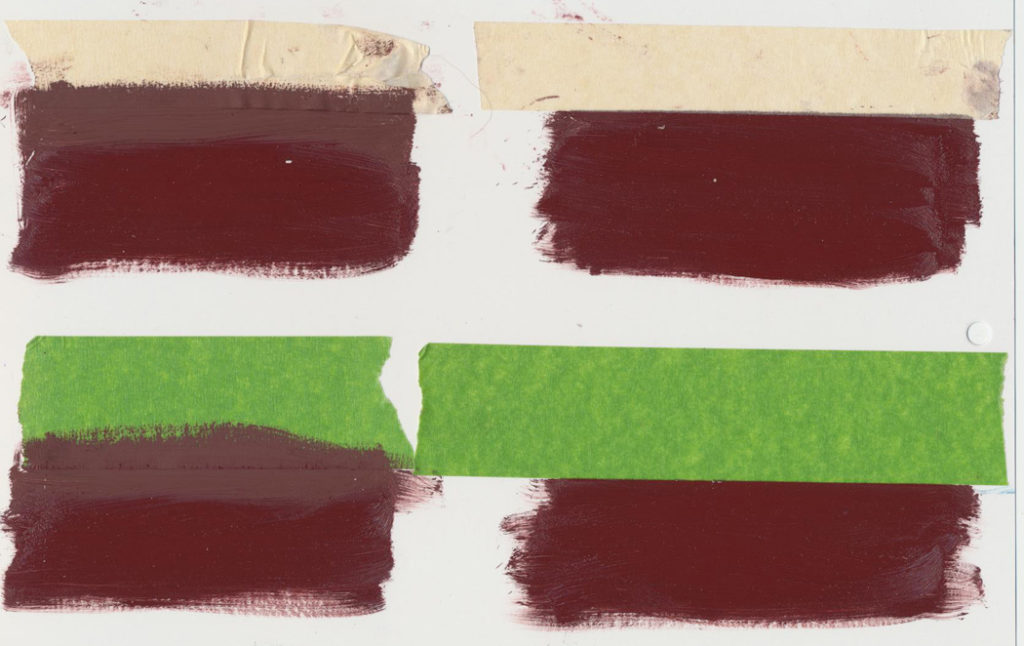
A very significant clue to understanding the cause came with tests that looked at where the paint and the tape made contact. It turns out that the matte halo seems to only develop when the paint runs over the edge, making contact with the top surface. Examples of that can be seen below. Note: some pieces of tape were removed after everything was dry for later examination (Image 4):
Compare that to the examples below, where we carefully removed the tape from the right-hand ones, replacing them with new pieces that only made contact with the edge of the paint. As you can see, those samples remained glossy (Image 5):
To rule out the possibility that the new tape had not made good contact with the paint, and to find an easier process, we repeated the experiment, this time applying a second layer of tape on top of the first prior to painting. After applying the paint, we then pulled this second layer off, being careful to leave the underlying clean strip of tape behind, which had a clear, unambiguous contact with the paint along its edge. Like before, none of those examples turned matte (Image 6):
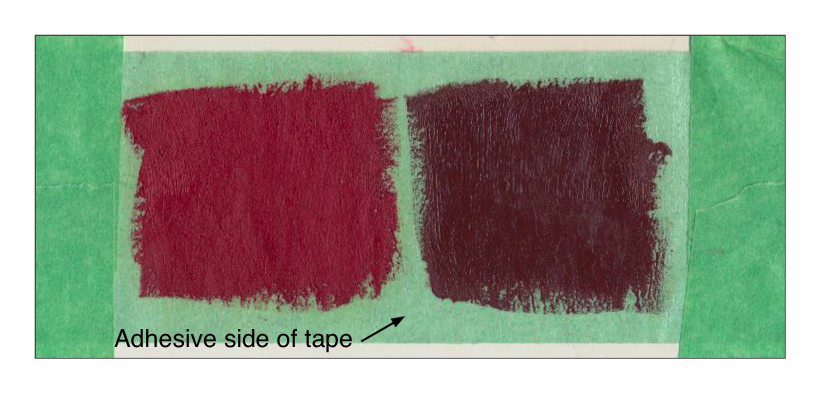
Lastly, we wanted to see if the paint would turn matte in contact with just the adhesive, so tried applying the paint directly to the sticky underside of the tape. In all these test cases, at least, they remained glossy (Image 7):
Timing
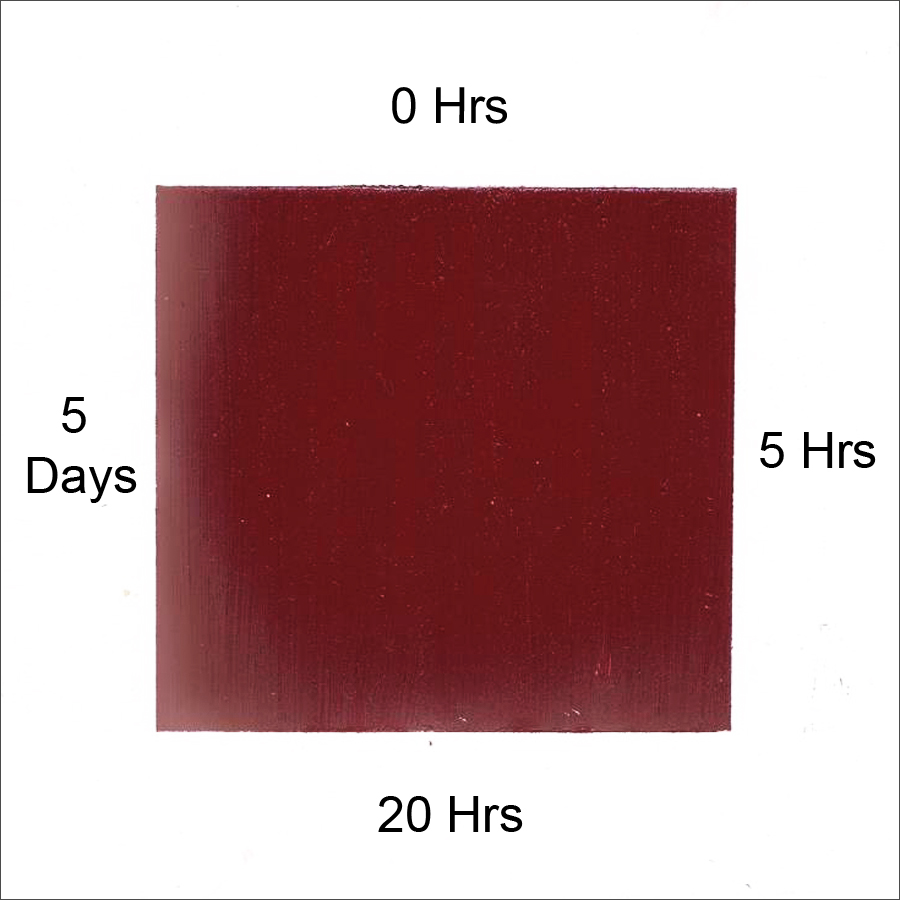
One section of our testing looked at the length of time that the tape and paint were in contact and whether this made any difference. Selecting some of the tapes that reliably produced dramatic results, we pulled off one side of the taped edges at different intervals: immediately after painting, 5 and 20 hours later, then finally after 5 days. As you can see below, which was representative of the results, the sides where the tape was either pulled up immediately or after 5 hours, remained glossy while the sides after 20 hours and 5 days appear increasingly dull. So clearly some amount of extended contact is needed for the matte effect to take place (Image 8):
Film Formation Issues
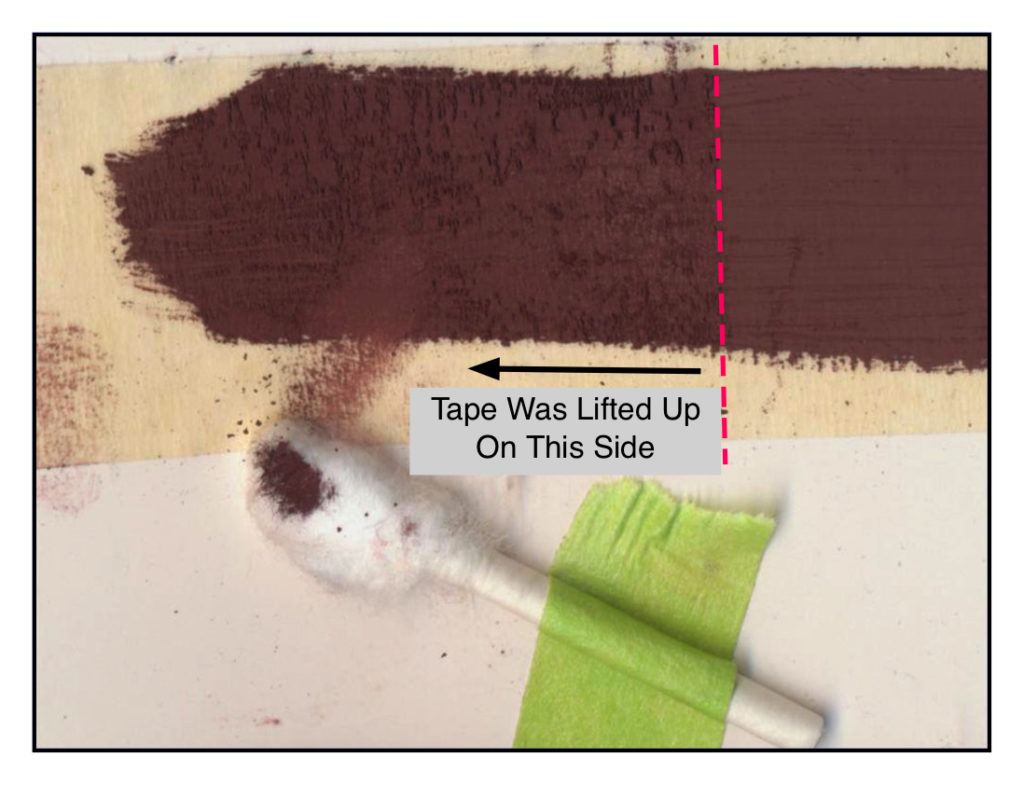
When we tried applying the paint solely to the top of the tapes that had caused the greatest effect in earlier rounds, we encountered a very dramatic disruption in the ability of the oil paint to form a film. The paint was clearly no longer wet; rather, it had turned into a very waxy, clay-like substance that could be easily smeared or wiped off with a finger or cotton swab. So it was not simply a matter of the drying process having been delayed or stopped midstream but somehow chemically altered or transformed into something else altogether. And so far it has retained this quality even after a couple of weeks. While it is hard to capture in a picture just how strange the paint feels, you can hopefully get some sense of its texture and fragility in the image below (Image 9). The rough texture on the left half of the paint happened when this section of tape was partially pulled up, causing the paint to literally pulverize into small tiny clumps:
Different Paints Different Results
Most of the current testing used Mars Violet as a form of control as it performed reliably, drying in a reasonable period and, by itself, to a fairly consistent glossy finish. In the past, however, a range of other colors were clearly affected, so we knew it was not simply an isolated incident. Unfortunately, trying to fully test a wide range of different pigment chemistries, formulations, and drytimes was far more extensive then we could undertake. That said, we did look at one very small set chosen mainly around drytime as a factor, choosing a selection of faster drying colors versus a slower drying one like Mars Black. And indeed, this did seem to impact the results. Five colors that typically dry in 1-3 days (Raw Umber, Cobalt Blue Deep, Phthalo Green, Titanium White, and Prussian Blue) had dramatically better results than the Mars Black, as well as the Mars Violet used in many of the other examples we have shown.(Image 10) However, Cobalt Blue Deep was still impacted, and more work would need to be done to rule out other variables and make sure the differences we are seeing are not somehow tied to other factors.
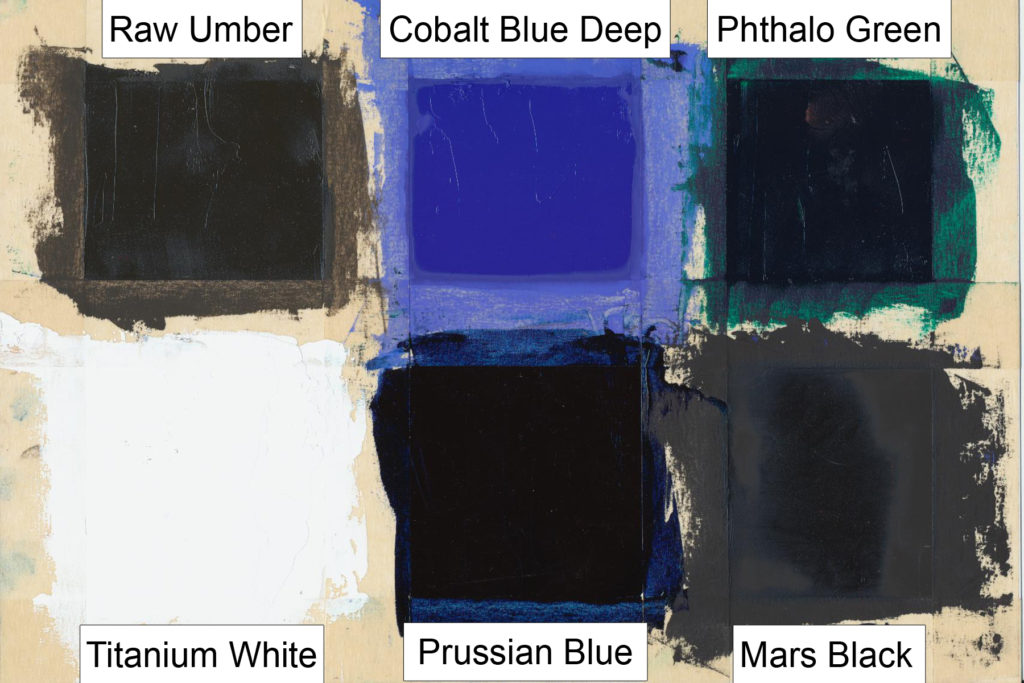
We also did not test the impact of mediums or solvent additions, which would obviously be critical to understand. So these are definitely avenues for future study.
Apparent Ineffectiveness of Sealing the Edge of the Tape
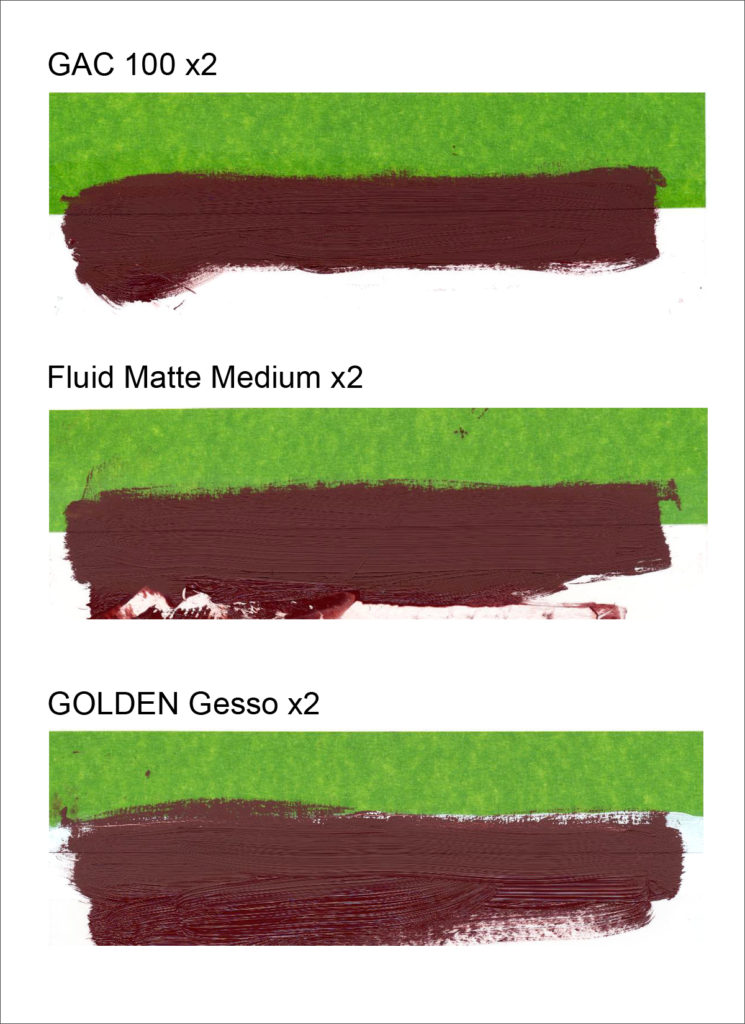
Moving from investigating the problem to looking for solutions, we took two of the tapes that had performed poorly in earlier rounds and tried sealing the edge with either 3 coats of GOLDEN Gesso, or 2 coats of GOLDEN Fluid Matte Medium or GAC 100. Unfortunately, as the example below illustrates, none of those options prevented the problem from occurring (Image 11):
Conclusions and Recommendations
So, where does all of this leave us? At this point, we still do not have a clear sense of the actual cause of the matte effect, simply a better understanding of factors that impact it. There might be traces of some release agent or unreacted catalyst left over from the manufacturing process of the tape that is disrupting or altering the curing process of the oil film. That still remains to be seen. What we can do, however, is recommend some best practices for oil painters who use masking or painter’s tapes as part of their process, whether to create hard edges within their work or to tape down primed paper or canvas prior to painting:
- Test any tape you plan to use. This can be as simple as applying a strip of tape to a piece of glass or other sealed, flat surface, and brushing paints along the edges and allowing them to dry. However, by itself, this is not always full proof as there might be batch to batch variations, changes in formulations, or other factors that the testing cannot account for.
- Pull the tape as early as possible. While ideally, you should pull it immediately after applying any paint along its edge, certainly try to do it within the first few hours.
- Use a second layer of tape. If you need the tape to remain in place for an extended period, try applying a second layer directly on top of the first and pull it whenever painting along the edge. This can be done multiple times if the area will be revisited, and could be very useful when using tape to secure a piece of paper or canvas to a panel.
Finally, if you are a conservation student or researcher and would like to pursue this issue, we think it is certainly an area of concern that has not been covered in the literature. If interested, please contact us and we would be happy to share the particulars of our testing and to help in any way we can.
And as always, if you have any questions or concerns of your own, let us know in the comments or email [email protected].

Understanding the interaction between oil paint and tape is important for artists who want to achieve specific results in their work. By learning about the curious results and possible explanations, artists can make informed decisions about when and how to use tape in their painting process.
Neesaun Zarbakhat Architecture