Large paintings present an increased difficulty level when it comes time to apply an “isolation coat” or a varnish layer. Spraying in lieu of brushing makes sense when a smooth, defect-free surface is desired. After all, there are reasons vehicles are spray painted instead of using a brush! While one may be receptive to the concept of spraying, most artists simply do not know where to begin, especially when selecting equipment. This is a valid concern because it’s not easy to decipher which equipment is most suitable for your specific needs. Artists may also be nervous about spraying products because it’s a foreign approach for them. The terms used are unfamiliar and technical. The studio workspace needs to be set up a bit differently to accommodate overspray and minimize airborne contaminants. Rest assured that learning how to use spray equipment is very similar to working in a new painting medium or employing a new painting technique; practice makes perfect and it takes time to learn how to do it right. If you know of someone that uses spray equipment such as a fellow artist, furniture craftsman, or automotive refinisher, it would be wise to seek their council.

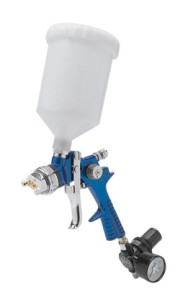
When buying spray equipment for the first time, the most practical approach is to start on the lower end of the range. There are decent spray guns available for very little cost. A HVLP (High Volume Low Pressure) gun we often suggest is a 1.4mm nozzle “Vaper” brand spray gun available at tool outlets such as NorthernTool.com. This $40 spray gun provides a decent spray pattern for thinner products like MSA Varnish or the GAC 500/Airbrush Transparent Extender (2:1 ratio) “isolation coat.” This gun is sufficient for achieving satisfactory results and even if you decide to move towards better equipment, you’ll now have a great baseline for comparison.

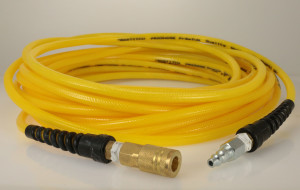
You will also need hoses to connect your spray gun to an air compressor. Longer hoses allow you to run the air line to the studio from another location where the noisy compressor may reside, resulting in a quieter working environment. All connections need to be air tight, and Teflon plumber’s tape is effective in preventing air leaks. The hoses and spray equipment should all be joined with quick-release connectors. These items can be purchased online or at a local hardware center. An air cleaner/moisture trap is also very handy to eliminate contaminates from being sprayed onto your artwork. Many moisture traps have air regulators which allow you to adjust the air pressure in the studio rather than having to keep going back and forth to the compressor to adjust the “psi” or pounds per square inch. PSI relates to the physical air pressure level; A more viscous paint will require more pressure to adequately spray compared to a thinner paint.

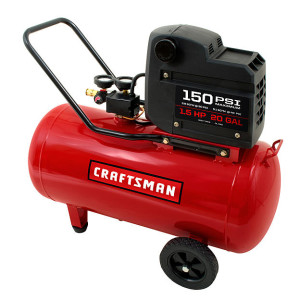
The most costly purchase (and potentially the most confusing as well) for your entry level stage is the air compressor. It is important to select an “oil-less” or “oil-free” model with a generous air tank, usually 10 or more gallons. This allows for a clean and smooth pressure while you spray. You can choose from many brands and models. Since this is an expensive piece of equipment, you might want to check around your family and friends’ garages to see if they own a compressor. Classified advertisement websites and the local paper are great sources for finding equipment less than retail as well. Just make sure the used equipment works properly before buying it.
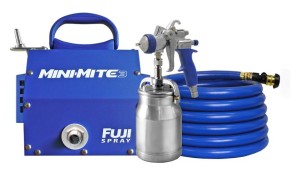
While this suggested set-up is intended to allow artists to get into spraying a large area with a relatively low startup cost, there are also “all-in-one” spraying set ups. The manufacturer has paired the spray gun with a compressor in order to take some of the guesswork out of spraying. These tend to cost more money but the need to figure out pressure settings, or what might be causing spraying issues is often reduced. Fuji Spray Systems has several set ups of HVLP spray equipment. These setups do work well but you are essentially locked in, as they will likely not work with a different spray gun, or a new compressor.

When you get your equipment set up, you should test it all put together to assure it’s working well. Simply fill the gun with water and check out the pattern quality and play with the adjustments on the spray gun and compressor to learn what they control. After that, move onto spraying the product you need to spray, but do so on test panels first. You can start with large pieces of cardboard coated with a dark color house paint. The sheen should be somewhat similar to the kinds of paints you work with. You’ll probably need to readjust the controls when you graduate from water to product, because the isolation coat mixture or varnish will have a different viscosity and flow rate. Before you jump headfirst into coating an actual painting you care about, be sure to practice your technique and follow the tried and true spraying application methods rather than “getting creative”. Here are some links to give you an idea of established methods: http://www.proceedsystem.com/wiki/index.php/Proper_Spraying_Techniques & http://www.proceedsystem.com/wiki/index.php/Spraying_a_Panel. As always, if you have any questions or issues, just contact a GOLDEN Materials Specialist!
