By Patti Brady
When I first heard about the new Digital Mixed Media products, I was totally flummoxed. The word “digital” meant that I was in deep trouble. I have enough trouble sizing my digital images, much less the idea of messing with printers or software programs like Photoshop®! I love paint. I love drippy, gooey, thick, luscious, physical paint and especially the hand to canvas, or tool to surface application.
Technology. I’m always behind the eight ball here. I just figured out how to use a blackberry, sort of and am totally freaked when something happens on the computer. This seemed complicated and out of reach.
And then there was the ‘pizza wheel’ cautionary warning. Take the pizza wheels out of the printer. Now I have to be a technician…with a screw driver. (By the way, I have never taken a pizza wheel out of my printer and still have had success!) Oh, yeah — and then all the cautionary legalese about blowing the warranty on your printer!
Another stumbling block for me was the use of the photograph for this new media. All I could think about was Rauschenberg. Hadn’t he already taken the photographic image to its ultimate in the art world?
This was an opportunity to embrace these new products and inspire the professional artists in my program.
Bug Bit.
Eventually, there were “hooks” that pulled me into exploring these new grounds and I have to admit, it was around recycling digital images of my finished pieces. As many artists do, I work in a series, re-working images from drawing, prints and paintings. Trained as a printmaker and working in monotype, I began to see the advantages of using stored digital images and printing them with an inexpensive ink-jet printer.
I’ve always loved collage and my paintings are painted in a collage-like process, so the idea of creating personal collage elements was a natural. I was already using skins that I had created and applying them to my paintings.
Printing on paper was not a big draw for me, but the idea of making skins from acrylic was! I was in the midst of finishing my book (see back cover), so I was already thinking about “pushing” the boundaries of acrylic, and now, why not with skins? The timing couldn’t have been better!
After getting several simple skins through the printer and jamming the printer numerous times (without killing it), the fear receded and the fun began. I finally realized that if I ruined a printer, there was always another one at the nearest Staples®… it was just a tool that could be replaced easily.
Quick Overview of the How-To: Making Acrylic Skins
Surfaces for Skins…
My favorite surface for making skins on is a large piece of High Density Polyethylene, about 1/2 inch thick, 24″ x 36″. I can make multiple skins at one time, and move the sheet from my work table to other tables for drying. I have several of these in use at all times. When teaching, I use plastic sheet protectors from the local office supply. These are made from a material that is perfect for making skins, but the best thing is that they are similar in size to standard print paper, 8 1/2″ x 11″. This also allows for stacking the skins when dry as they won’t adhere to each other. Even cheaper, and easier to find are freezer paper, kitchen garbage bags and plastic sheeting from the hardware store.
I usually pour out the paint or gel that I am using directly on the plastic sheeting and use a tool to spread the paint. I use a palette knife, a large pastry knife, a window cleaner, or a large putty or plaster knife to level out the acrylic. I’m not keen on very flat surfaces, I like a bit of texture, so I don’t spend a lot of time fussing over how smooth the surface is.
When the skin is dry, I apply the preferred Digital Ground. I like the cheap sponge brush for application. When using the clear Digital Grounds: Digital Ground for Non-Porous Surfaces and the Digital Ground Clear (Gloss), I attach Post-it® notes to the skin to keep track of the number of layers I have applied since it is recommended that you apply two coats: the first application vertically, the second in a horizontal fashion. Since these Grounds are clear, it is almost impossible to see them. Several times I printed onto skins that I forgot to coat.
When the Ground is dry, I tape the skin to a “carrier sheet”. I use regular standard weight printer paper or a heavier cover stock for thinner skins. Trim any thick edges, or pieces that extend over the edge, and tape cleanly the leading edge and both sides. I line the tape up very carefully to match the edge of the paper.
I use Photoshop to manipulate my images, both photographs and digital images of my paints and paintings, mostly to increase contrast and color saturation. I insert that saved image into a Word Document. It is very simple to place the image in the center of the page, so that it will print where you want it to on the skin. I sometimes also adjust the printer options for paper selection and text or image choices. You’ll want to spend some time experimenting with all the features possible.
Photoshop.
Similar to many artists, I haven’t mastered Photoshop, and probably never will, but I have begun to explore it. Using my digital images of paintings and prints, I wanted to change the colors, saturation, and contrast for printing onto various skins, especially when printing onto a patterned or strongly tinted skin. The original image needed to shift in hue, values and saturation.
The printer that I am using for all my forays into printing is an Epson Stylus® NX400 All-in-One. Unless I wanted to completely take the printer apart, there is no simple way to get to the little tracking wheels inside, so I proceeded onward, and have had no problem.
Skin Ideas.
Not too long into the experimental printing phase, I got pretty excited to see how wild combinations of acrylic products might combine to create really unique skins.
Following are several options that I have explored.
MULTILAYER SKINS: After making several skins too thin and fragile, I began to add another layer to strengthen and thicken the skin. I was able to create especially beautiful skins when using the Iridescent and Interference products.
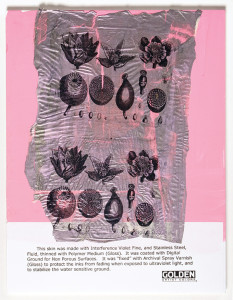
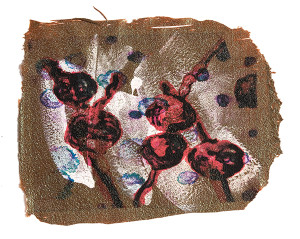
One skin began with a thin layer of GAC 800, then a wash of Iridescent Stainless Steel and Interference Violet, lightly brushed on, leaving clear spaces so that the skin remained somewhat translucent.
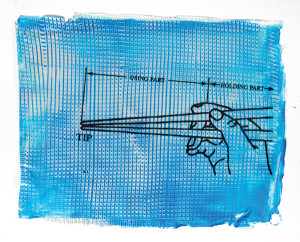
The first layer of this skin was Interference Blue painted out and scraped with a comb to create the basket weave. When dry, a layer of Manganese Blue Hue thinned with Polymer Medium for more transparency was applied.
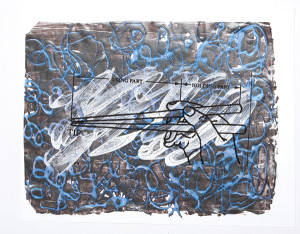
This skin began with dripped twirls of Interference Blue mixed into Clear Tar Gel. When dry, I scraped a layer of Micaceous Iron Oxide over the swirls to maximize the Interference effect (best over black)! One extra clear layer of GAC 800 to strengthen the skin was added. Then a loose and painterly application of the Digital Ground White (Matte) was applied on top.
GLASS BEAD GEL: For the purpose of creating skins, this product works best if it is kept as thin as possible. Because of the shape of the beads, it is especially beautiful if it’s tinted with a small amount of Interference color. The back side of the Glass Bead Gel will be very flat and easier to print on, but the “pebbled” side is also printable, offering a more speckled image!
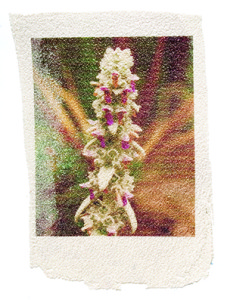
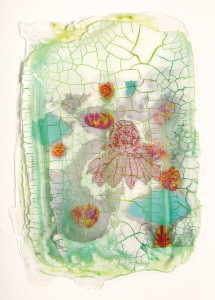
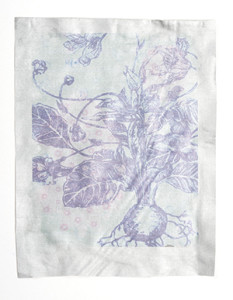
This skin is Glass Bead Gel, tinted with Iridescent Pearl. The “top” pebbled side was coated with Digital Ground for Non-Porous Surfaces, then printed on with an image of a flower stem.
This skin is Glass Bead Gel mixed with Interference Oxide Green. One layer of Digital Ground for Non-Porous Surfaces was applied and when dry, the loose white brushstrokes of Digital Ground White (Matte) was created. The digital image was originally a monoprint, the color and size were manipulated in Photoshop.
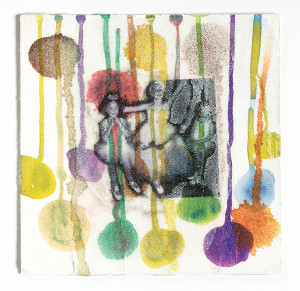
The Glass Bead Gel skin in this example is totally transparent, and was printed on the smooth side, with a layer of Digital Ground for Non-Porous Surfaces. I used an old black and white photo of ballerinas. On one side I washed off the black edges, but left the other side alone. This skin was glued with Soft Gel (Gloss) to a backing board created with: 1. Light Molding Paste, stained with the “balloons” of thinned Fluids. 2. A layer of Glass Bead Gel, when dry, repeats of the “balloons” and stains.
The Digital Ground is quite water sensitive, which can be a drawback, but also a great opportunity for manipulating the image. Water and a brush, or water with pointed color shapers can remove areas of the image. The image can then be “set” with a quick spray coat of the Archival Spray Varnish, so that the image can then be painted onto, or have gels applied without dragging the image. The benefit of using the Archival Spray Varnish is the added protection of the Ultraviolet Light Filters and Stabilizers (UVLS) present to protect the image. Another option is to very carefully apply Matte Medium to the surface of the image. Use a very soft brush and apply gently, so as not to resolubilize the Ground and the ink. (This will not add the UVLS protection, so that should be applied when the entire piece is finished.)
Water Sensitivity of Digital Grounds.
Another boon to the water sensitivity of the Digital Ground and the ink-jet inks is that they can be completely washed off an acrylic skin. Several times I have printed an image that didn’t work, and I was able to easily wash it off and save the skin to be printed on once more.
CRACKLE PASTE: Now this one was a brain teaser! First I put down a skin of Clear Tar Gel. When dry, I applied a layer of Crackle Paste and let it crack overnight. I very carefully washed a layer of thinned Fluids over the surface and let that dry. Lastly, I applied another layer of Clear Tar Gel, sandwiching the Crackle Paste between the layers. The resulting skin resembled alligator skin.
The image printed on this skin was originally one of my paintings. It was altered, or removed with water and a brush, removing sections, and then finished with several coats of Archival Spray Varnish.
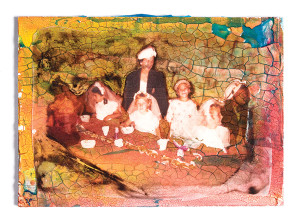
This skin was made with Soft Gel (Gloss) for a completely transparent skin. The image was printed, and most of the background and foreground were removed with water. The communion dresses, hats, veils and paper cups were painted with Fluid Titanium White on the reverse side. When dry, the skin was glued to a previously worked Crackle Paste board.
TRANSPARENT: I have worked extensively with Plexiglas paintings, having finished an eight painting commission for Whole Foods Market®. Working with the plexus, I took advantage of the wall color, by leaving areas open and clear, also painting on the backside and the front side, so with that experience, it was a simple step to create transparent acrylic skins to re-create the options. Clear Tar Gel, GAC 800 and Soft Gel (Gloss or Matte) work well for clear skins.
Working on the back side of the image with transparencies also affords some interesting options, especially when applying to patterned backgrounds as the painting obliterates the background.
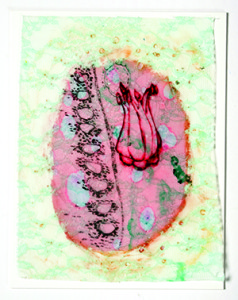
LACE: I took an actual piece of blue lace and covered it with Self Leveling Clear Gel, embedding the lace in the gel. After drying it, I coated it with Digital Ground for Non-Porous Surfaces. The printed image is a color enhanced and digitally tweaked original print. Again, the edges were removed with water, changing a rectangle shape to oval.
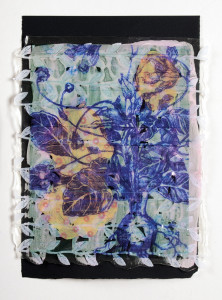
RIBBONS: Mary Morrison, our GOLDEN Working Artist in Colorado had been working with fabric artists and had shown me a way to embed ribbons in Heavy Gel (Matte). Tape the ribbons flat and taut, leaving a 1/2 inch between them, then spread a layer of Gel over the surface. On the back side, the ribbons remain uncoated, but the top side is one clean layer of gel. Either side can be coated with the Digital Ground and printed. Make sure you cut and tape all the edges carefully on the carrier sheet. The best results are with light value ribbons.
In this skin you can see the edges of the “ribbons” on the left side. In this case the ribbon was a pressed paper in the shape of a vine and leaves. The blue image was printed on the slick side, over a Digital Ground. The back side was washed with a thin glaze of Titanium White and Quinacridone Red, finally applied over a background of Micaceous Iron Oxide.
ACRYLIC SKINS EMBEDDED IN ACRYLIC SKINS: This was an extension of a workshop that I developed for Rubber Stamp artists. I had created marbled paint skins – flat pours of Clear Tar Gel with droplets of Fluids, then using the tip of a palette knife, dragged the color through. This process is done much like the chef who swirls chocolate sauce through raspberry sauce for the desert tray! I had stamped an image onto this dry skin and cut out the shapes for a collage workshop. I wondered if I couldn’t use these pieces in a skin, so I placed them on the HDPE, and poured Clear Tar Gel over them, and spread it out flat. When this was dry, I applied the Digital Ground to one side and printed on it. The result was curious and mysterious.
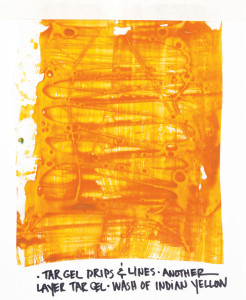
TEXTURED: I created a quite beautiful and unusual skin by beginning with long spidery strands of Clear Tar Gel dripped over the HDPE. When dry I brushed another layer of Clear Tar Gel over the strings to consolidate the piece. A final thin wash of Quinacridone/Nickel Azo Gold was applied. The paint pooled around the edges of the raised line, revealing the patterns of the first layer.
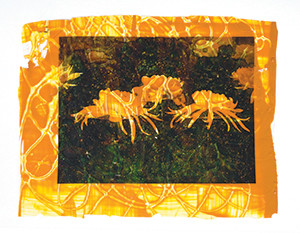
On this skin, I actually forgot to apply the Digital Ground, and a very detailed photograph of Chrysanthemums bled over the surface, only leaving the bright white area with crisp edges. It was one of the lucky accidents, as it is a much better piece with the greenish black becoming one element, dissolving the leaves and stems.
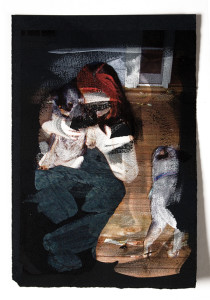
DARK SKINS…DARK PAPER: At one point during exploration, it becomes obvious that the printer does not print white! So, the skins that you make must be fairly light in color if you want the image to be clearly visible. But you don’t have to be limited by that. There are some very interesting ways to use dark paper or skins, in conjunction with the Digital Ground White (Matte). Using an absorbent paper such as Arches® Black, run it through the printer without a digital ground. The image will be faint, but you will be able to see the general outlines. Use the Digital Ground White (Matte) to paint into areas that you want the image to be clearly printed, leaving some areas unpainted. When the Digital Ground has dried, (and not having moved the original image) run the image through the printer again.
This print of a photograph was printed on Arches Black (a printmaking paper). The print is only visible on the bright white of the ground. My husband, Phil Garrett used a large round brush, and quickly, loosely applied the Digital Ground White (Matte) to Black Arches printmaking paper. The application was ragged and in some areas almost dry brush. When the full color image was printed, it created an odd mix of highly detailed sections and ghostly abstract areas. The Digital Ground White (Matte) picks up the most vivid color and detailed images.
The same image was printed on an open filigree Japanese black paper. This paper was glued down over a brightly printed image, also a digital print onto a skin of Coarse Molding Paste embedded into cheesecloth.
You can play with the same ideas with dark skins…
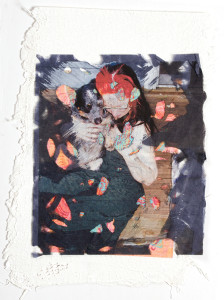
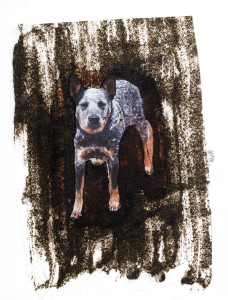
Another interesting skin in the “dark” area is using the Coarse Alumina, a blackish, grayish gritty gel. I mixed this in with GAC 800 for a poured skin resulting in a “dirty stippled” translucent skin, but too dark for a printed image. I had to apply the Digital Ground for Non-Porous Surfaces to get an image on this skin. When it was printed, I removed areas (Rosie the Heeler) with a brush and water. When dry, I applied the Digital Ground White (Matte) into the area. Then I ran the same print through the printer again. (If you have this image saved in Word, then you will have it registered.)
GOLD MICA FLAKE: I was curious to see if I could embed the Mica flakes in a skin, so I mixed Gold Mica Flake into the Clear Tar Gel, poured it out, and spread it with a palette knife. In later versions, I added a touch of Interference Violet for greater reflective qualities.
Now that I had Gold Mica Flake embedded in a skin, what else could I experiment with?
PRINTING ON FABRIC: Many fabrics are porous enough to take a print without the Digital Ground, but using the grounds will help to secure more ink on the surface rather then bleeding through. It will also stiffen some fabrics.
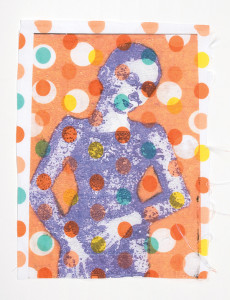
Cotton – This is simple polka dot 100% cotton. I used Digital Ground Clear (Gloss) to prime the fabric. I taped the cotton to cover stock for a fairly stiff carrier sheet.
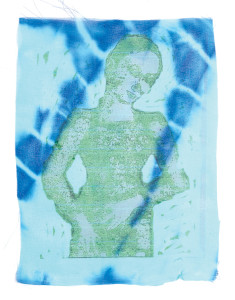
Polyester – This is “tie-dye” polyester fabric. I used the Digital Ground for Non-Porous Surfaces.
Ironing Board Fabric – I used Digital Ground for Non-Porous Surfaces. This is a 100% Polyester fabric, with stitched embroidered designs and metallic thread, using the Digital Ground for Non-Porous Surfaces.
Printmaking Opportunity.
There are some obvious printmaking options using the printed image from an ink-jet printer. The first is printing onto lightweight Japanese papers that are traditionally used for Chine-collé. Many of these papers are absorbent enough to accept the ink without the digital ground, but the application of the digital ground will keep the ink on the surface, and prohibit it from bleeding through to the backside of the paper. This is helpful when the paper is adhered to the larger printmaking paper that is the backing support. The image should be sprayed with Archival Spray Varnish because most often the Japanese paper is applied to a dampened printmaking paper. Chine-collé is most often done on a large professional press.
There are opportunities for printmaking application on a smaller scale, and without a press. Using a transparency film for an ink-jet printer, coat it with two layers of the Digital Ground for Non-Porous Surfaces (test both sides) before printing, have a high quality printmaking paper (half sized, waterleaf, paper damp and flat on a hard surface) and a brayer or woodblock batten ready. You can also have registration marks on the paper, as you will be able to see through the film for placement. Run the film through the printer, and immediately place facedown on the damp paper, using one of the tools to carefully rub the image into place. Pull off the film, and the image should be directly transferred to the paper. This will take some trial and error to find the right papers and offset methods.
Scale.
Eventually, I wanted to do larger pieces and was yearning for a larger printer, with a straight through path so that I could do larger prints, but was a bit put off by the prices. While exploring the web one day, I ran across a free program, blockposters.com.
It was so simple even I could use it! You download one of your images, fill in the size and number of pages you want the program to create, and hit enter…your image is put into PDF files…and can be printed out immediately, creating very large versions of your image! I was able to make several small skins that could be glued together to create a larger image, saving the current need to invest in a larger printer.
Combining with Paint.
This is the fun part, adding these skins and images to an array of grounds created with gels. I have hundreds of surfaces that I have created with various layers of gels, grounds, washes, stains and texture. Finding the right surface to apply these skins to is a challenge. Painting back into the skins, pouring gels over, or slathering with thick gels, and scraping back is all part of incorporating them into pieces.
Explosion.
In my teaching and lecturing on the new Grounds, I have had a new group of artists attending to discover what these products can do. Digital Artists, who compose their paintings in the digital world, are interested in the new surfaces available to them. Fabric artists, who make large wall hangings, quilts and mixed media, are fascinated by the opportunities for printing on fabric. Photographers are intrigued by the possibilities for new substrates, and it is an obvious boon to printmakers. Schools and art teachers are finding this to be a wonderful teaching tool. An inexpensive ink-jet printer…who would have thought?
About Golden Artist Colors, Inc.
View all posts by Golden Artist Colors, Inc. -->Subscribe
Subscribe to the newsletter today!
No related Post

