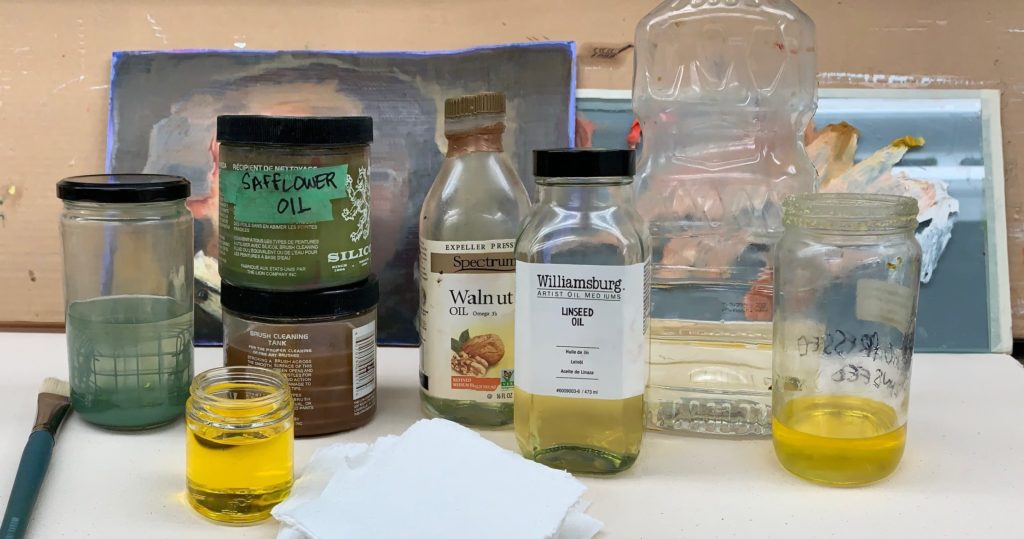
For oil painters who want to reduce the amount of solvent in their studio, we would like to share a solvent-free brush cleaning option that can be used during and after painting. All you need for this process are paper towels and a container with 2-3 inches of drying oil such as linseed, safflower, walnut or poppy oil. We are all familiar with using turpentine or mineral spirits for cleaning our oil laden tools. But, we often share with artists, that if you spill salad dressing on the counter, you don’t reach for the turps to clean it up, you typically reach for a paper towel or rag – which is the first step in this process.
Step 1. Unload any excess paint out of the bristles with a paper towel or painting rag. Get as much paint out of the bristles as possible. Removing paint during this step will make cleaning with oil much easier.
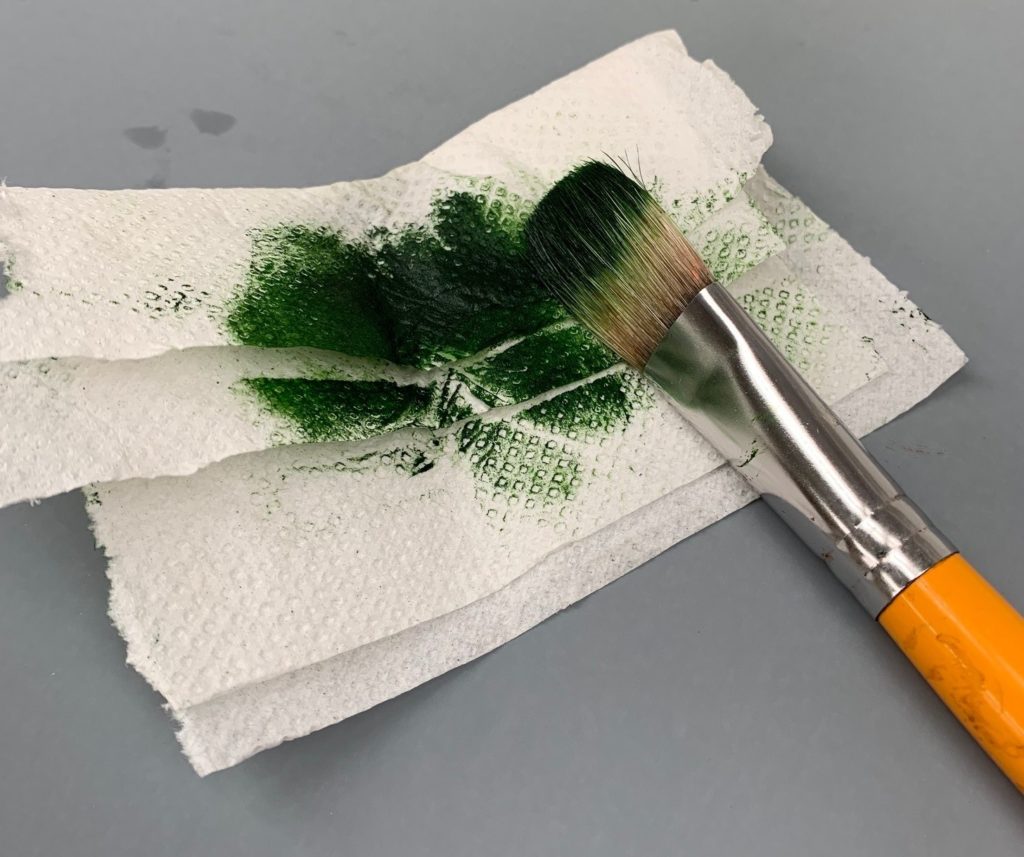
It is not so obvious to use drying oil to remove paint from your tools, just like you wouldn’t pour olive oil onto you salad dressing spill to clean it up. But, when it comes to cleaning pigments, oils are incredibly effective. Drying oils are amazing wetting agents, which gives them the ability to effectively surround pigment particles and flood them out of the bristles.
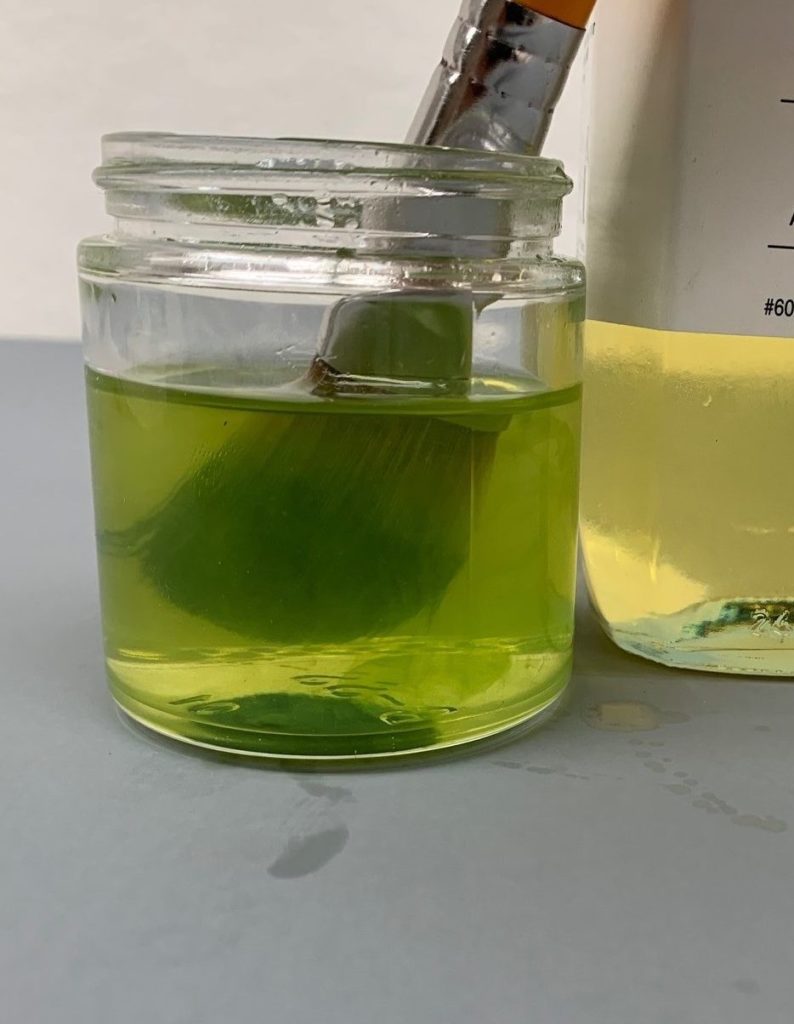
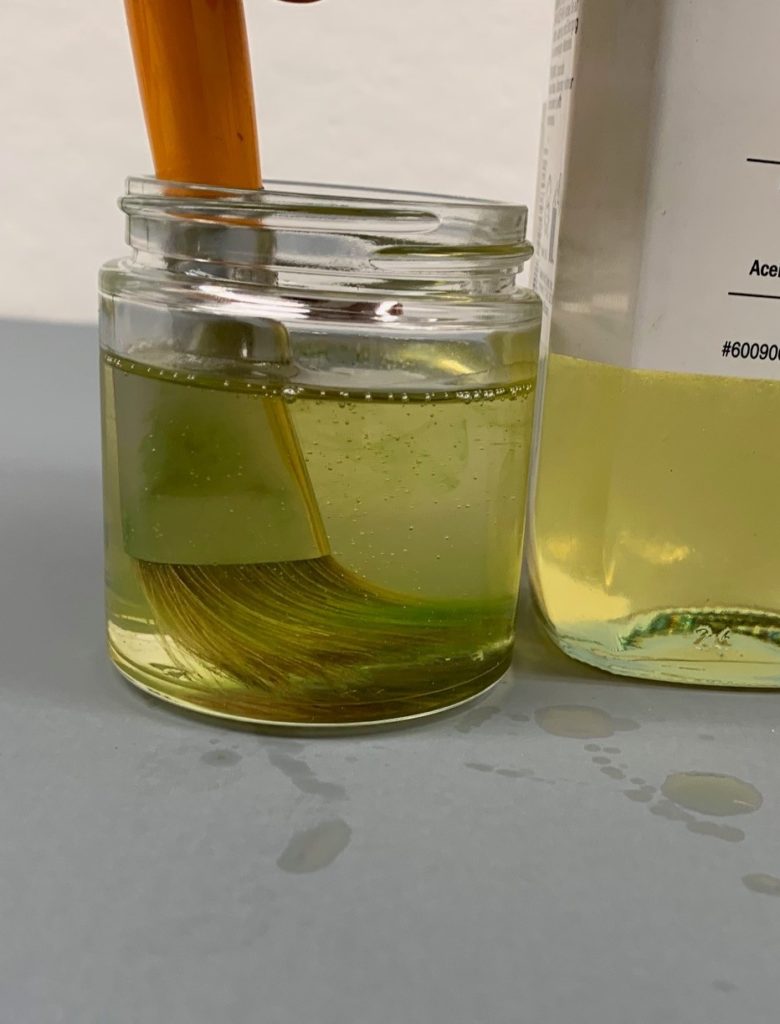
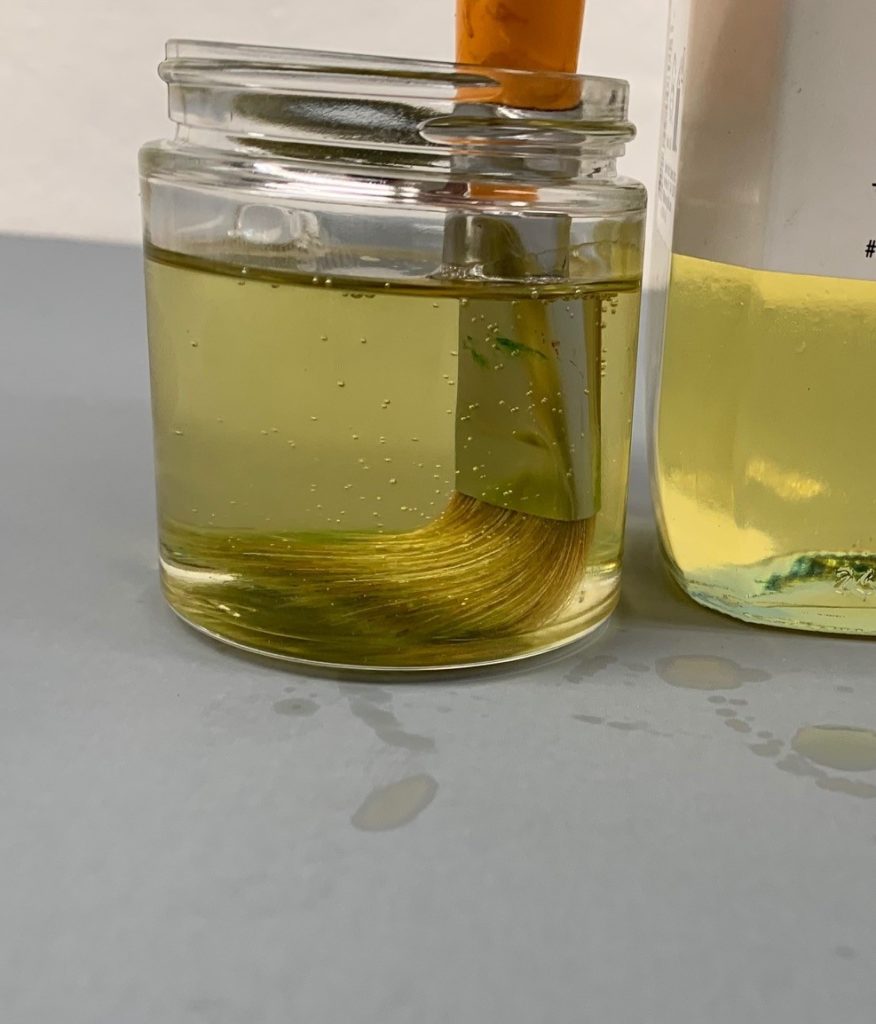
Step 2. Dip the brush into the oil up to the ferrule, entirely coating the bristles. Use a paper towel to work the oil in-between the bristles, releasing and drawing out the color. Squeeze the bristles from the ferrule to the tip or simply wipe the brush back and forth onto a towel. Use a fresh paper towel with each dip. Repeat as many times as needed until the oil starts running clear. Wipe and massage any remaining oil out of the bristles before use. There may be some residual color in the brush, but it should be good for most colors, especially dark or neutral colors. It took three dips and subsequent wiping to remove the Sap Green from the brush in the illustration below.
Step 3. If a little residual color is not acceptable and further cleaning is required, dip the brush back into the oil and bounce the bristles against the bottom of the container – switching from one side of the brush to the other. Repeat until all residual color in the brush gets released into the oil. Try not to smash the brush straight down, which can splay the bristles and damage the shape. An alternative option is to use a Silicoil™ cleaning tank filled with oil. When using a Silicoil, gently work the bristles back and forth against the coil to remove any remaining color. Wipe all the oil out of the brush with a fresh paper towel. This brush should now be clean enough to continue working with even the palest colors, including white.
Step 4. At the end of the painting session, brushes need to be cleaned with soap and water. After step 3, simply lather the bristles with brush cleaner or mild soap and massage them at the ferrule to remove all the remaining color and oil. Rinse and repeat until the water runs clear. Shape the bristles and lay out to dry.
Although this process is fairly straight forward, there are a couple things to consider:
Use drying oils such as linseed, safflower, walnut or poppy oil to clean brushes during the painting session. This is because the oil used to clean the brush will inevitably get into the painting and needs to dry like normal paint and mediums to form stable paint layers. It should be fine to use safflower, walnut or poppy oil from the grocery store for cleaning during the painting session, but make sure they do not contain Vitamin E or Tocopherols, which are anti-oxidants and will slow down the drying process. These ingredients should be listed. Reserve non-drying oils such as vegetable, canola or mineral oil for cleaning brushes at the end of the painting session before washing with soap and water.
The oil you use for this process will get dirty. Although pigments will ultimately settle to the bottom of the container, it can take some time. Having several containers filled with oil for cleaning can help with this issue. One option is to use the dirtiest oil for the first rinses, then move to cleaner oil as your brush gets cleaner. Or, have a couple containers where the oil can settle. Gently pour the cleaner oil into a fresh jar before each session. Theoretically, you should be able to keep using the oil without having to discard it. When it gets dirty, simply set it aside and let it settle. If the oil gets too dirty or the container has a lot of accumulated sludge, then pour off any clarified oil and clean out the sludge at the bottom with a paper towel and discard. We recommend wearing gloves for this procedure, as it can be pretty messy.
Cleaning brushes with oil requires patience. This process can take more time than cleaning with solvents. Not only does it take longer for pigment to settle out of the oil (days to weeks), but staining colors will take more time to clean out of the brush with this method than earth colors or colors with low tinting strength. Consider using dedicated brushes for stronger colors or specific color families during painting. These brushes can simply be wiped clean and reused for similar color mixtures so they do not have to be cleaned as often.
Please keep in mind, that oily rags or paper towels are a SPONTANEOUS COMBUSTION HAZARD. Store and dispose of contaminated rags properly. To reduce risk, paper towels or rags should be kept in a covered, metal trash receptacle and fully saturated with water. Remove all oily rags daily from the studio or home in a sealed trash bag.
Admittedly, it is hard to change practices that one has performed for years. The method described above does require some getting used to, but the ability to remove unneeded solvents from your studio is something we think you’ll find incredibly valuable. Please let us know how it goes!





Thank you for ways to clean up without toxicity. I was told by a prolific oil painter that Murphy’s Wood Oil Soap works well for cleaning brushes. Bought some but haven’t tried it yet. She swore by it.
Hello Sharon,
you are welcome. We are glad to share this information.
I haven’t used Murphy’s Oil Soap for a while, but used to use it a lot for cleaning my oil paint brushes. I also like Palmolive dish soap. Both seem to work well and don’t dry out the bristles. Give it a try. If you find for some reason, your bristles become more rigid after using these products, then discontinue use and go back to a brush cleaner/conditioner.
YES!!! Murphy’s Oil Soap is a wonder! A must have for painters!
Thanks for the comment Syl!
Thanks for the post! I have cleaning brushes with safflower oil for about a year now, but I still learned a lot from this post.
Hi Julie
Glad it is working out for you! It is not really that difficult and it is a major upgrade in air quality.
Thanks and take care.
Greg
I am just curious why you do not recommend wiping and then cleaning with soap and water during the painting session to reduce the number of dips required.
Hello Sally,
Thanks for your comment. We simply wouldn’t want an artist to inadvertently incorporate water into their paint layers. Water can cause oil paints to dry slowly, potentially remain soft and to form surface defects. It may take more water than just damp bristles to cause these issues, but we prefer to err on the side of caution when making recommendations. For example, Willem DeKooning was known to create emulsions with his paint by adding oil and water. There is an interesting study of his paintings by Susan Lake, called “Willem DeKooning – The Artist’s Materials”, that elaborates on some of these conservation issues. While using oil requires more dips, we feel more confident that a small amount of oil getting into the paint layers should not cause any unforeseen issues over the long term.
Greg
I use a watermixable oil paint and wish Williamsburg would develop a line. Almost zero water until clean up and if do, water will not be a “invader”. Underpaint in Golden acrylics then oils, utilizing spike lavender as the almost exclusive dryer. Thank you for this article and advancing the solvent free possibilities. Sensitivity issues solved.
Hi Claude,
Thanks for the comment. No plans at the moment for Williamsburg Water miscible oils. Want to be sure to note that oil of spike lavender is still a distilled solvent and can have an impact on air quality and cause sensitivity in some users.
Best,
Greg
Thanks for the post. I have been using a silicoil tank with cooking oil and/or ivory or Murphys oil soap to clean my brushes for years. It’s easy and totally routine now. I had thought that cleaning brushes with a solvent was a relatively new thing (like in the past 200 years or so).
I’d like to try not cleaning brushes at all and keep them in oil mixed with oil of cloves between uses so the paint doesn’t dry but I haven’t done it yet.
Jeff
Hello Jeff,
We will have to look into when solvent first started to be used specifically for cleaning brushes. Not sure about that. On leaving brushes in oil between sessions, I have done that successfully without the addition of clove oil, using a paint roller tray. I simply filled the tray with oil and laid the brush handles on the ramp with bristles submerged. The only drawback, was the oil dried along the edges and onto the handles of the less used brushes after some time. While adding clove oil might mitigate this issue, it could also radically slow drying if it gets into the paint layer, and according to MITRA, could substantially weaken the dried paint film.
MITRA is material Information and Technical Resources for Artists – an online forum hosted by the conservation department and the University of Delaware: https://www.artcons.udel.edu/mitra
Best wishes,
Greg
Good post. I’ve been using walnut oil in a silicoil jar for more than three years now. I’d recommend that over “daubing” the brush on the bottom of the jar. Not only does it protect the bristles shape but also keeps from stirring up any paint sludge laying in the bottom.
We agree Patricia. Thanks for your comment!
Can you give me directions for cleaning acrylic paint out of my synthetic brushes?
Hello Deborah,
Wet acrylic paint can simply be wiped from the bristles, then cleaned with soap and water. Warm water should be fine. If the paint is dried in the bristles and up into the ferrule, it may require a dedicated brush cleaner or brush restorer product. We do not make brush restorer, but you should be able to find one through your local art supply retailer.
Greg
Wonderful forum! Thank you! A ps to the acrylic clean-up post – remember NOT to poor out acrylic water clean up in the sink/nature as it contains micro plastics which is a big issue. There are some good posts about alternative solutions on the net. Many folks think “water soluble” is a green light to poor down the drain. 🙂 Maria
Thank you for your comment Maria. We have a new waste water cleaning system for removing acrylic solids and pigments from water. Its a very simple process. Here’s an article on that system: https://justpaint.org/cleaning-your-acrylic-waste-water-made-easy/
You can contact us at [email protected] with any questions.
Take care,
Greg
Thanks Greg – I have been using oils and vegetable cleaning agents for cleaning in the print studio for over 15 years since leaving uni – had also used sparingly in paint studio after completing paintings – thanks for the extra advice during the painting process – I have been wrapping brushes in cling film – this will make this less messy
Hi Gary,
You are welcome! Great to hear cleaning with oil has been working for you in the print and painting studio! Thanks for the comment.
Cheers,
Greg
Amazing, thanks for sharing great stuff, many things I learned from this blog
Glad it’s helpful!
Thanks!
Greg
A tip from the sign industry: Sign painters keep their brushes constantly wet with ordinary car transmission fluid. Having dabbled at this a bit in the past and now retired, I still have a tray with a dozen or so squirrel hair quills in perfect shape that have never dried since their last use many years ago. And if this trick works with the fragile hairs in sign brushes, it will be fine with other thicker-haired brushes as well. I keep them in a tray with a slightly angled insert (it can be piece of wood on one end) in it to allow the brush hairs to sit in a thin puddle of fluid. Clean with a solvent or soap and you’re ready to paint.
Hello Joe,
Good tip for more industrial applications. In this case though, we would not recommend the use of transmission or other automotive fluids in the oil painting studio, as it may inadvertently become incorporated into a painting, which could lead to unexpected drying results or permanently sticky layers.
Thanks,
Greg
Thank you for the helpful post!
Once the paper towels have dried, are they safe to go to the recycling bin? If not, is it safe to burn them? I know the oil wouldn’t be a problem in an outdoor fire, but what about the pigments?
Best,
Rebekah
Hello Rebekah,
Once paper towels are dry, they can be thrown away into the trash. It may not be a bad idea to wet them with a little water in case they are still drying and consuming oxygen. For the most part though, dry towels are at a low risk of spontaneously combusting, as combustion correlates with the early stage of drying when the oil is consuming a lot of oxygen. We do not recommend burning your oil painting rags, as some pigments can be transferred into the body through inhaling the smoke they produce during combustion.
Greg
That sounds good! Happy painting!
Greg
Olive oil is not only good for salads and cooking, but it can also be used to clean paintbrushes. It’s easy to find in the kitchen, so there’s no need to run to the store.
Just make sure to clean olive oil, or other non-drying oils, from the bristles with soap and water before using that brush on the painting. That way you wont accidentally mix non-drying oil into the painted layers.
Thanks for advice Greg. I do similar to your steps 1 to 3 at the end of the day but using a pure, clear, odourless, non-drying mineral oil such as baby oil. The reason for choosing a non-drying oil is that I can completely dispense with the chore of ever having to give my brushes a final wash with soap and water. I simply remove as much of the cleaning oil as is practically possible using a paper towel knowing that any residue remaining in the bristles up into the ferrule will resist hardening and therefore serve to protect the brushes however long they are left unused. The risk of mixing traces of non-drying oil into the painted layers is, I agree, a theoretical possibility but in practice the amount transferred is incredibly minute and in my experience of doing alla prima painting results in no detectable impact on the surface quality or drying characteristics. I have not tried car transmission fluid mentioned by Joe but found vegetable oil to become thicker/ stickier after repeated uses and the pigment does not settle in the container as rapidly as with baby oil which is quite fluid.
Thanks for your comment David!
Several people have mentioned a similar technique to yours, that it works great and hasn’t failed them yet!
Cheers!
Greg