Numerous artists have asked about using acrylic mediums and gels to preserve dried organic materials, such as grasses and flowers. After one such phone conversation, we began our first test, which involved layering dry peony petals over and under thick layers of Soft Gel Gloss. The petals were from a blossom that dried in a vase and held its form for months on a work desk, the Soft Gel came from our testing room where a piece of glass offered the perfect substrate. The peony petal test began years ago and it continues to evolve. This sparked in us a desire to try more acrylics with other plant specimens. In brief, we found that how the plant is dried makes a difference. Results can be unpredictable, and changes are going to happen as plant parts and acrylic evolve together over time. Although embedding plant pieces into acrylic films might slow down the natural aging of the organic materials, it will not create a time capsule with perfect preservation and might even encourage change. Acrylic gels and mediums do not provide UV protection. Further, acrylic contains water, and dry acrylic films are porous. Once acrylic is dry, moisture may still move in and out of the dry film depending upon ambient humidity. If the moisture in acrylic impacts the plant materials, transformations may occur. This article provides a brief survey of some of our tests and related thoughts and considerations.
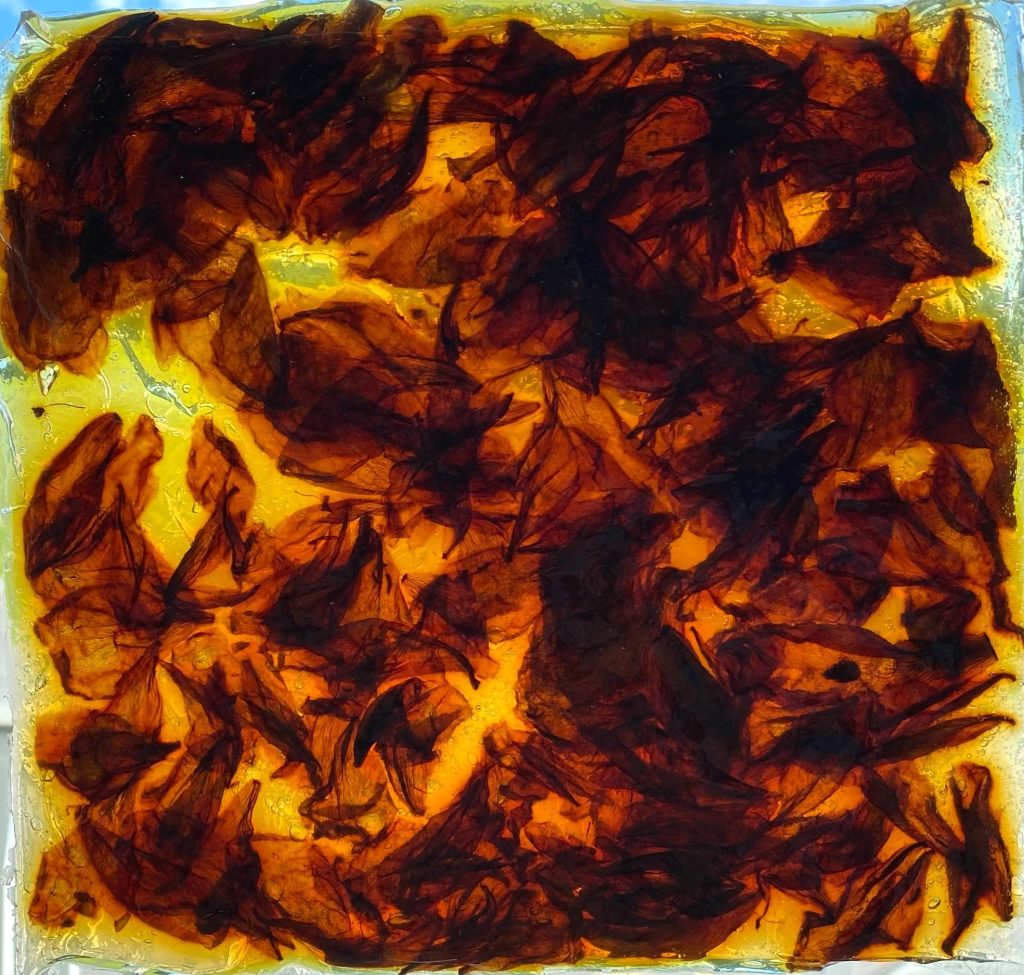
We believe it important to first think about the nature of the plant parts themselves, and what you need the acrylic to do. How thick and dimensional are the specimens you plan to use? Will you need a gel to adhere and encase them, or will a thin medium work? Could both be used — a gel for a thicker adhesive layer, and a medium for a final topcoat layer? Keep in mind that a medium is likely to create a thinner film and might even soak into the dried plant material, creating a thinner barrier against potential damage.
Our organic test specimens are mostly from plants growing near us in Upstate New York: flowers, grasses, and tree leaves. Our tests were done on gessoed canvas and on glass (to create gel skins). We skim coat applied the gesso so there was less canvas texture to compete with the delicate petal forms.
The Acrylics:
Acrylic films remain porous, and moisture can both enter and leave a dry film. This is a consideration with plant parts, as exposure to moisture could speed up change. Thicker applications are more likely to pull color from organic objects and might temporarily cloud when atmospheric moisture is high. In addition, there is a possibility that thickly applied gels may yellow a little with time. As anyone who has experimented with acrylic gels knows, it is also very easy to introduce bubbles during application and those bubbles may stay in your composition (see image 16-I in addendum).
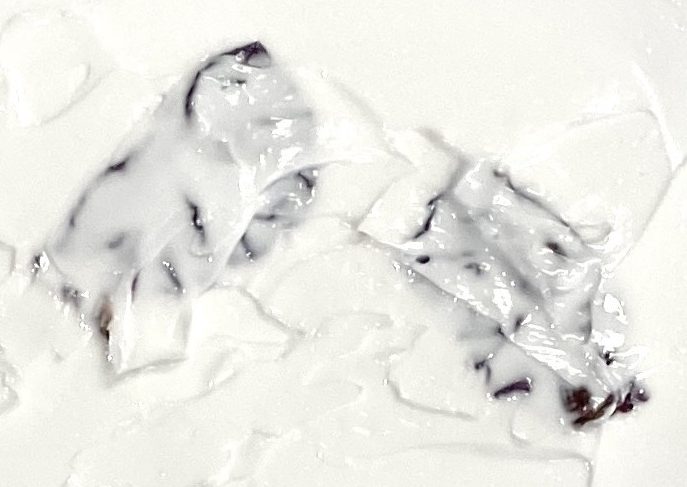
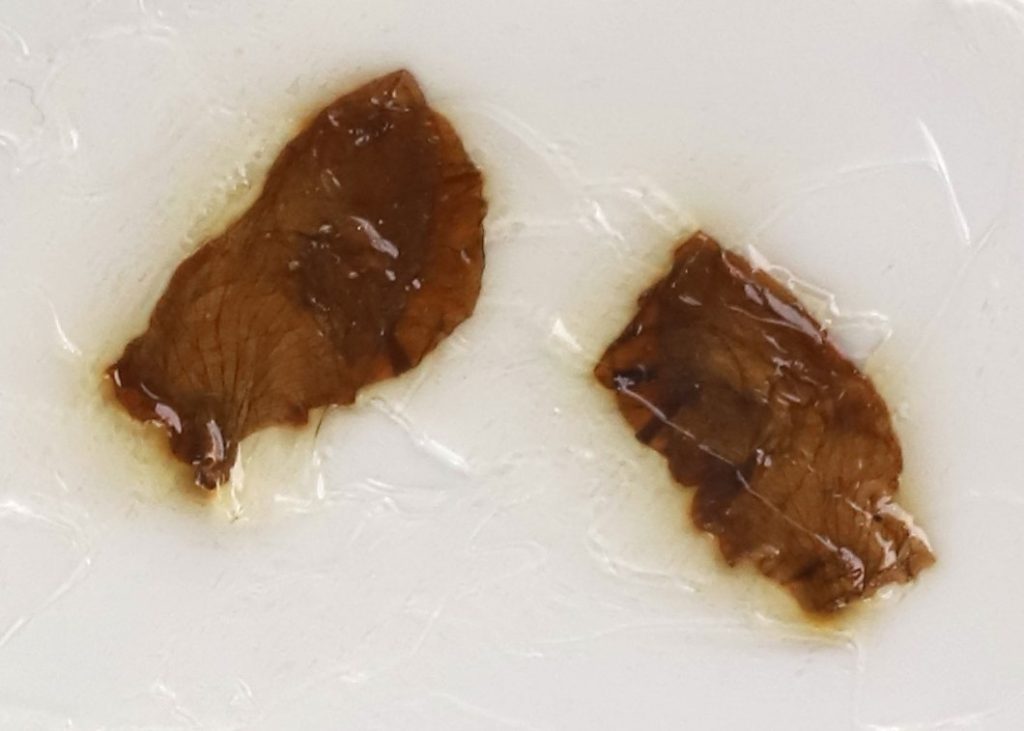
Images 2 & 3: Air dried Rugosa Rosa petals encased in High Solid Gel Gloss with a palette knife on gessoed canvas. Petals were pushed into the first layer of gel, and immediately covered with a second layer. Note the difference in color and form between these petals and those below which were press dried flat and secured with a medium. Left: wet gel July 14, 2023; Right: dry gel, September 13, 2023.
In most of our tests, we used gels and mediums with a gloss sheen for their greater clarity. Matte and satin products contain matting agents which might reduce perception of color and form, especially in gel applications where the acrylic might be more thickly applied. However, we found with very thin flat petals, Fluid Matte Medium worked beautifully and created an almost imperceptible film over both the dry petals and the gessoed surface.
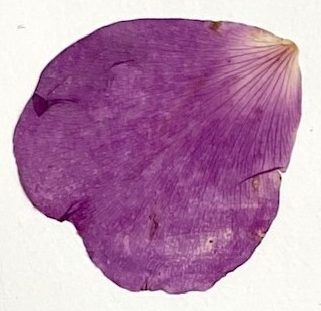
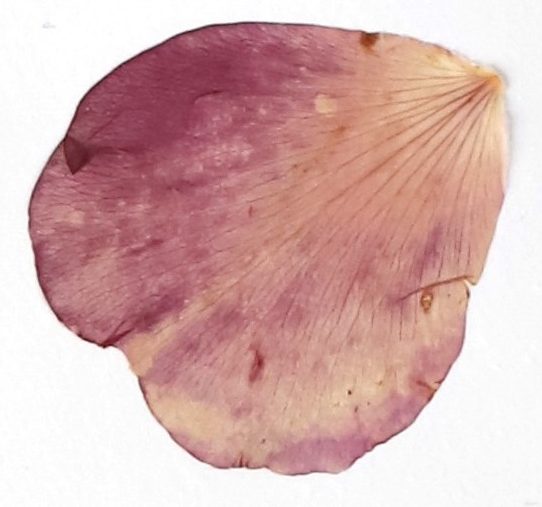
Images 4 & 5: Fluid Matte Medium brushed over press dried Rugosa Rosa blossoms on gessoed canvas. Left photo taken just after the Fluid Matte Medium had touch dried on July 14, 2023. Right photo taken September 13, 2023. Colors are changing with time.
Application Approaches:
We tried several basic approaches in our tests, with two main variants. The first was to apply a wet layer of acrylic, set the organic material onto it, and immediately continue applying more acrylic. This embeds the organic material completely in wet acrylic and is our preferred method for thin flat materials like those dried in a flower press.
We found this immediate application of a medium successfully allowed for the elimination of air bubbles under delicate specimens like pressed flower petals. The best approach was to brush medium outward from the center of the petal, swiping gently with the brush to push out any air bubbles while coating the surface with acrylic (as in images 4 & 5 above). Brushing inward from the edge encouraged the petals to wrinkle and fold onto themselves (as in image 6 below). Also, be aware that a thin medium layer might not protect vulnerable objects from abrasion or curious fingers.
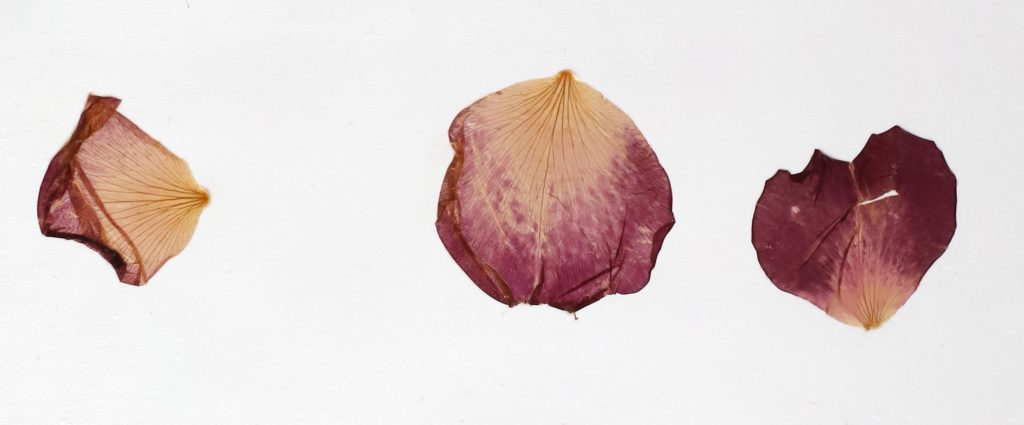
Images: Fluid Matte Medium brushed across press-dried Rosa Rugosa petal resulted in edges of petal rolling and folding.
Test begun on July 14 and images taken September 13, 2023.
With a delicately textured surface like that of a grape hyacinth bloom, it can be helpful to hold the brush upright and use the bristles to scoop out bubbles that form when brushing a medium over the texture created by the blossom’s florets.
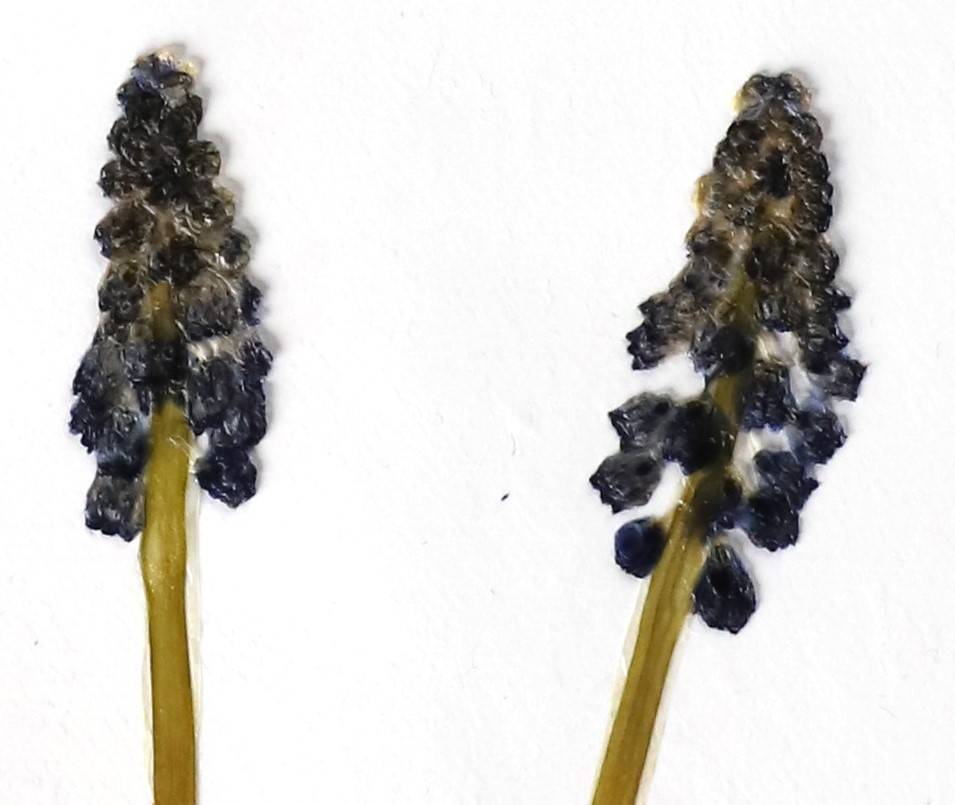
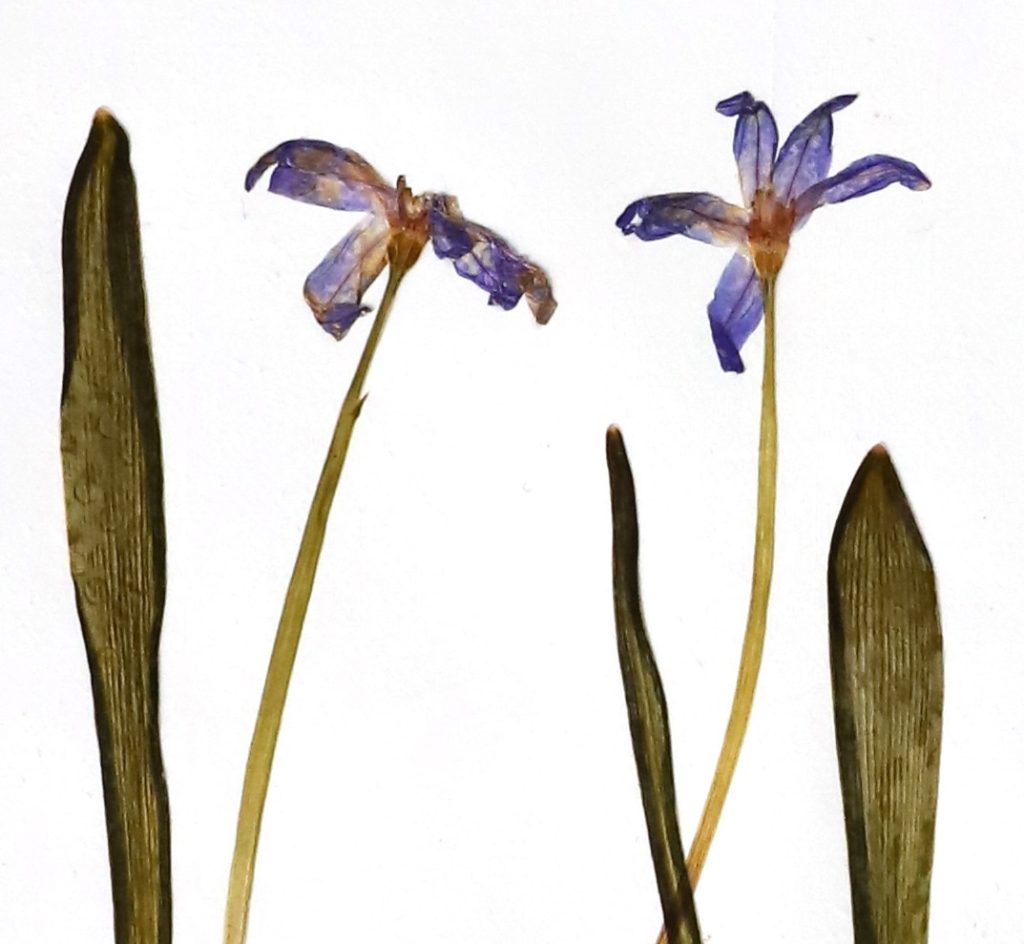
Images 8 & 9: Left, detail of press-dried grape hyacinth with High Flow Medium on gessoed canvas; Right, detail of press dried Siberian Squill adhered with Fluid Matte Medium on gessoed canvas. Tests begun on July 14 and images taken September 13, 2023.
The second approach featured a two-step acrylic application. An initial wet ‘adhesive’ layer of acrylic was applied and the plant parts placed onto it carefully in an attempt to not trap air beneath the specimens. When this layer of acrylic became clear, a second layer of acrylic was brushed or knifed over the top, completely coating the first and encasing the acrylic between the two layers. Application of a second layer of acrylic over a dry layer can be less stressful because the plant parts have bonded to the first layer and are not as likely to move or tear during application of the second layer. In addition, if the specimens are adhered to a dry layer of acrylic before applying the final layer, it is easier to judge the thickness of the top layer. It is also possible to use a different acrylic as the topcoat over the specimen.
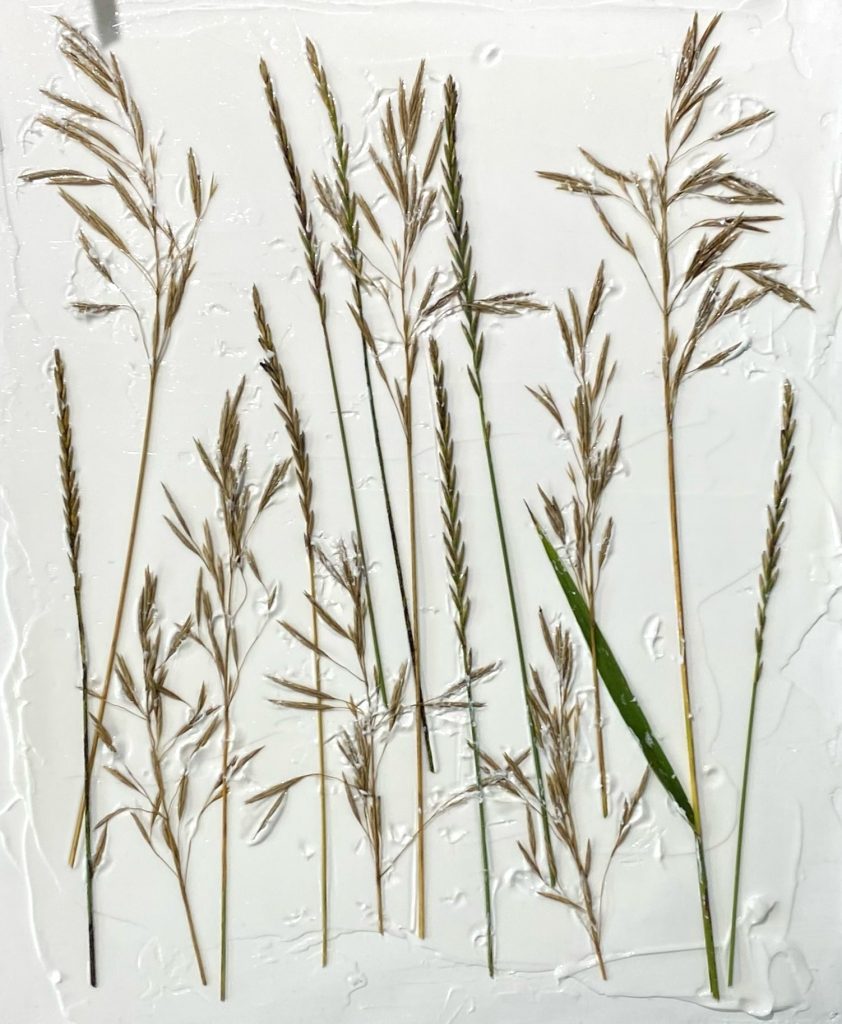
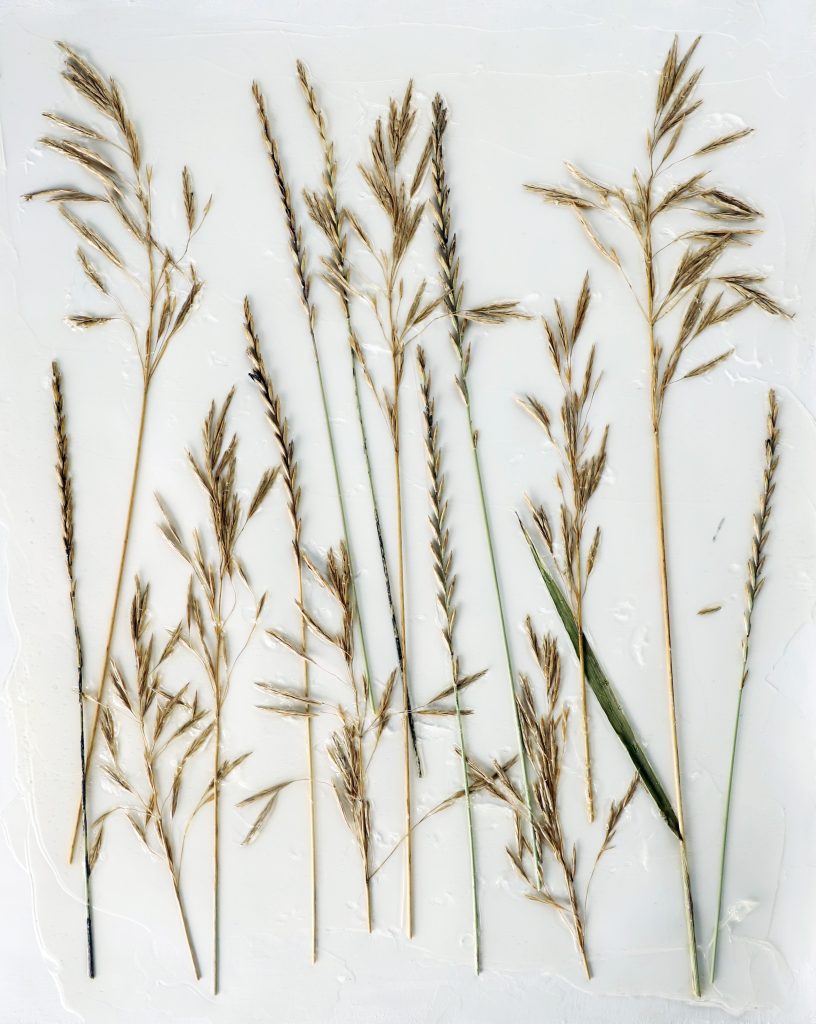
Images 10 & 11: Grasses gathered from a field at the Golden Artist Colors factory and air dried. Left: just after being settled into wet Regular Gel Gloss, fingertip marks visible. Right: after the gel clarified and the gessoed canvas below could be seen, the grasses were brushed with High Flow Medium. Overall size, 15 x 13 inches. Tests begun on July 14 and that is when the left photograph was taken. Right photograph taken September 13, 2023.
This is the approach taken with the dried grasses. Unstretched gessoed canvas was placed on a table top where it could remain untouched during drying. Using a palette knife, an area of gel about one-eighth inch thick was spread over a gessoed canvas. We estimated the area of gel needed for the grasses we had collected. The stalks were immediately pressed into the wet gel, and fingertip imprints from doing this can be seen (image 10, above). This might have gone more smoothly with tweezers. After the gel was clear and dry, High Flow Medium was brushed over the grasses, following their forms. This thin medium sank into the grasses and is likely consolidating them somewhat. Although this approach does not provide a physical barrier on top like a gel might, use of our thinnest medium as a final layer allows the grasses to look very natural.
The method of drying plants may make a difference:
When we placed intensely pink rose petals and peony petals flat on a table top to air dry, it resulted in dark brown-red petals (rose) or pale beige petals (peony) that crumpled into dimensional forms as they retracted into themselves. This made them too 3D to completely adhere with a medium. Careful attempts to flatten the air-dried petals often resulted in resistance and torn petals. Even when carefully opened and spread out as much as they allowed, the crumpled forms were not necessarily petal-like in appearance once encased with acrylic. Since they had become dimensional, the crumpled petals adhered more successfully with a gel. The gels were more likely to pull color from the petals as the acrylic dried. The peony petals darkened and leached more color more quickly than the rose petals did (see images 2 & 3 for air dried rose petals).
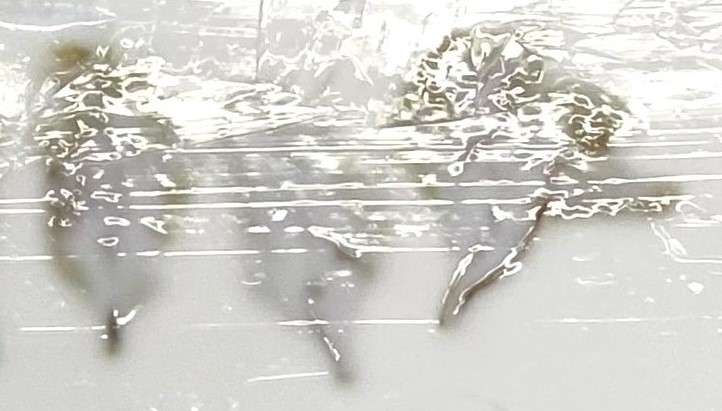
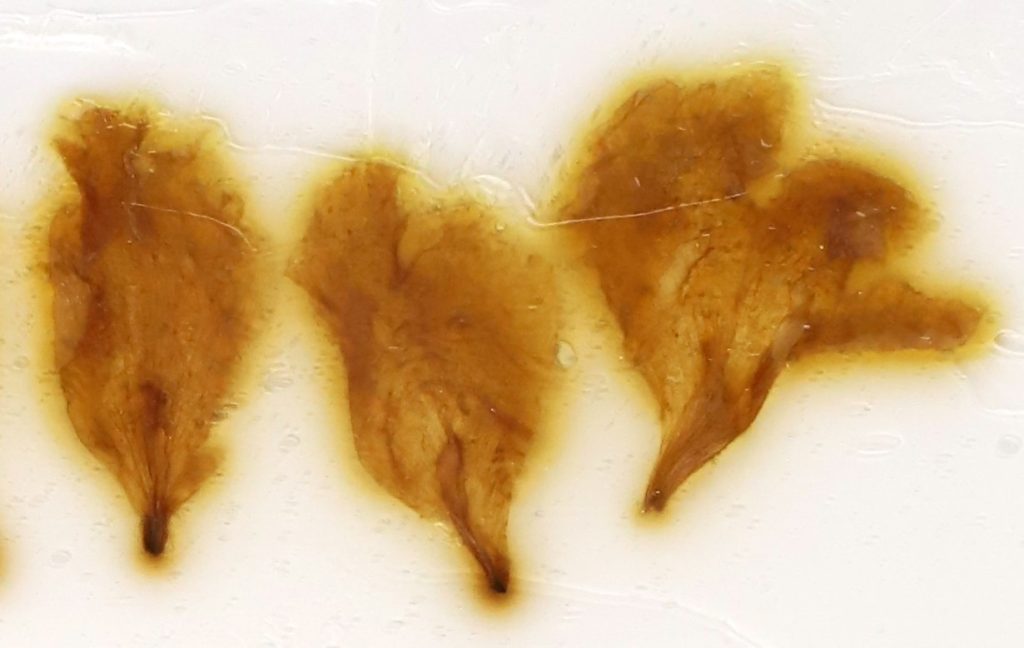
Drying the rose petals in a press resulted in flatter petals than drying them loose on a table top. Using the press seemed initially to preserve a tiny bit of the rose petals’ color (images 3, 4, 5, 6). The pink has faded slightly over several months. Using a press also preserved some of the color in the stems, leaves, and blossoms of grape hyacinths and Siberian squill (images 8 & 9). In addition, flattening the specimens in a press maintained the structure and appearance of these delicate plants. See the addendum for more information and an image of our handmade flower press (image 14).
Potential interactions of acrylic and plant specimens:
Coating dry plant forms with acrylic will not change the ephemeral nature of natural organic materials. Unexpected changes can happen. Thicker coatings of acrylic created with gels may leach discoloration from the plant parts over time, creating an evolving composition that embodies change. In our tests, various stages of this process are happening in the thicker gel applications, sometimes beginning while the gel dried. Thicker applications also appeared to have a more immediate impact on color than thin films. Initially, pressed pink Rugosa Rosa petals retained a little more of their color when thin layers of High Flow Medium, Fluid Matte Medium, or Soft Gel Gloss were used; but in more thickly applied layers of Regular Gel Gloss and High Solid Gel Gloss the pale pink dry petals became tan almost immediately and began to bleed this color into the gels.
A further complication arises when we consider that not all plants are the same. As we have seen, some flower petals discolor acrylic more quickly than others. Leaves also demonstrate this varied reaction to being encased in acrylic mediums and gels. Some leaves have a wax-like coating that resists adhesion to waterborne acrylic. Oak leaves provide an excellent example of this (see image 16 in the addendum below). To be sure everything will work together as desired, it is important to test before incorporating organic materials into an artwork.
In conclusion:
Acrylics are porous, and the organic materials will continue to change as they age. What you see when the acrylic dries might not be what is seen in two months or ten years.[i] However, if you accept the fragility and ephemeral quality of dried plants and embrace the potential changes that occur as acrylic and natural materials evolve together, you might find these explorations to be rewarding and exciting. We included examples of some of our tests below in hopes they inspire our readers to conduct their own creative investigations. Clicking on an image should open a larger version in a new browser tab.
[i] A resin might be a better choice for complete protection and a water-clear impervious protective layer. See: Art Resin, “Can You Embed Leaves In Resin?” https://www.artresin.com/blogs/artresin/how-to-resin-napkin-holders-for-thanksgiving and “How To Resin Flowers and Preserve Them?” https://www.artresin.com/blogs/artresin/how-to-resin-flowers [both accessed 9/5/2023]
Addendum:
Image 14: Flower Press
When we began these tests, we needed a way to flatten some of our specimens. We appropriated two pieces of wood from the Paintworks part of our applications room and cut clean blotting paper and paper towels to fit between the pieces of wood. We created ‘sandwiches’ of 2 pieces of blotting paper followed by a plant specimen topped with two pieces of blotting paper. For greater absorbency, we separated the wood from the sandwiches and the sandwiches from each other with 4 pieces of paper towel. We then wrapped the assemblage tightly (to ‘press’ the wood pieces toward each other) with whatever tape we had at hand, and re-taped as needed when it became loose from the plants shrinking as they dried. We checked the status of the press every week, and switched out the blotting paper and paper towel pieces as needed when they became overly moist or stained from the plants.
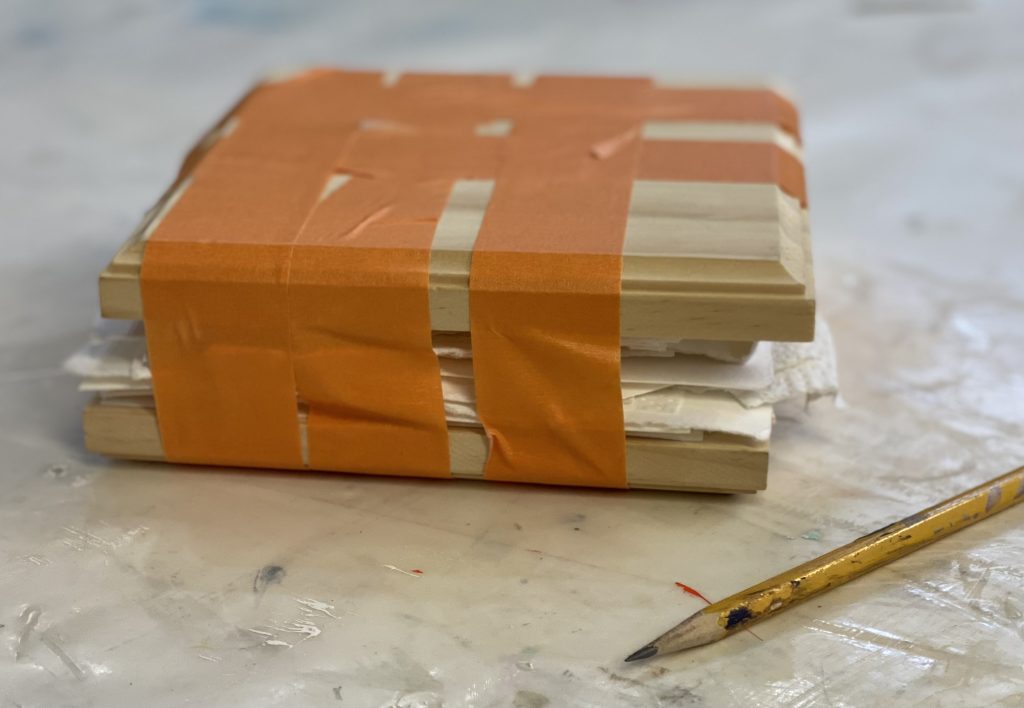
Image 14: Handmade flower press with pencil for scale
Image 15: Flower petals and flowers tests
All of the petal and flower tests are details from this panel. Various gels and mediums on skim coated gesso, overall size about 16 3/4 inches high by 37 inches wide. Text on the yellow tape indicates date of application, acrylic product, drying process for the plant, and the type of plant.
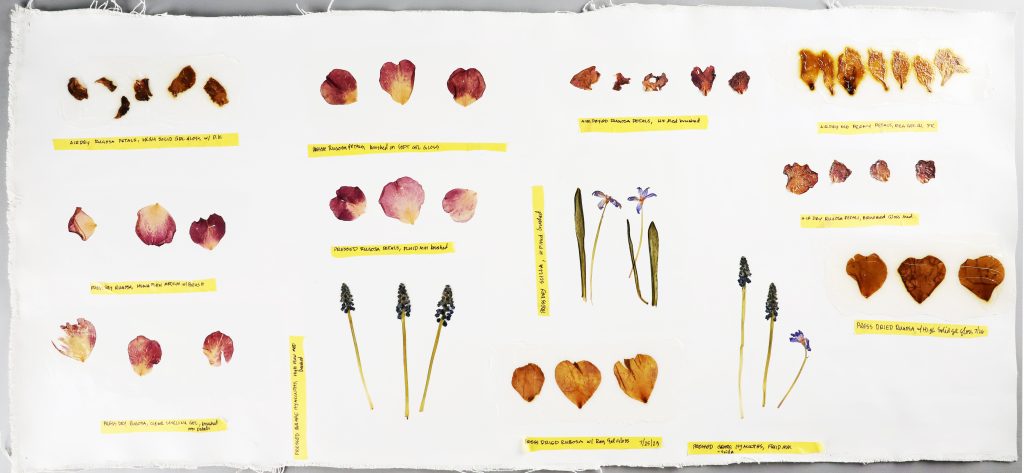
Image 16 A – I: Oak leaves test
Below are 8 photographs showing the process of creating an immediate gel skin that encases dried oak leaves. Included are the set up and process steps, as well as front and back photos of the dry skin and a close up of a section of poor adhesion and air bubbles both with the oak leaves and in the gel. Oak leaves have a fairly sturdy waxy coating that can cause adhesion issues when waterborne products coat them. Air bubbles formed between the leaf and the gel even when the leaves were cleaned with isopropyl alcohol and allowed to dry before the gel skin creation began. Adhesion was worse on the back of the leaves. We encourage you to always test before incorporating natural materials into an artwork.
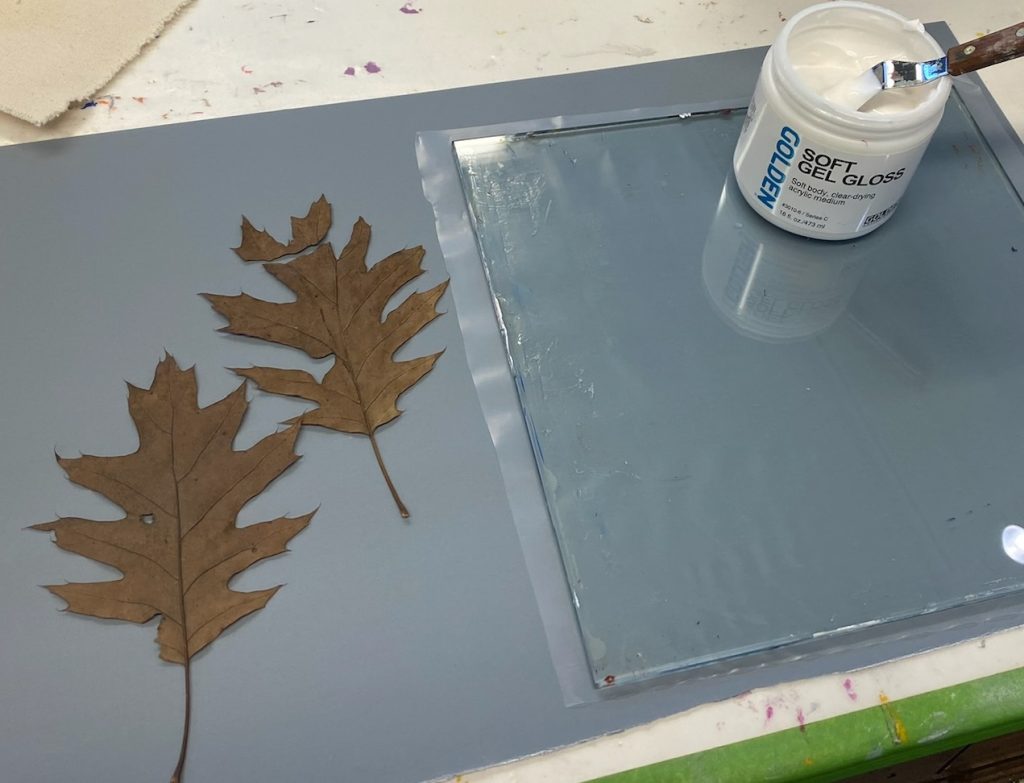
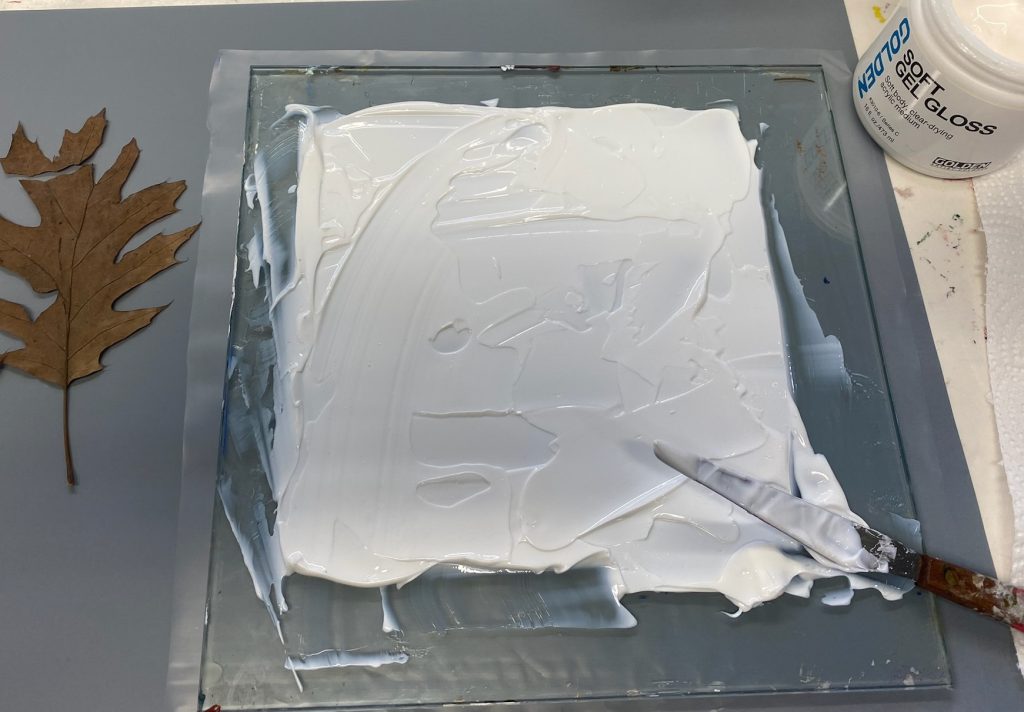
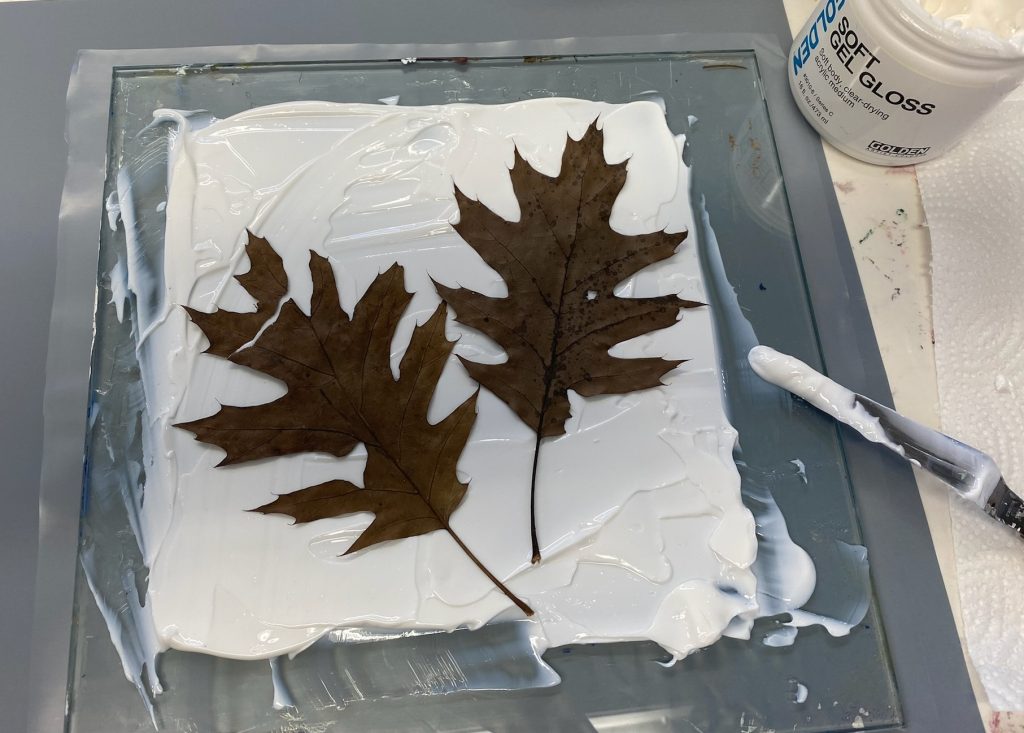
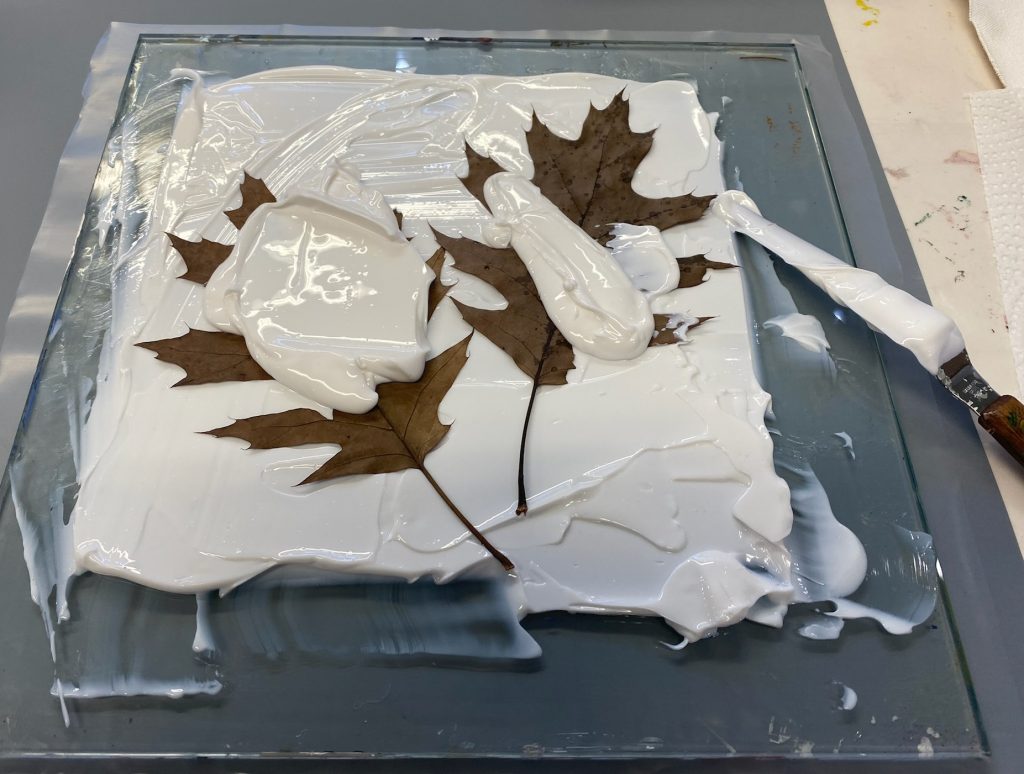
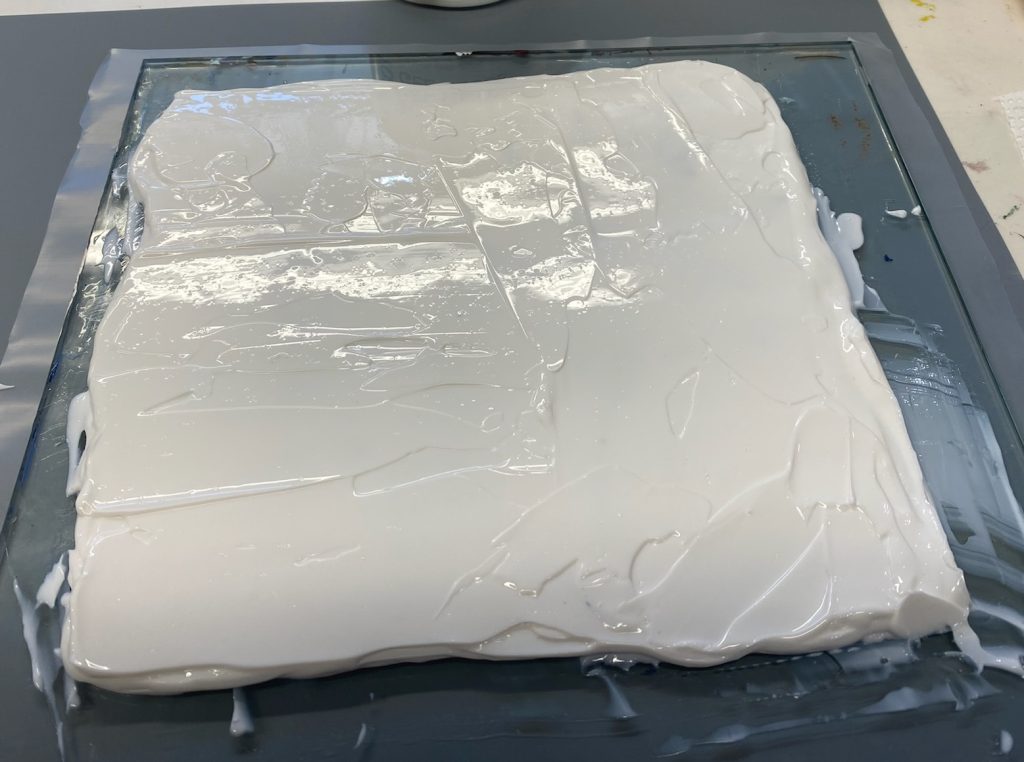
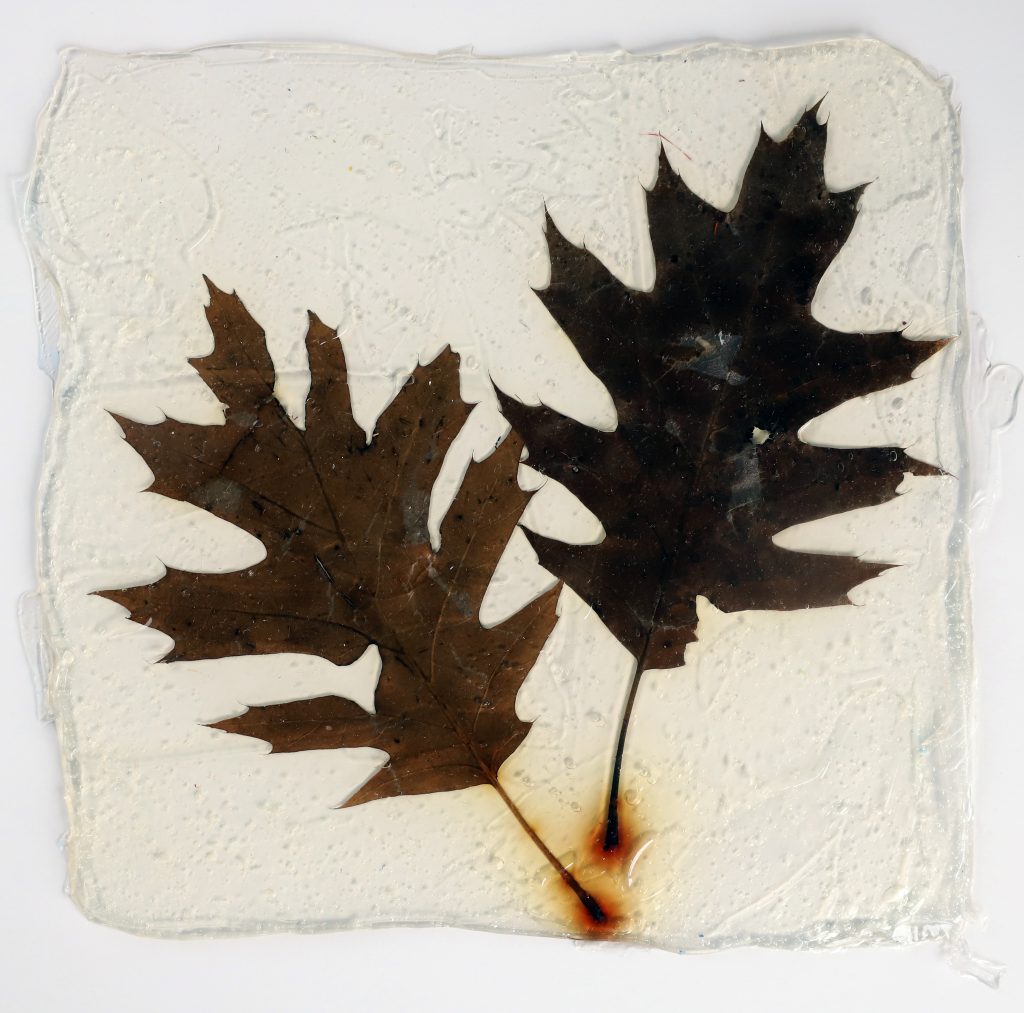
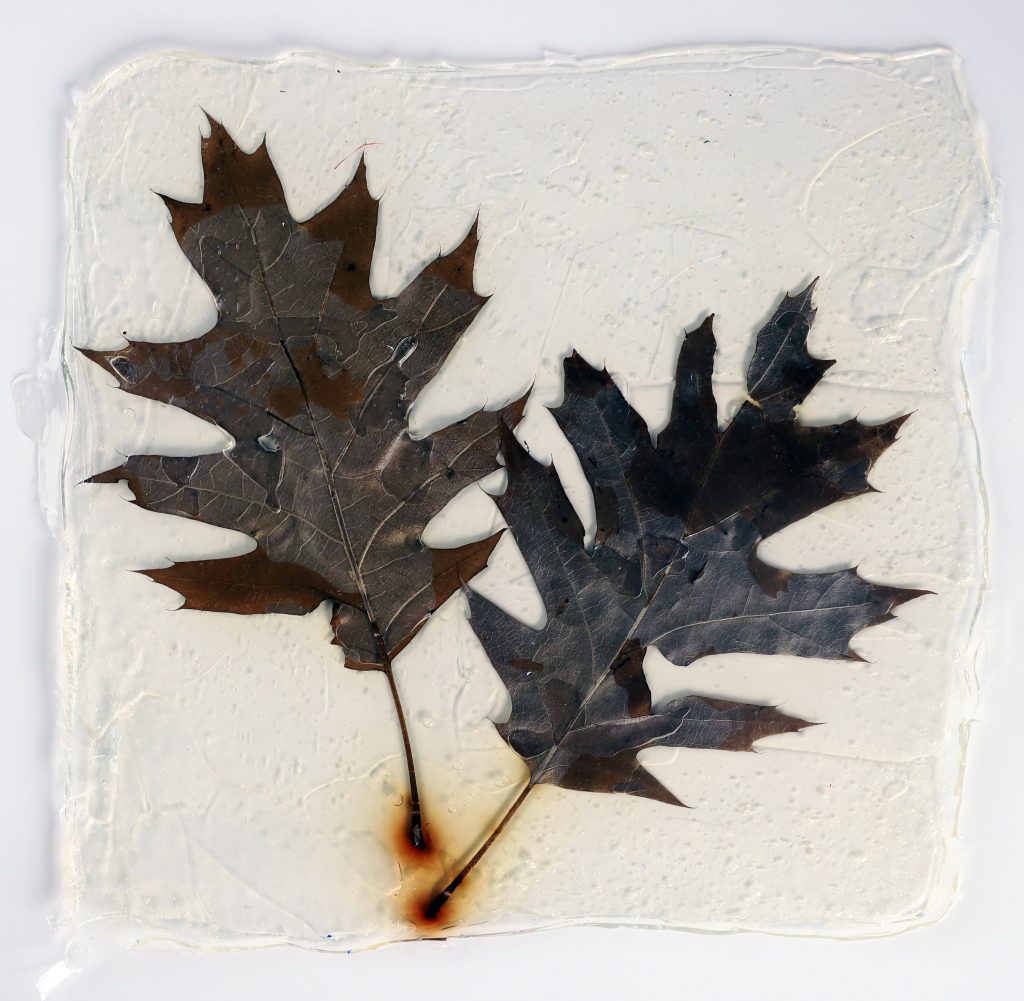
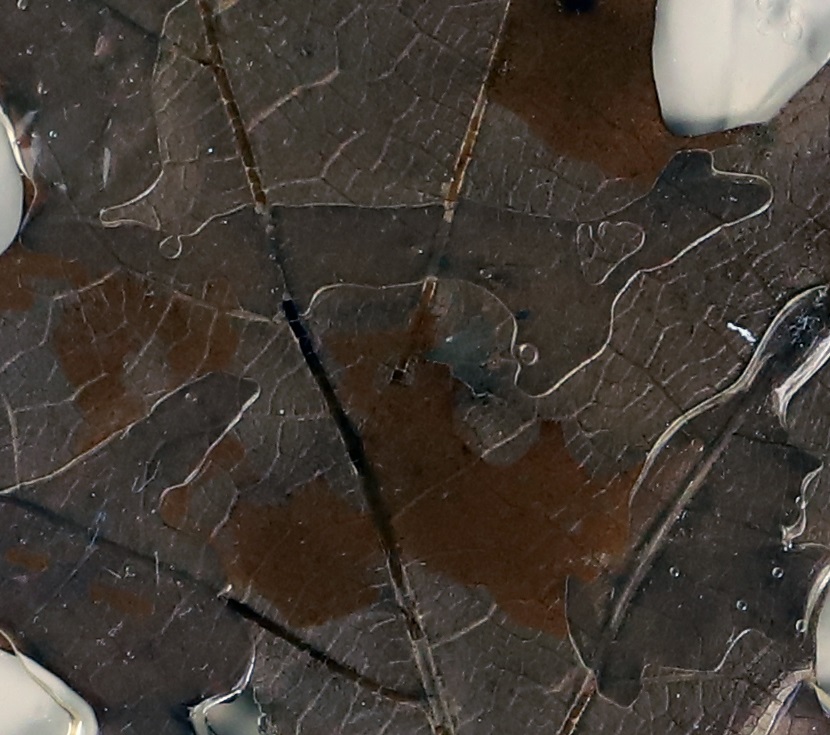
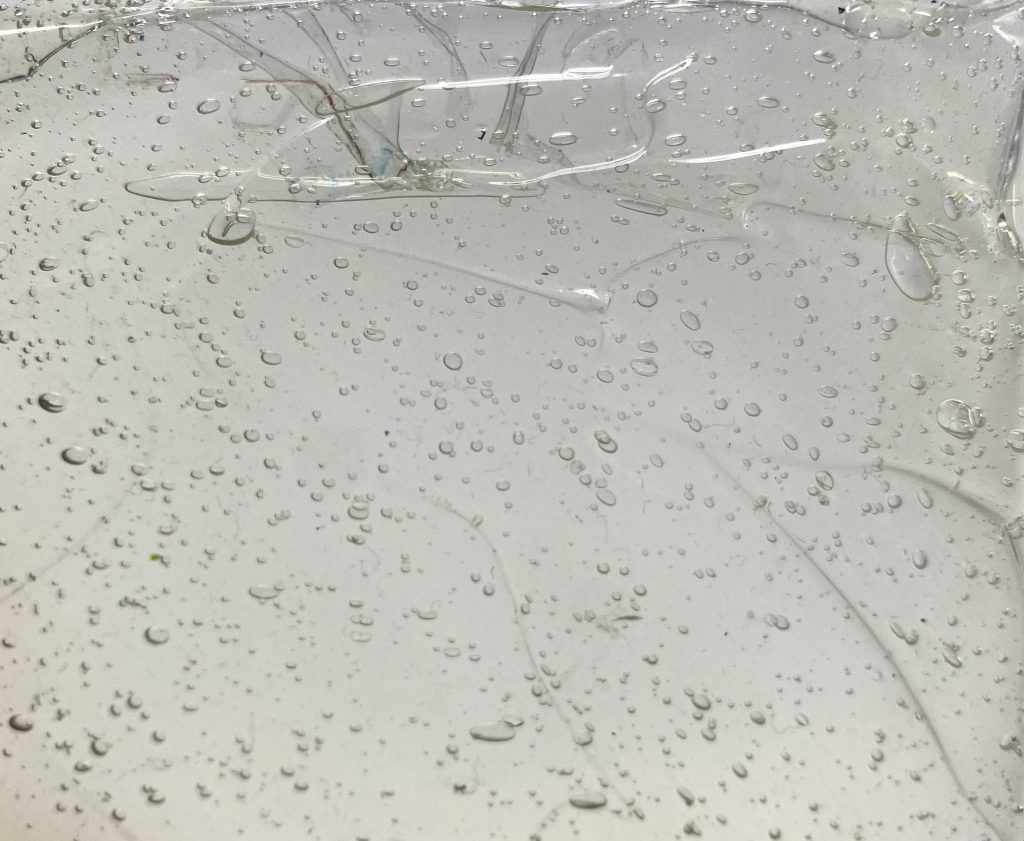
Image 16, A-I: Dried oak leaves in a Soft Gel Gloss gel skin, using glass as a temporary substrate, about 9 1/2 inches high by 10 inches wide. Test begun November 4, 2022 (first 5 images). Dry test photographed September 13, 2023 (last 3 images).
Images 17 & 18: Siberian Squill and Grape Hyacinths (entire)
Press dried plants on gessoed canvas. Plants were adhered and coated with Fluid Matte Medium, brushing in the direction of leaves and stems and from the center out with the petals.
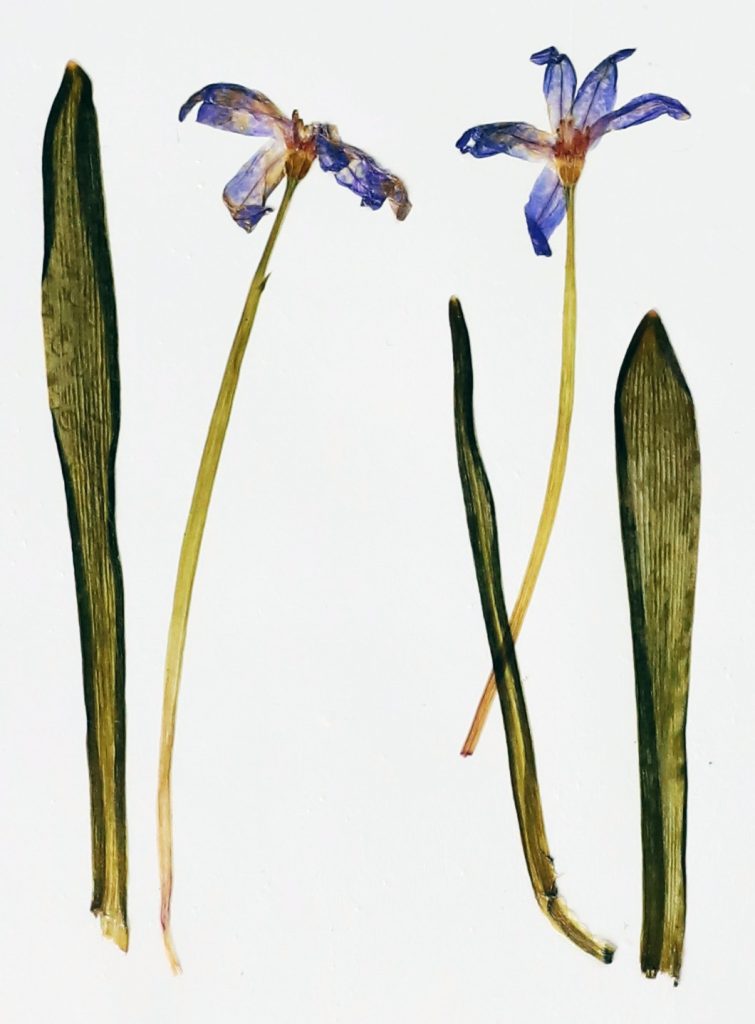
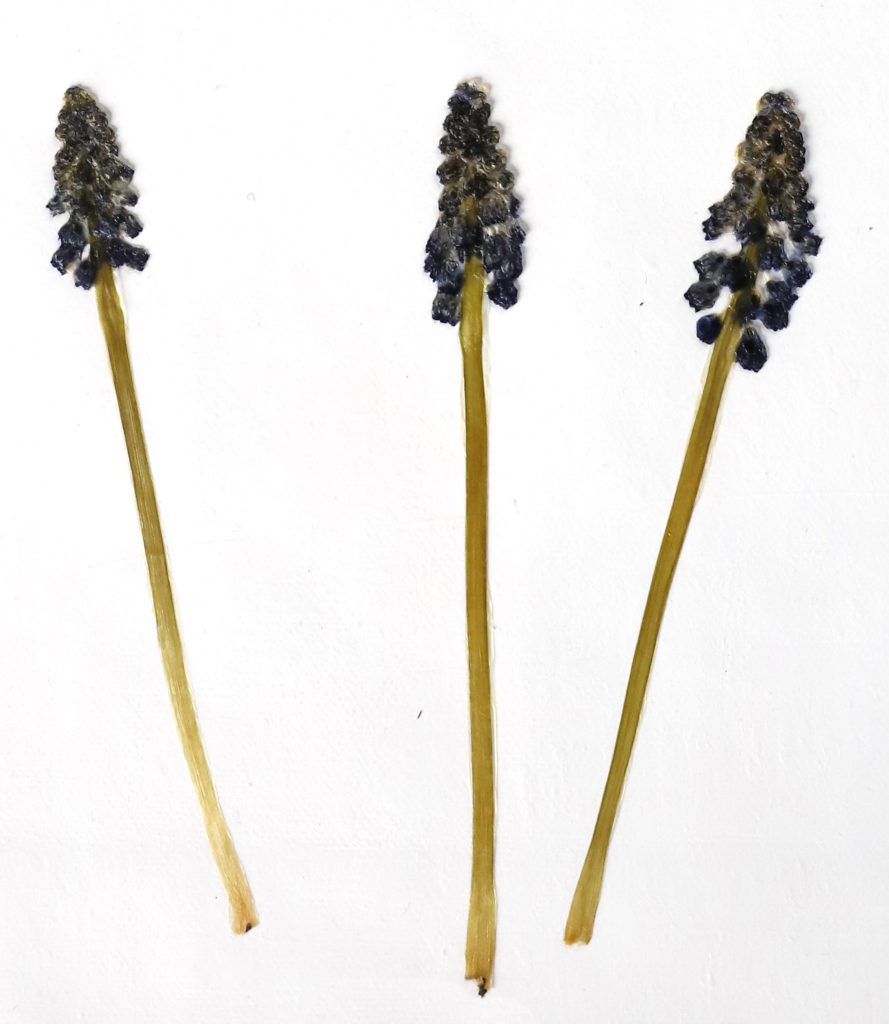
Siberian Squill, overall size about 4 1/2 by 6 1/2 inches. Grape Hyacinths, overall size about 7 x 6 inches. Adhesion occurred July 14, 2023 and photograph taken September 13, 2023.
Image 19: Orange peel
In July of 2023 we tore a spiral of peel from a small orange and set the peel flat on a piece of plastic to air dry untouched. During drying, the spiral of peel twisted and became dimensional. After it had dried for several months, we wiped the entire peel down with Isopropyl Alcohol in hopes it would remove any waxy coating the peel might have. Once it was again dry, we saturated the surface with High Flow Medium (our thinnest medium) and allowed it to dry again. We thought the High Flow Medium might help with adhesion of a gel to the dry surface of the orange peel. The High Flow Medium partly sank into the surface and darkened the color a little. We then pressed the dry 3-D peel into a thick uneven layer of wet Regular Gel Gloss, pushing extra gel behind the raised areas of the peel to provide long-range support. Subsequently, this test air dried flat for a couple weeks. As the gel dried, color almost immediately started moving from the peel into the gel, creating a diffused orange halo that has strengthened over time.
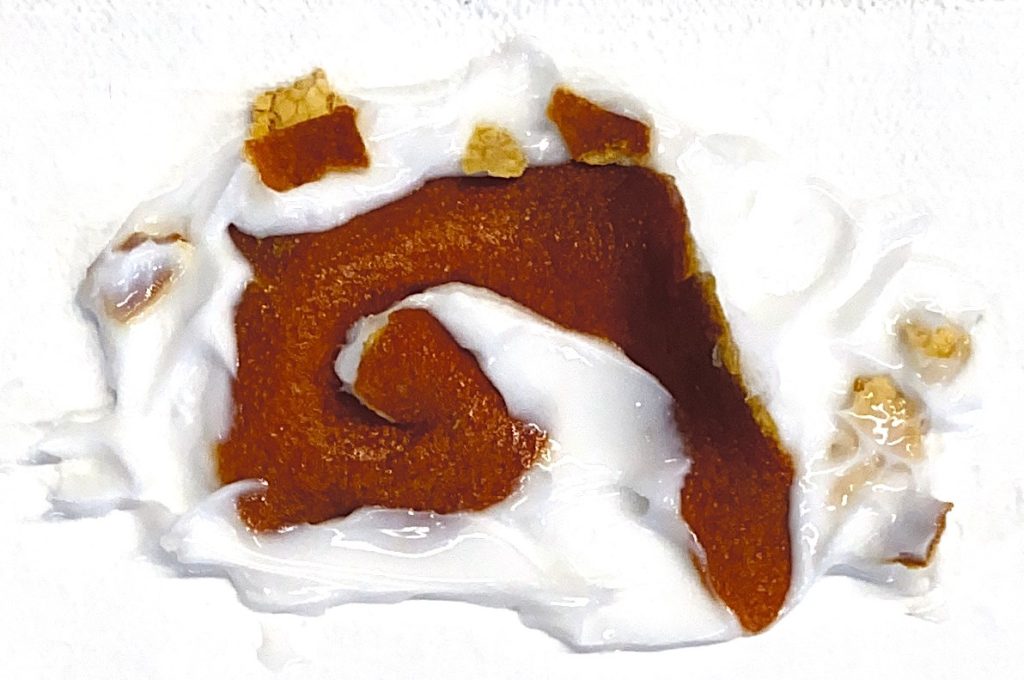
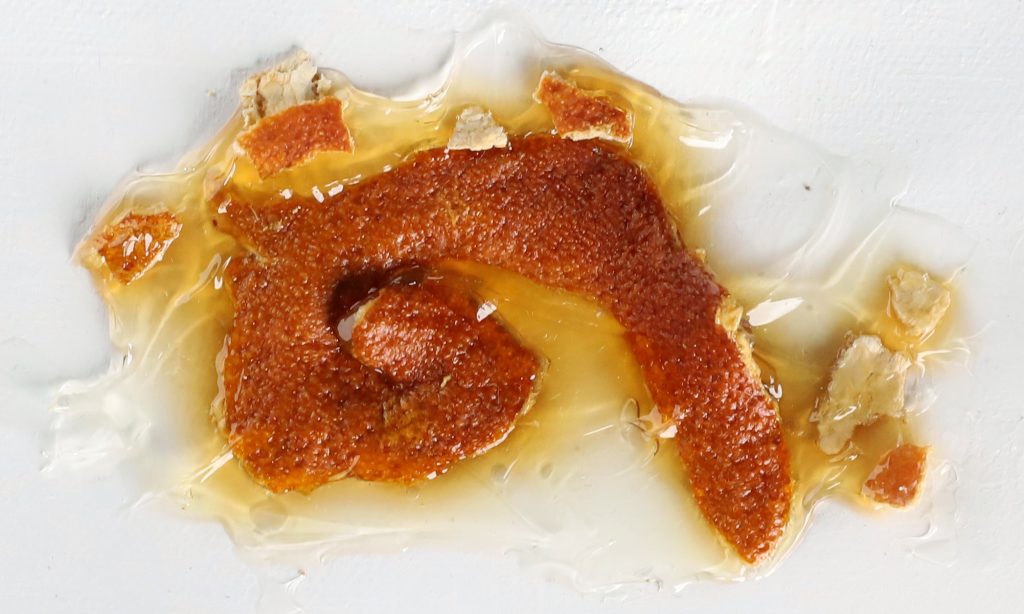
The acrylic area encasing the peel is about 2 inches high by 3.5 inches wide and is on gessoed canvas. Left, newly begun test with wet Regular Gel Gloss photographed just after application on July 14, 2023. Right, dry test photographed September 13, 2023.


What a fascinating article! I am a member of the Nature Printing Society, and I’ve had failure and success experimenting with leaves and flowers–preserving, printing, and storing. It’s great to learn from someone else’s experiments. (By the way, the demo that NPS received from Barbara DePirrot on printing with Golden Open Acrylics was so helpful.) Thank you!
Thank you! We are glad you found the article to be of interest. We really enjoyed creating the examples, and look forward to seeing how they age as the years go by. Thank you also for letting us know how helpful Barbara De Pirro’s demo was — we will pass that on to the people leading our Working Artist program!
Wishing you happy creating,
Cathy
Plants in acrylic gel article was great! I have been doing this for years with my handmade paper “site maps” series, and always use Golden fluid acrylics as paint (watering it down so it is more like watercolor0 and soft gel matte as glue. I often collect petals, leaves, grass and other natural materials in each place and use them fresh with Golden Acrylic Soft Gel Matte as the glue also over the top of the adhered leaf, petal, etc. Some discolor and some do not over time. The soft gel keeps it flexible over time and does not yellow. Actually, I embrace change over time in my work and have made many artworks meant to dissolve into compost and have seeds in the pulp to come back as living plants when installed outdoors on soil. I have many of these ‘site maps” that are still in good condition after 20 or more years. These are works on handmade paper that I also make from materials collected in each place. You can see some on my old website at http://www.janeingramallen.com and more recent work on my Blog at https://janeingramallen.wordpress.com
Hello Jane,
Thank you so much for sharing, we are pleased you found our article to be of interest. Your work is fascinating and lovely! The idea of making site-specific art that features handmade paper which itself incorporates natural materials from that location, harvested in a non-damaging way, is wonderful. The “In Deep Water” installation appears especially lovely. Thank you again for commenting and sharing your links.
Warm Regards, Cathy
That was more than useful for me. I recently put a dried flower into an accordion book with matt fluid medium and so far the result is perfect. Since there will be no light on the flower, I fully expect it to be perfect years from now. I press flowers, leaves and grasses between the pages of a heavy catalogue with paper towels between pieces. That seems to work just fine
Hello June,
Thank you for letting us know the article content is useful. That is what we desire! Thank you for sharing your approach to drying plants, too. When doing our testing, we thought how helpful those old paper phone books would be as flower presses. Be aware that acrylics are thermoplastic, and under pressure or in environments which are warm and humid, acrylics might become temporarily sticky… and occasionally can glue to surfaces against which they are pressed. Matte acrylics are less likely to do this than glossy acrylics. A thin coat of a microcrystalline wax polish over the acrylic, or the use of an interleaving material between the acrylic and the facing sketchbook page will stop this from happening. Silicone release paper or clear polyethylene plastic like that used for painting drop cloth are two interleaving options that can both be peeled from acrylic if they stick. Thank you again for your comment, and we wish you the best with your creations.
What a well planned & documented test. As a chemist I enjoyed the test, test, test approach to this subject.
Thank you! With each test, we thought: but what about … and the testing continued. If we had not had a deadline for the article, we would probably still be testing!
What is a good way to seal masking and painters tape that is applied to canvas so it doesn’t air age and start to peal from the face of a painting?
Hello Denis,
Thank you for your question. Unfortunately, tape can continue to age even when it is coated with acrylics. In addition, putting a product on top will not increase adhesion beneath unless that product penetrates both the tape and the tape’s adhesive to make contact with and adhere to the surface to which the tape is applied. Acrylic over top of tape might hold the tape to the surface even the tape adhesion fails, but the freed tape might bow up a bit under the acrylic layer. An acid free tape might brown less with time, but this is not something we have studied. If the tape is fading or changing due to light, then providing a final coating that protects against UV damage might be helpful, but even this is only likely to slow down changes and not stop them. We wish we had a happier response, but most tape is meant to be ephemeral and so will continue to age and change with time. We hope this is helpful, and we are here when you have more questions.
I am wondering if there is some other kind of sealant that you can spray on natural things first, before embedding in acrylic? Or could you paint or dip them in a resin first?
Hello, Kris.
Thank you for your questions.
Light coats of acrylic medium, such as High Flow Medium, or dilute GAC 100, can be used to secure the organic material. Spray Fixatives may also work to an extent. Very thin resins are also a possiblity. For example, KBS Coatings Diamond Clear is nearly water thin and craftsmen who make custom fishing lures (painted wood) will dip the lure into the product and then allow it to drip dry. Testing that we have done with the flowers and leaves is going to be limited but hopefully this article will give some guidance as to how you can test other materials and see which ones you find to work best.
– Mike
Thanks for this article Cathy! I am wondering, did you try any of the golden varnishes? I am collaborating with a pressed flower artist and we are thinking she could use varnish to adhere the flowers to my acrylic painting. We plan on experimenting with varnish but would love to know if you’ve tried it.
Hello Leanne, thank you for your question. We did not explore varnishes when testing for this article. Is there a reason you wish to use varnish as an adhesive, and not as a topcoat? UV protection will not help when it is underneath. MSA Varnish provides a harder surface, more sheens, and a slightly better UV protection than our Waterborne Varnish. However, the solvent in MSA Varnish also might saturate absorbent natural objects (like petals) and this could make them more translucent or otherwise change their appearance. Testing is a good idea! Please let us know if you have more questions, and you may email the Materials team directly at [email protected]. Happy testing! Cathy
Thank you for this helpful article.
Would applying an MSA varnish after the medium or gel help keep the color of the flower petals or leaves from changing?
Hello Linda,
We are glad you found the article useful! MSA may help prolong color. However, a UV varnish will not stop the colors of dried plant materials from fading or turning tan or brown over time. We do not know how much time varnishing with MSA may provide, as we have not tested the varnish over plant materials. We expect the time will vary according to the plant part used. We hope this is helpful, and we are here when you have more questions. Happy creating, Cathy