
Linen is a beautiful material that some artists prefer over cotton canvas for its pronounced weave and sensuous feel. Linen fibers are also stronger than cotton, resulting in a more durable, longer lasting support. While they are durable and rugged, flax fibers absorb moisture from the environment, or an applied product, more quickly than cotton, making them quite reactive. Linen swells and tightens when it gets wet and shrinks and slacks out when it’s dry. It is also less flexible than cotton so is more challenging to stretch tight and straight on the stretcher bars. Because of this, it can become slack after priming with acrylic Gesso or other water-based media like PVA size. When this happens, it is usually necessary to take the canvas off the stretchers and re-stretch to make it tight again, or at least key out the stretcher bars. We have a couple recommendations to help provide best results that are specific to the stretching process itself and how to apply the acrylic product to the surface.
Stretch Very Tight From the Beginning
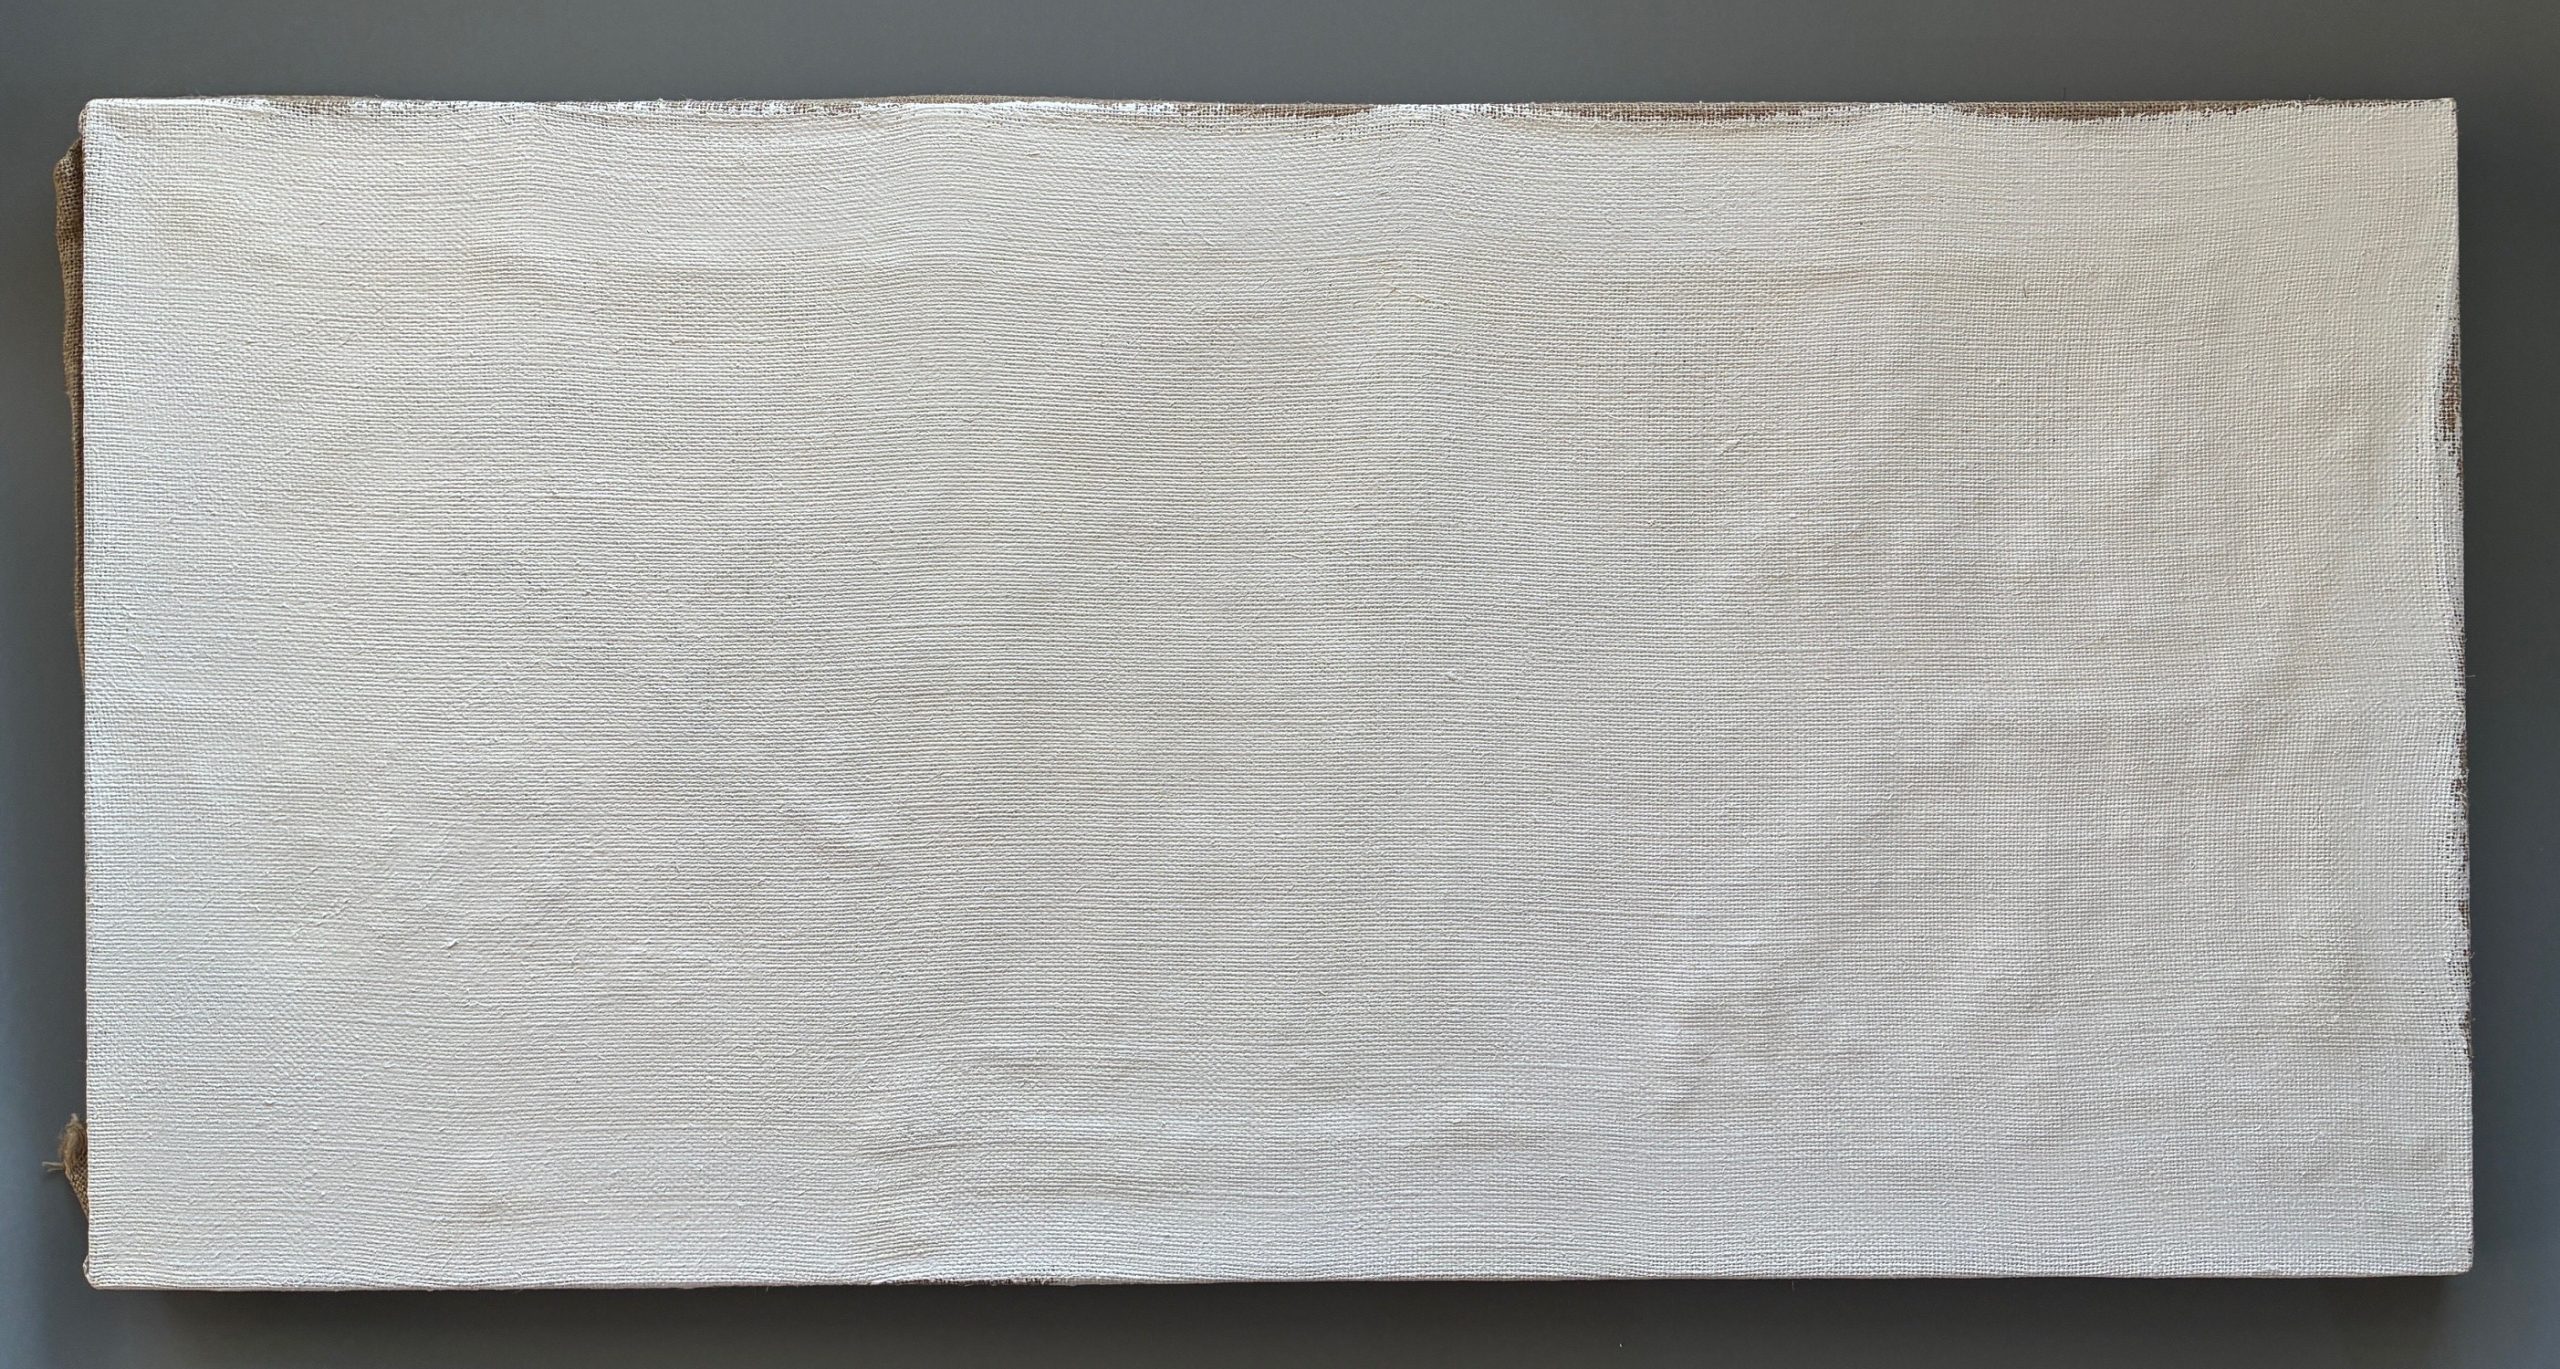
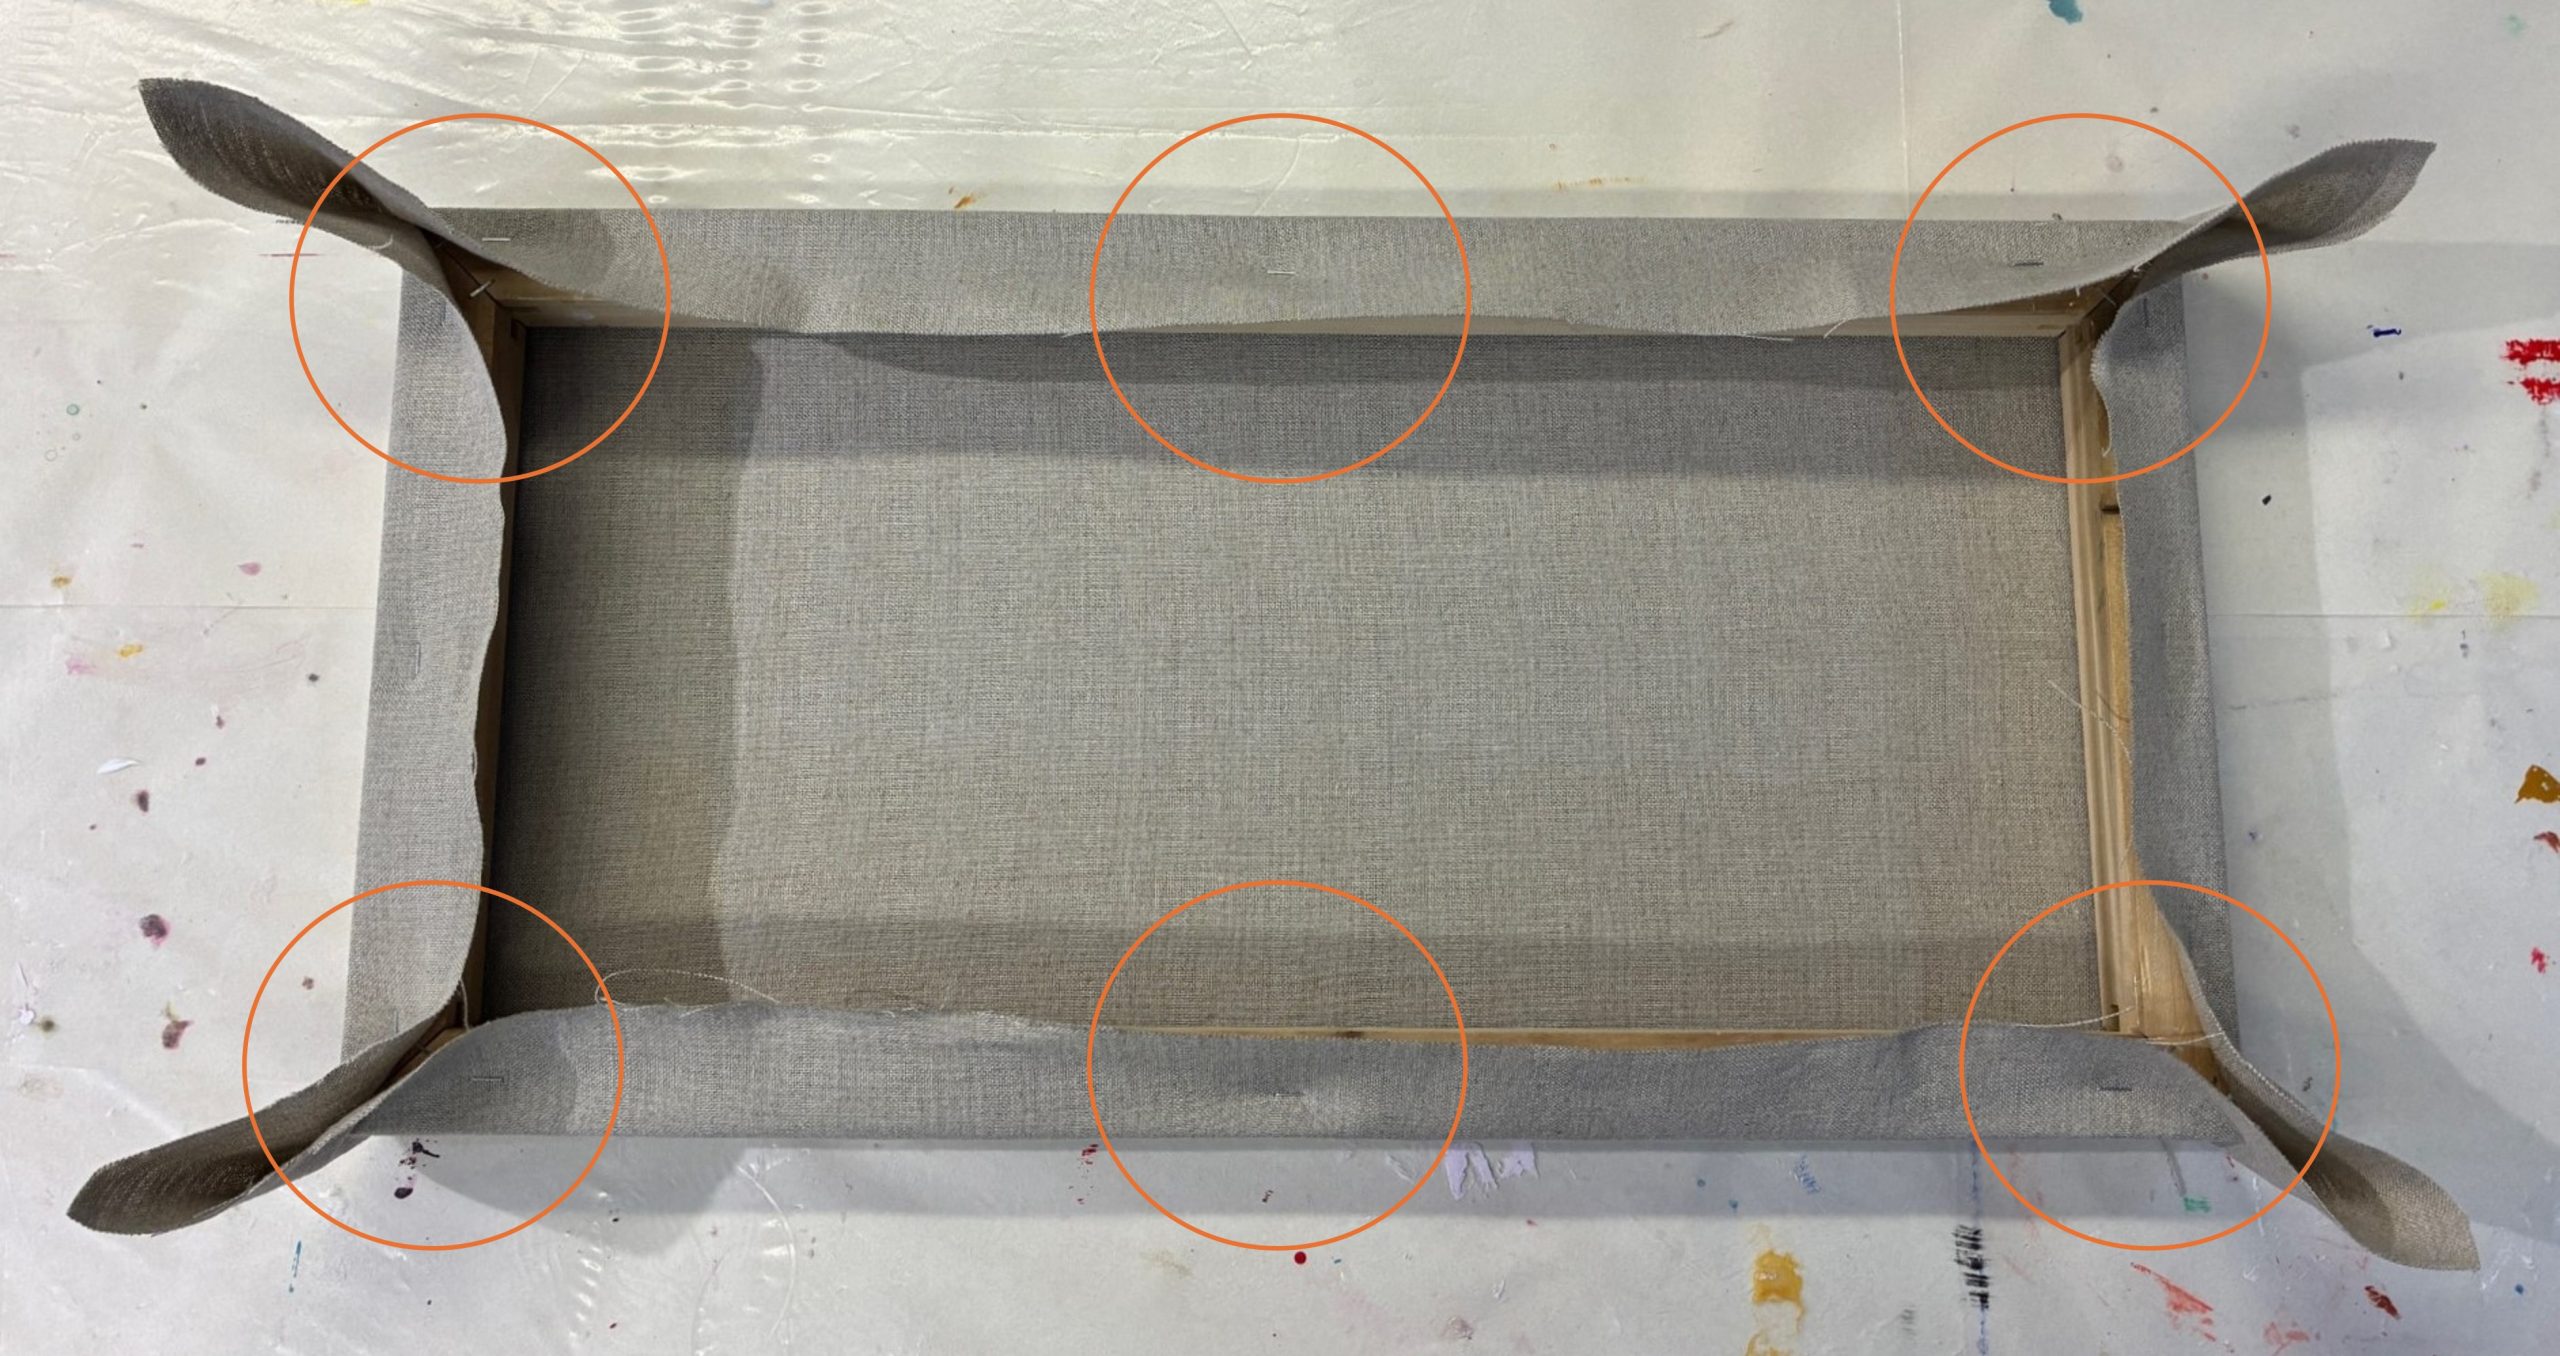
Stretching to the corners first leaves the fabric pulled tight and smooth without any planar distortions. When stretching fabric supports, most artists work from the centers of the stretcher bars out to the corners. When following this method using linen, it’s relatively easy to get buckling that looks like wavy distortions or a scallop pattern.
To mitigate this issue, try stapling your linen at the centers of the stretcher bars to stabilize the fabric, then stretch and tack in all the corners. This holds the linen tight and keeps the weave parallel to the bars. After stabilizing the corners, come back to the centers and stretch and staple out to the corners as normal with staples about 1″ – 1.5″ apart. You may need to remove your tacking staples in the corner to fold your fabric and finish the stretch. This approach should provide the benefit of straight stretch that remains parallel to the weave, with fabric that doesn’t buckle in between the tension of each staple along the length.
This article: A Remarkable Way to Stretch Canvases (and Other Essentials of Canvas Preparation), demonstrates how to stretch from the corners inward for those artists looking to re-imagine stretching. What we are suggesting above is a hybrid approach that starts in the corners to simply hold tension of the fabric while working from the center out.
Get to know your warp and weft. This article: Weave Direction & the Best Orientation for Stretching Fabric is especially important when stretching larger pieces of fabric that have a rectangular shape.
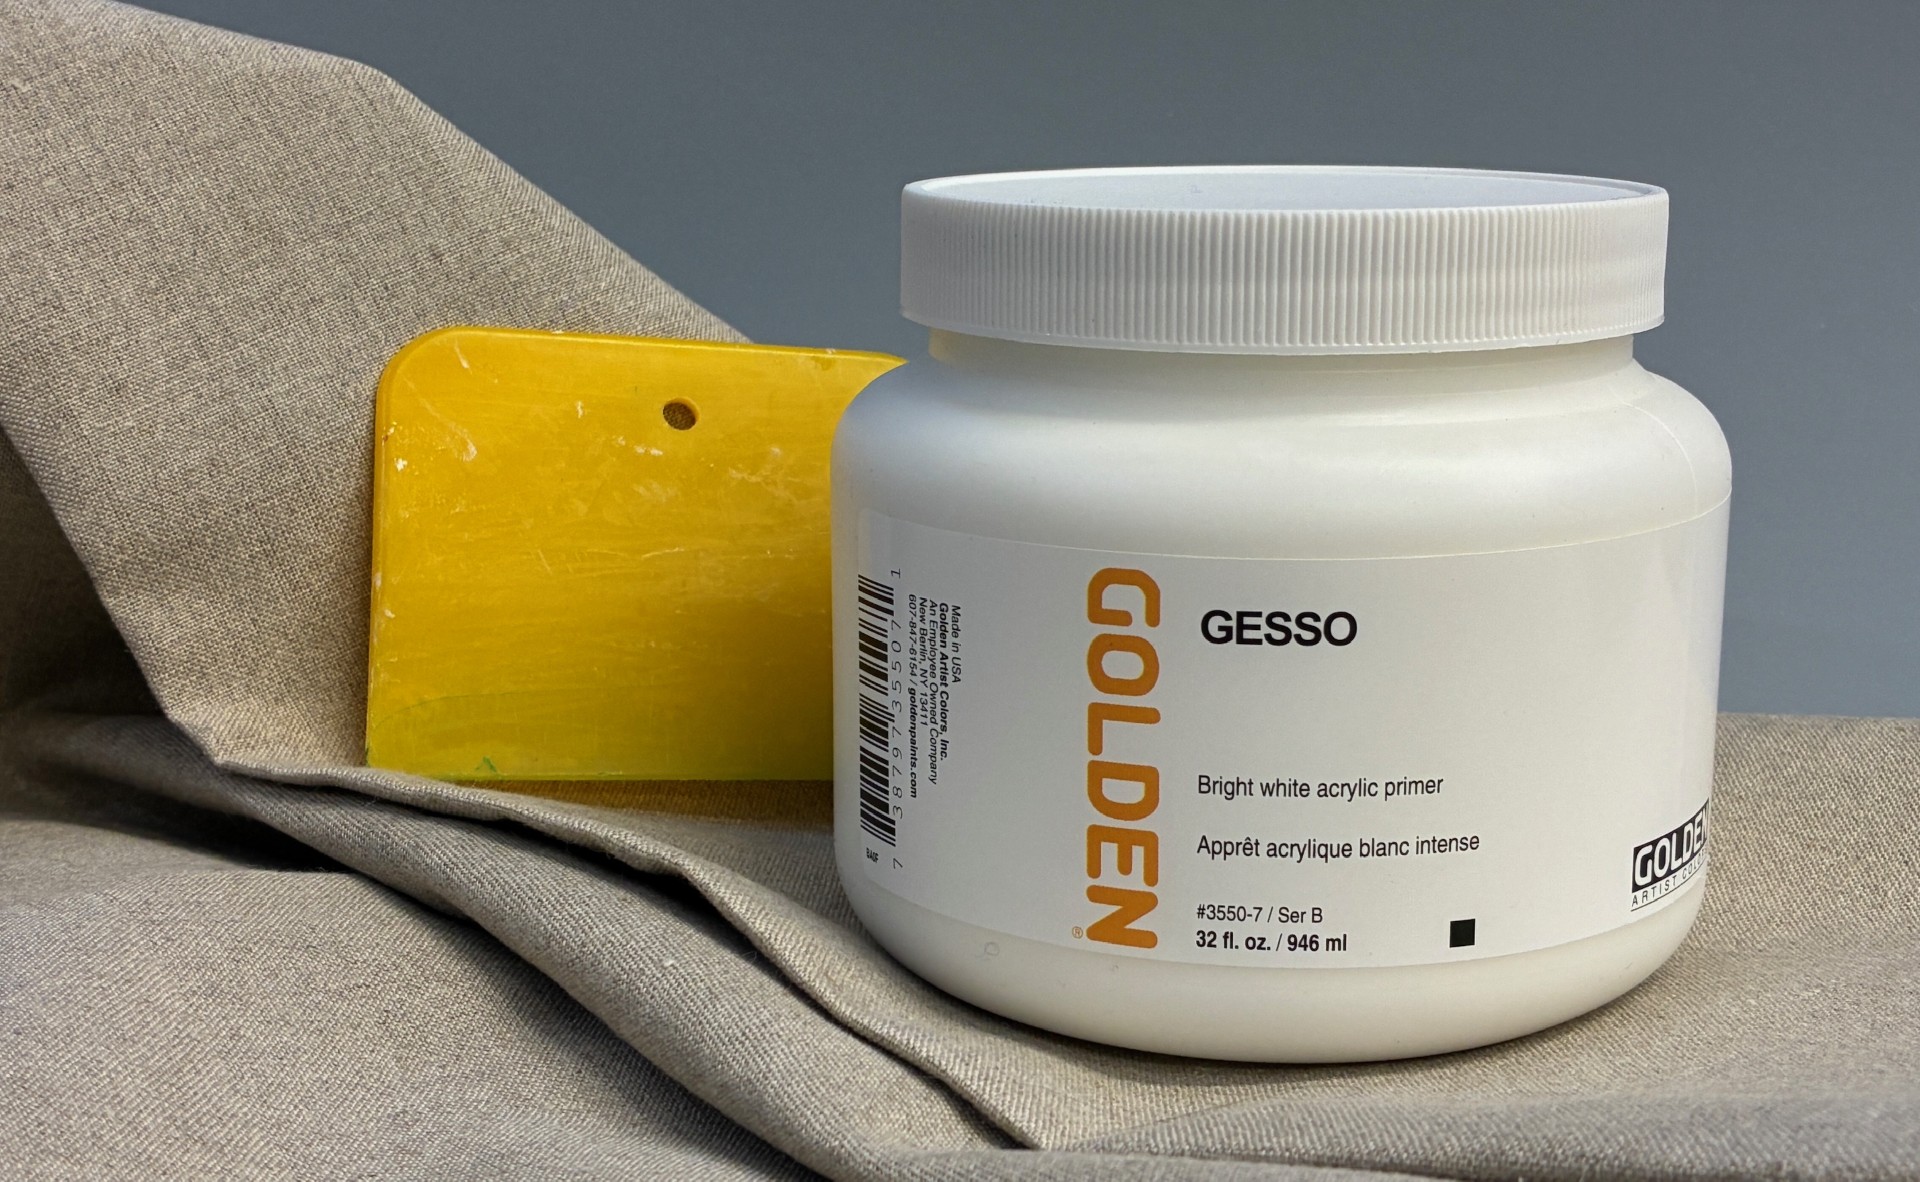
Apply the Gesso Fast and Thin
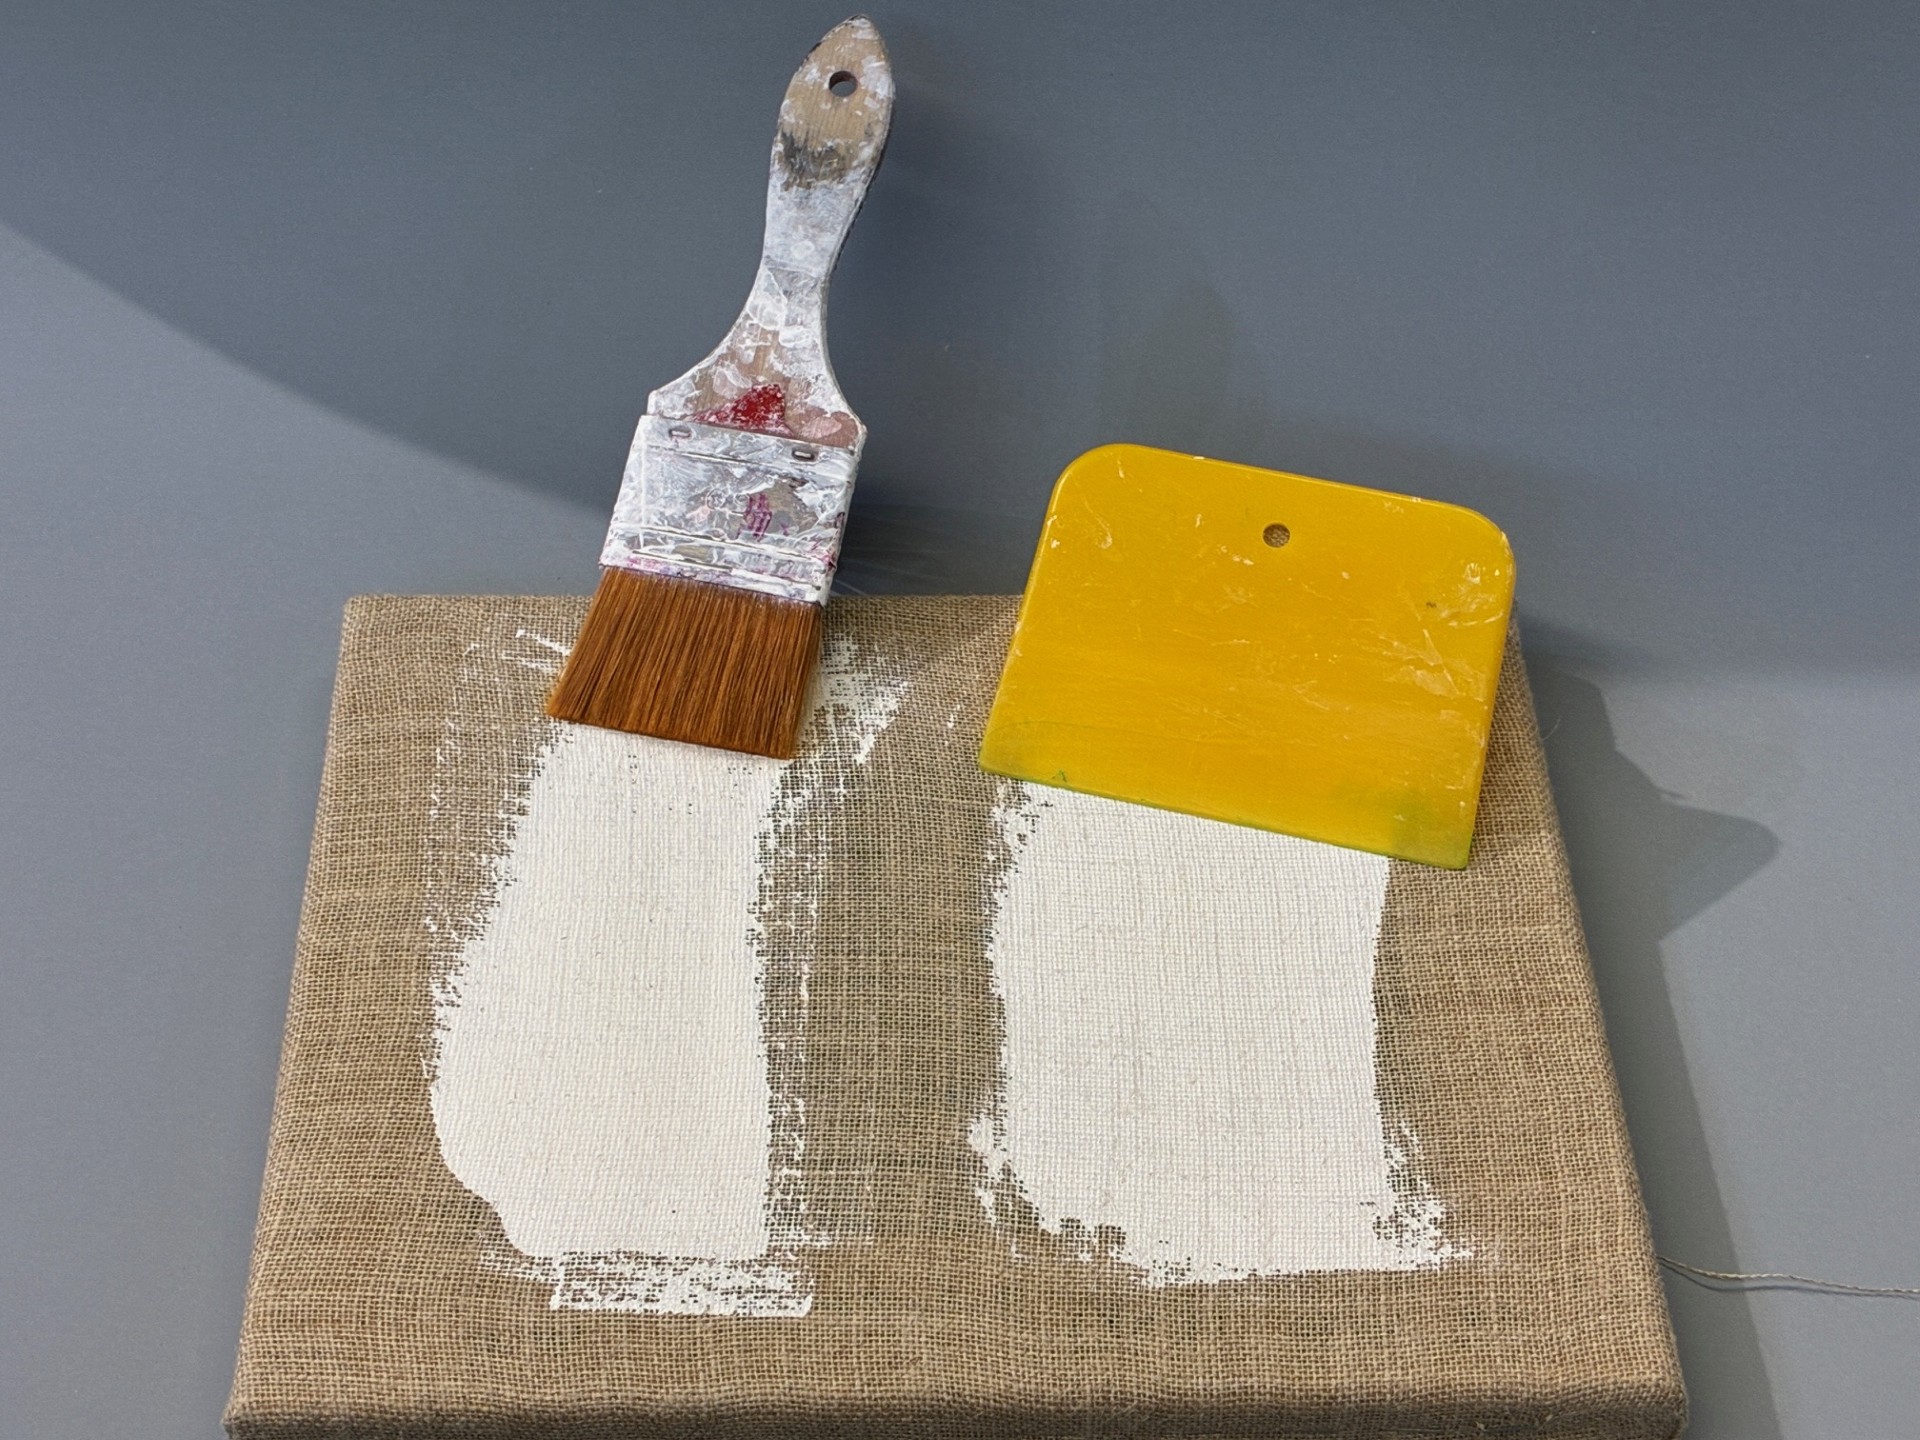
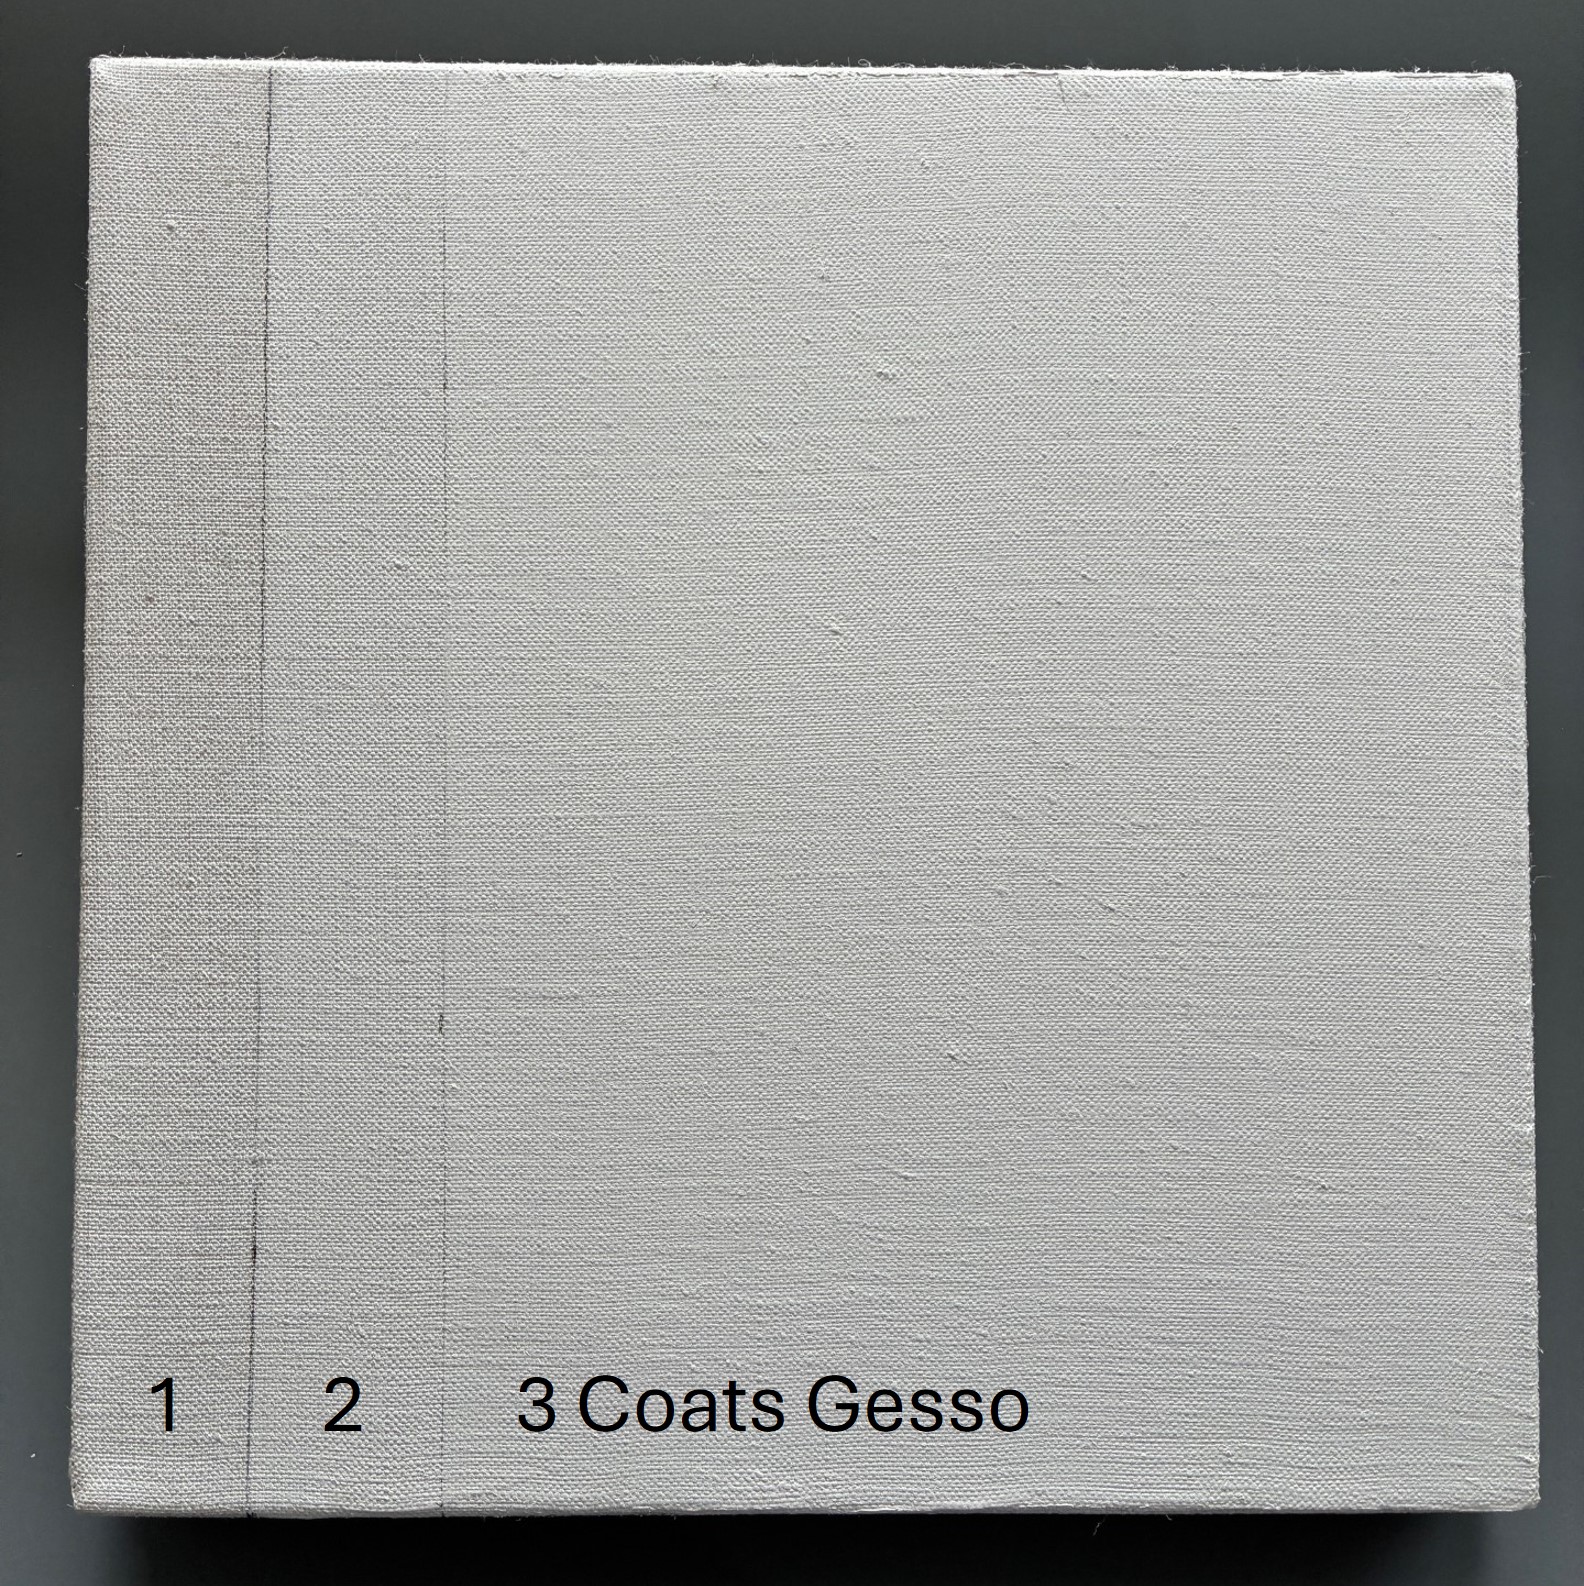
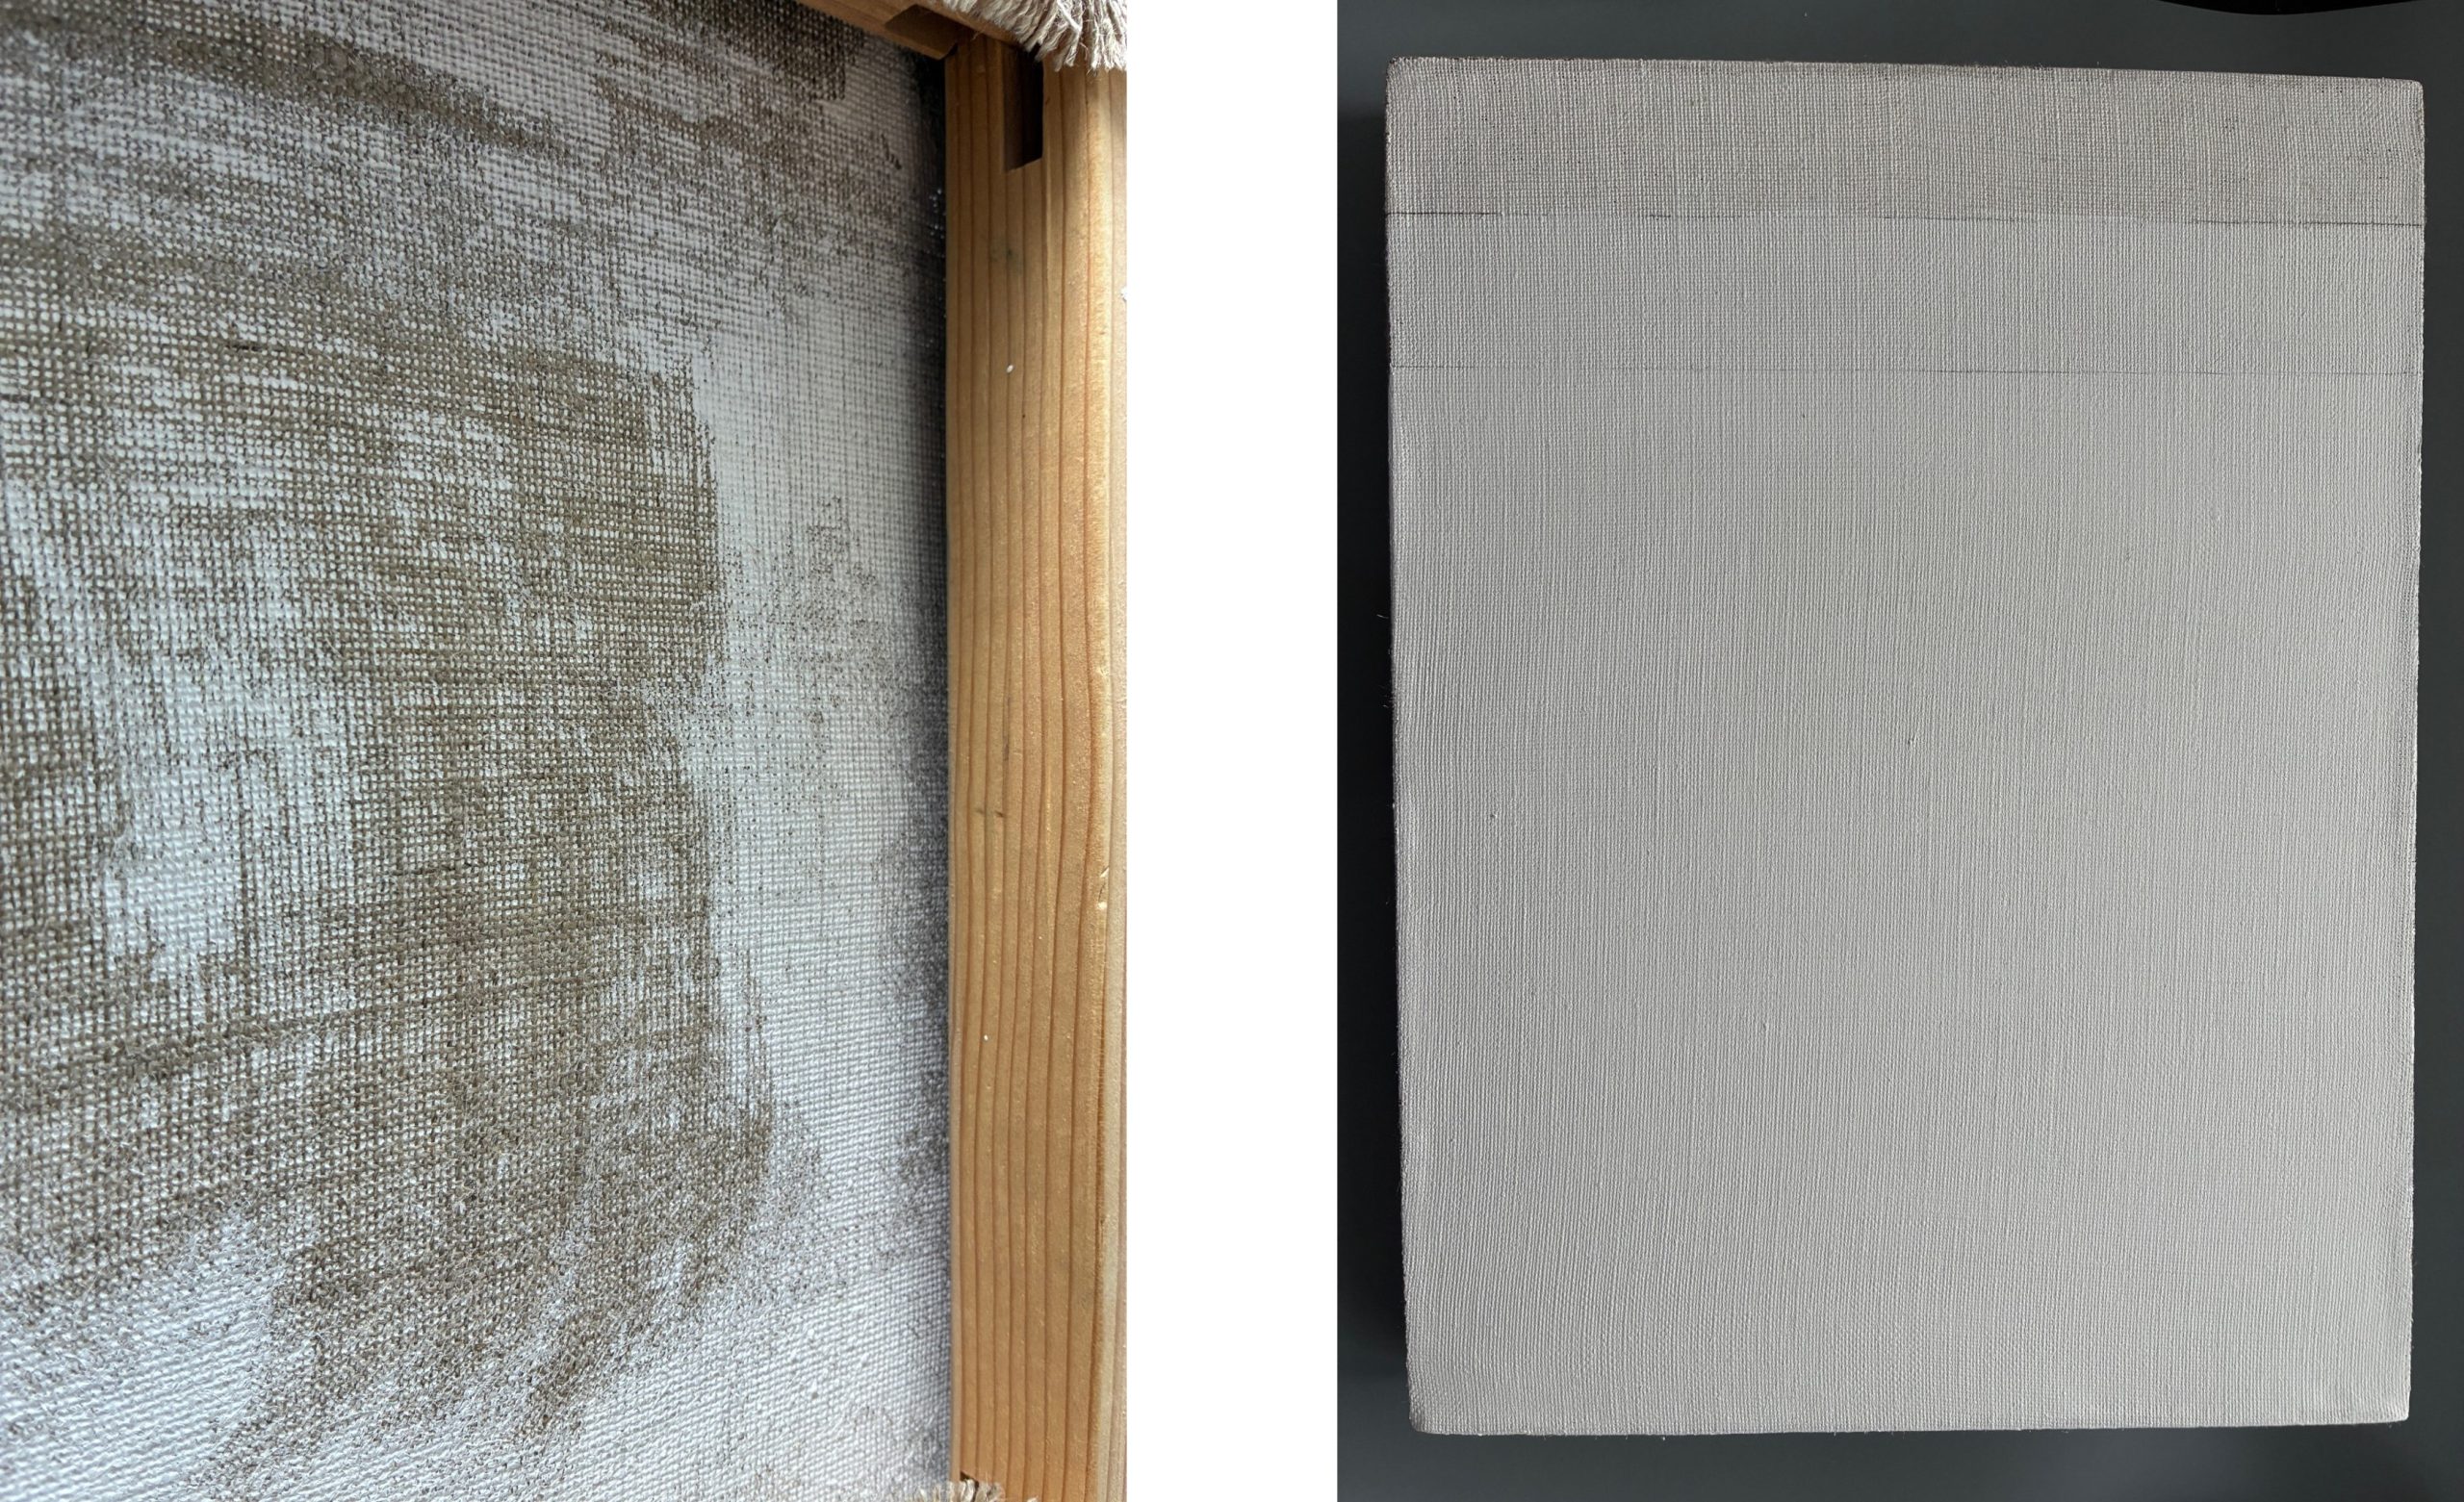
The fastest way to apply Gesso is with a soft plastic spreader or trowel. Using a spreader or trowel forces the product into the weave, coats all the fibers and removes the need for sanding if done well. It also spreads the thinnest coat possible which will dry quicker and not swell the linen fibers as much. Use undiluted Gesso for this process.
Many artists use a brush to apply the Gesso, which is time consuming and often requires sanding. Plus the brush need to be cleaned. Brushing can go faster with diluted layers of Gesso, but then you are wetting the fibers more (causing additional swelling) and it will require more layers in the end to build up to a bright white surface.
Four Simple Steps to Using a Spreader
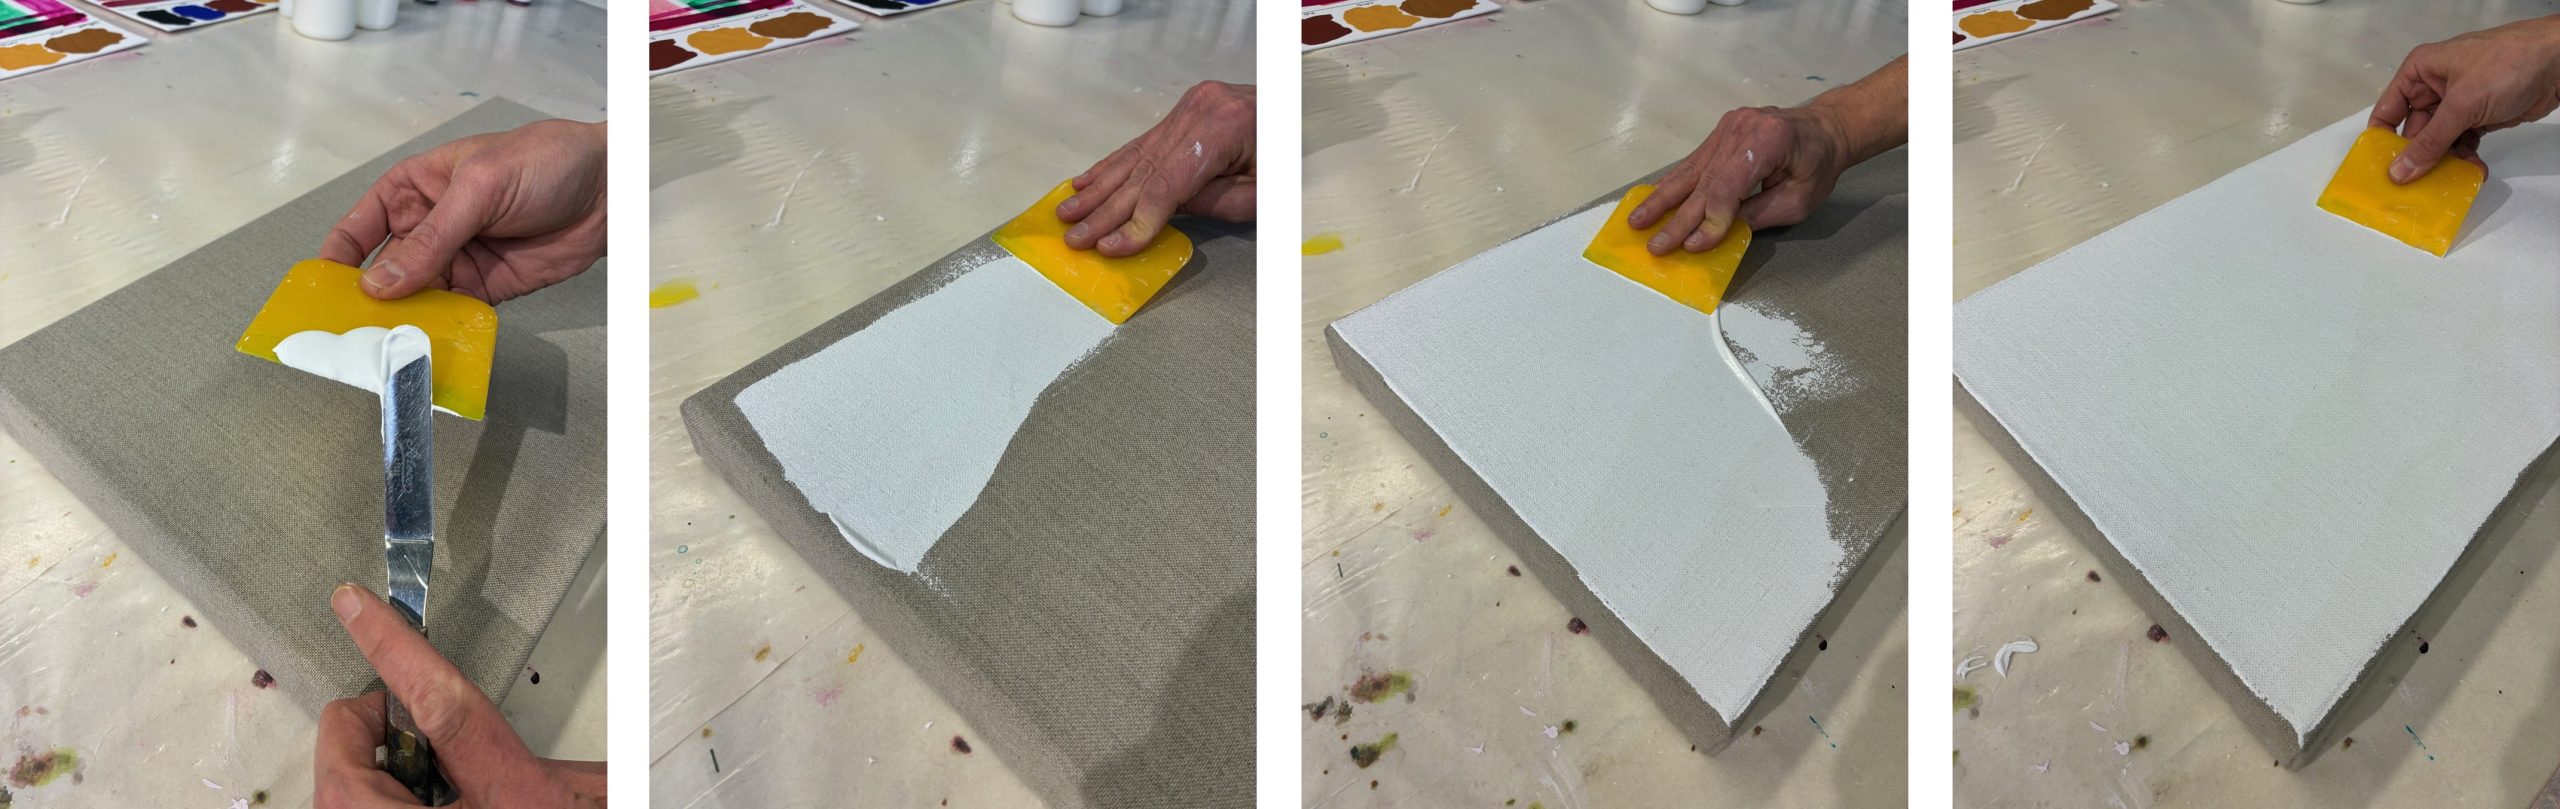
1. Instead of dolloping the Gesso directly onto the surface of the linen, apply it with a knife to the spreader for more control and less waste.
2. Hold the spreader so it is a little bowed with the center down and the corners floating just above the surface of the linen.
3. Work the product into the fabric by gliding the spreader over the weave. Move in every direction to make sure all the fabric is filled and coated.
4. After the entire surface is covered, systematically work across and down the surface to smooth out the product pushing any excess along as you go.
Using Products Other than Gesso
If you are painting with acrylic on the prepared linen and want to protect from SID, then the first layer can be Gloss Medium or GAC 100 followed by Gesso. Use the same spreader mentioned above to apply the Gloss Medium. If you want a clear preparation, then you can either paint acrylics directly onto the Gloss Medium, or add a layer or two of Matte Medium if you want a matte, toothy surface to work on.
Smoothing the surface is done more easily with Molding Paste. To fill the weave of most types of linen and soften the texture, trowel on 3-5 coats of Molding Paste. You can either paint directly onto that or add another product. For oil painting, skip the clear acrylic and just use Gesso or Molding Paste. See Revisiting Oils Over Acrylic for more information.
Keying Corners
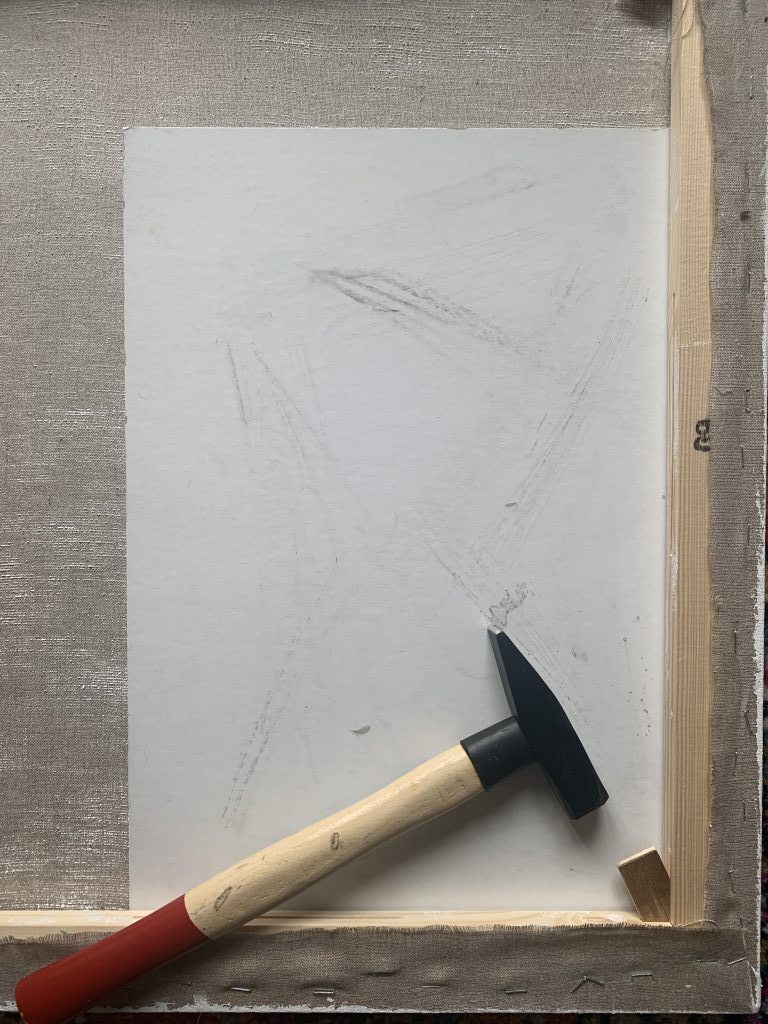
If there’s only a bit of slackening effect after your acrylic application, it might be sufficient to key out the stretchers. This creates tension by slightly expanding the corners. Keying out can work well for smaller and medium sized paintings when they are young and still quite flexible. Older paintings, especially oils, can become stiff and be at risk of cracking with the stress from keying. Make sure to place a piece of cardboard into the corner of the canvas before keying out. This protects the back side of the canvas from damage while using a hammer to tap in the keys. If this doesn’t provide enough tension in the linen canvas, remove the staples and re-stretch.
A Couple Tips for Best Results
Folds and Creases in the Fabric: Some linen comes folded from the manufacturer. Even after stretching and Gesso, folds can lock into the acrylic primed surface and become difficult or impossible to remove. Consider ironing the fabric before stretching to soften the folds and tidy things up before you begin. Alternatively, pre-stretch the fabric and wash the fibers with tap water. The fabric will tighten and release the creases. Re-stretching will likely be necessary after this step.
Consider the Weave: Tightly woven fabric is ideal. It doesn’t allow product through to the back and it is easier to stretch straight along the weave without locking a wavy pattern into the fabric. It is also tougher and more durable against pokes and tears.
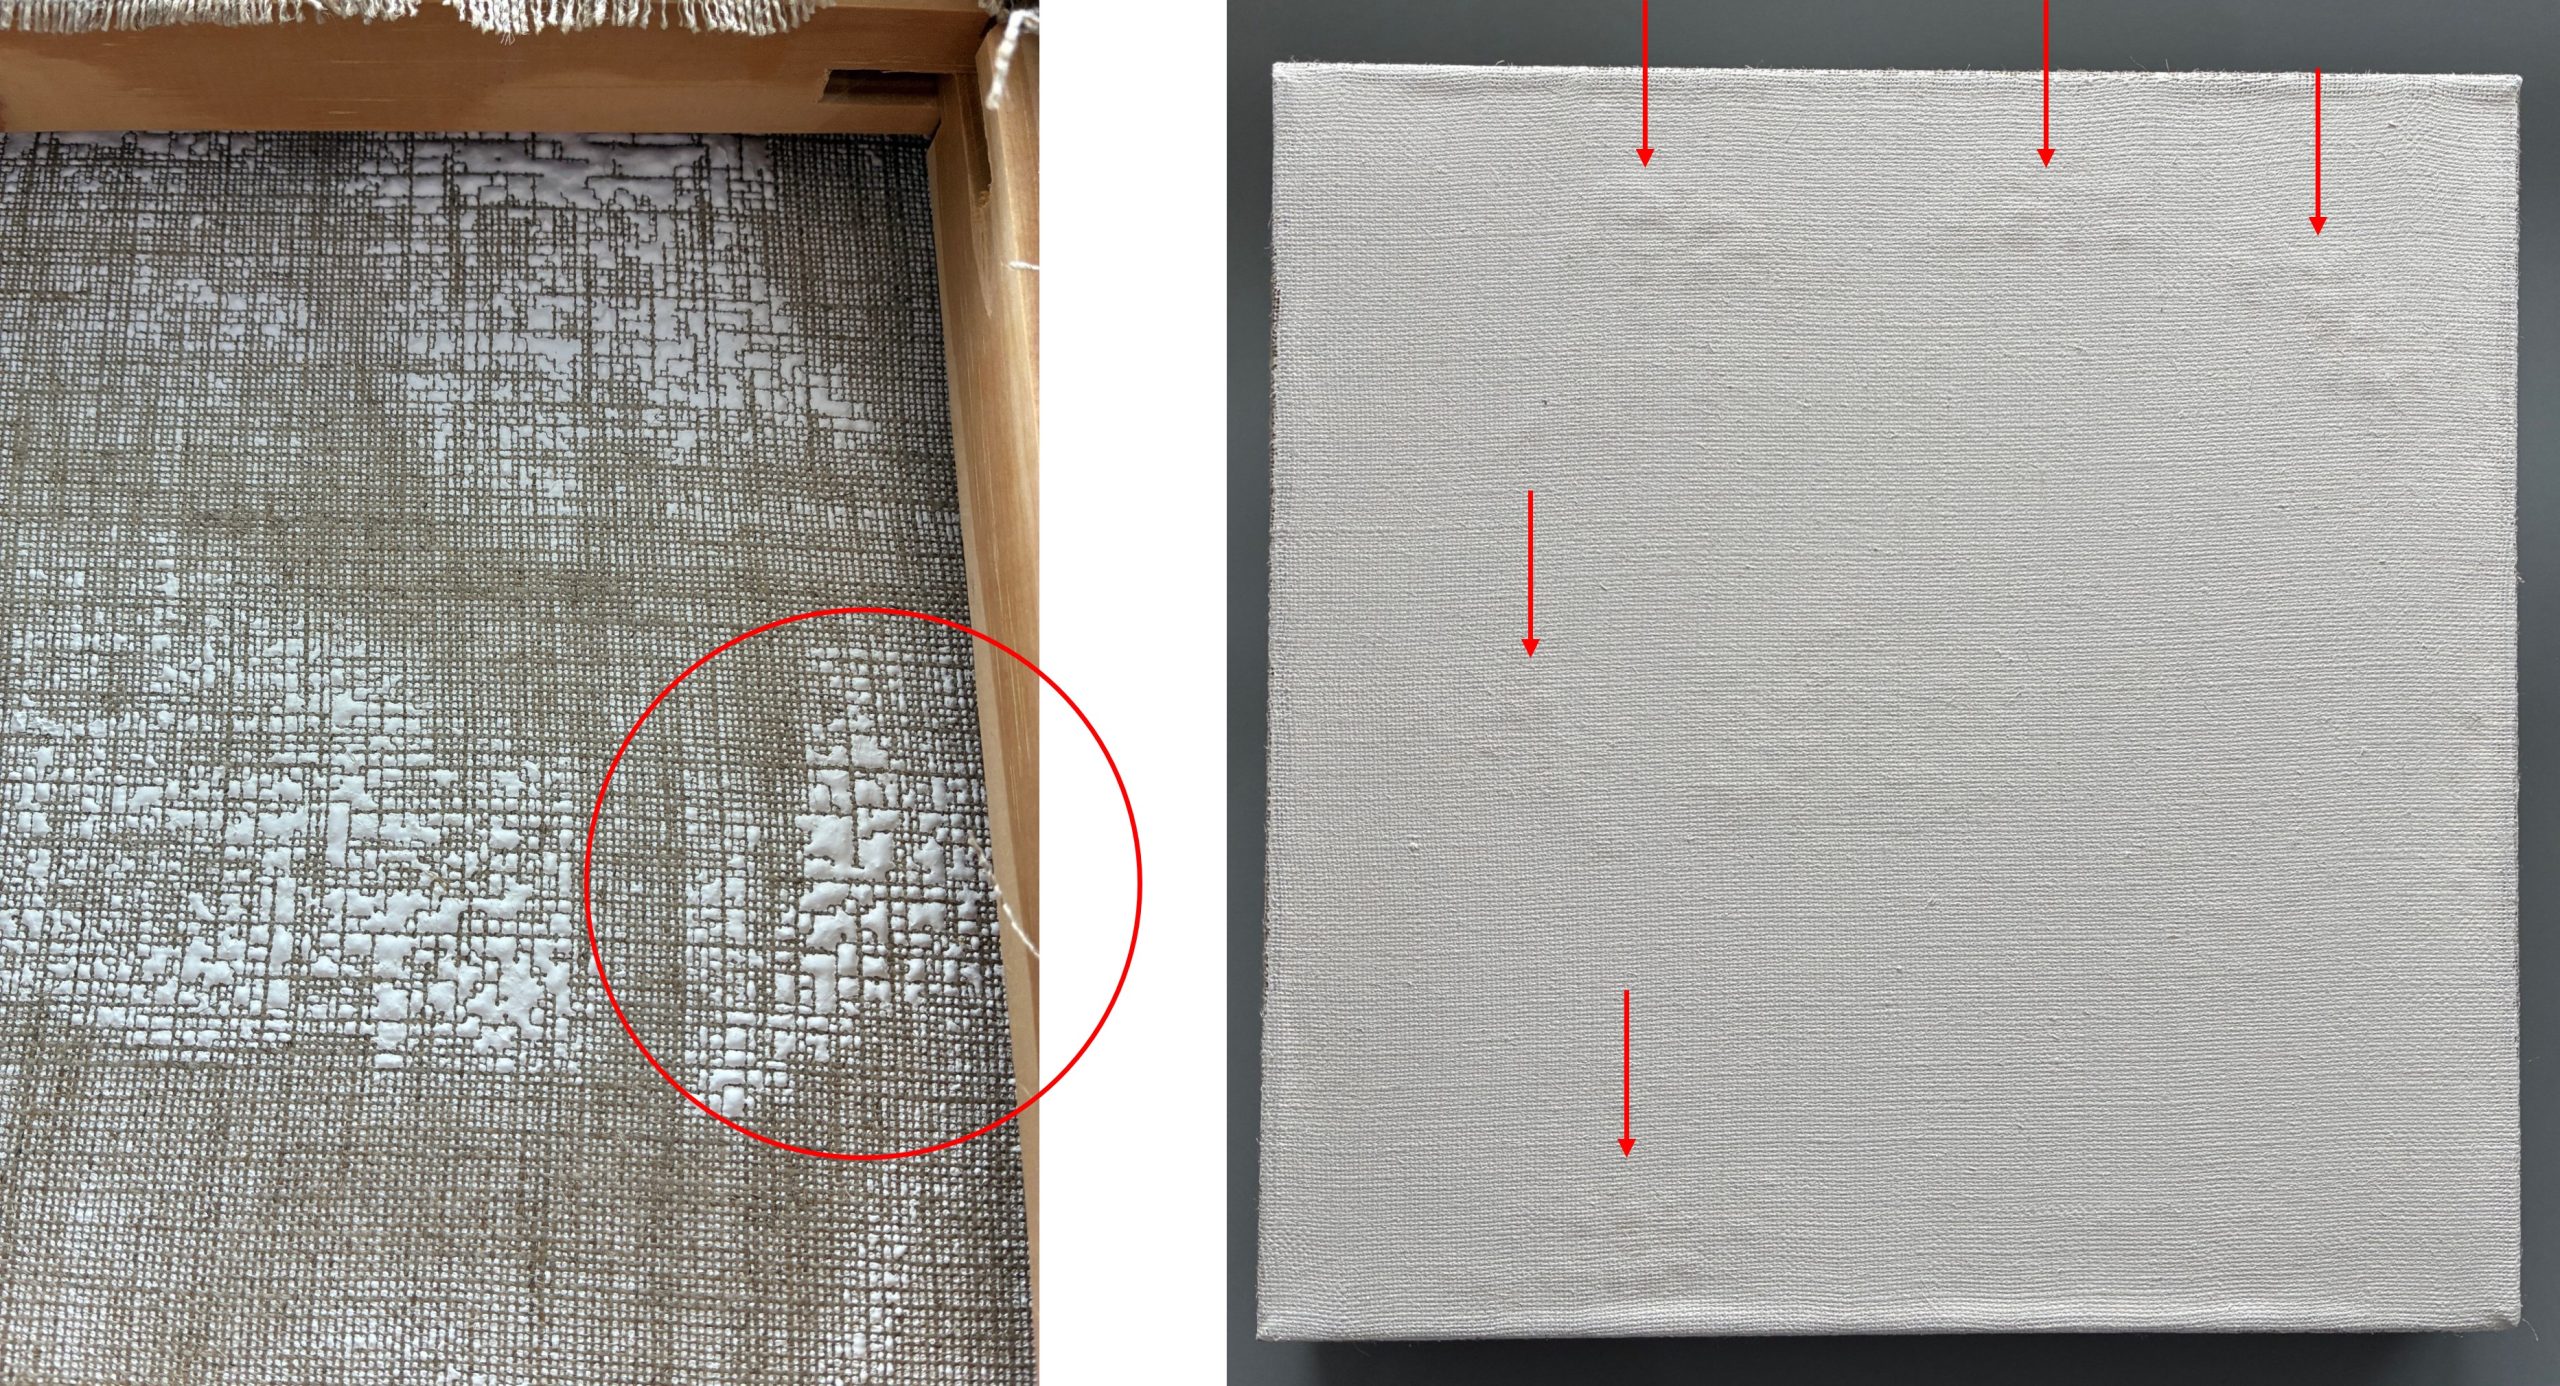
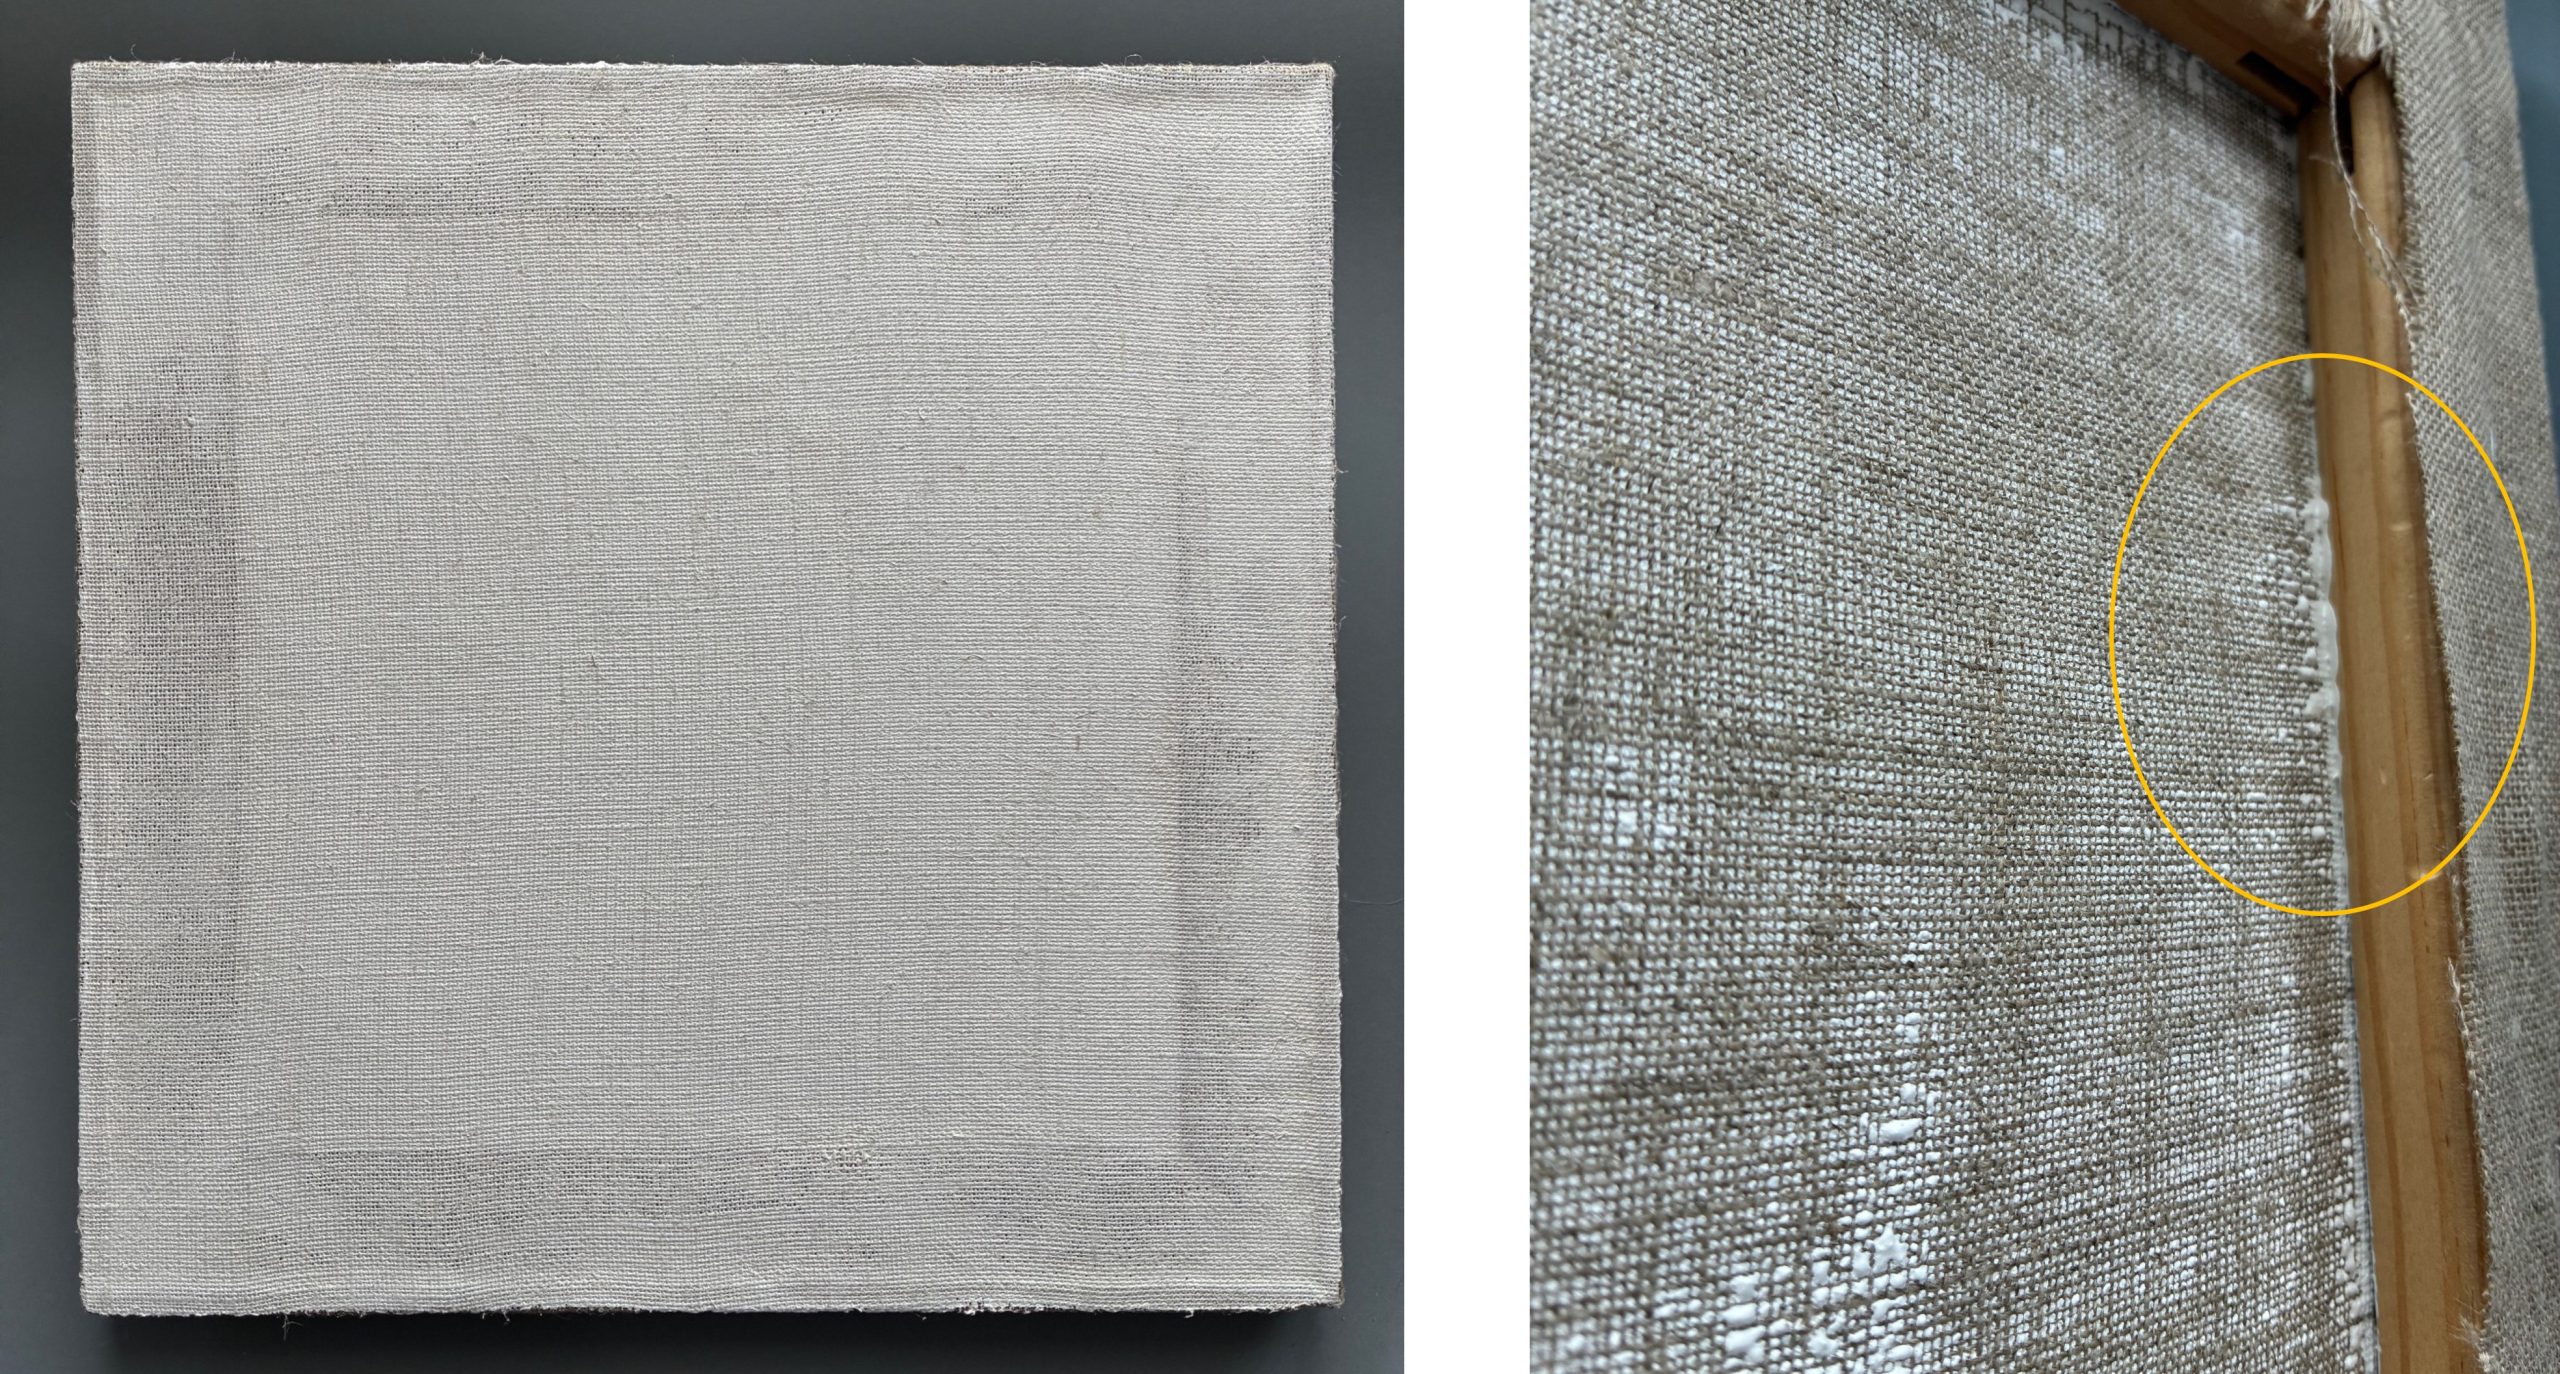
Open weave linen is more challenging. It’s more flexible, which makes it harder to stretch straight. The staples or tacks are holding onto fewer fibers so the tension can be quite variable along the tacking margin during acrylic application. Regardless of whether the acrylic product is brushed or troweled, open weave linen lets product through to the back, which can collect in little clusters and telegraph as distortions onto the front. If this happens, scrape the bumps off the back while wet, then tidy up the front before the Gesso dries.
About the Stretcher Bars: Use a deeper bevel so the trowel doesn’t run against the profile of the bar when you are spreading the Gesso. This will help provide a uniform coating on the surface, and in the case of open weave linen, keeps the gesso from squeezing through the back and gluing the fabric to the front of the stretcher.
A lot of artists stretch fabric over strainers as opposed to stretcher bars. The primary difference being strainers have fixed corners and stretchers allow for keying out. If you have the option when painting on linen, then choose stretcher bars. The option to key the corners may come in handy once the fabric is primed or the work complete.
Staple Spacing: If staples are loose or spaced too far apart, then the fabric may scallop along the edge once the acrylic pulls the fabric tight and locks into place. For less variability in this regard, staple close together on the back of the bar as opposed to the sides. This wraps the fabric around two edges to provide more stability when the fabric shrinks and pulls tight.
Conclusion
There are many ways to successfully stretch and prime linen. The method chosen may depend on the type of material and technique you will be using for your painted layers. In the end, you simply want a sturdy piece of fabric that is well stapled to the bars with even tension from the center all the way to the corners. Be sure to apply acrylic priming quickly and as uniformly as possible. Make it thin, as a thick wet layer will saturate the surface and swell up the fabric. After a couple layers of acrylic, the linen will become less reactive and be able to handle additional preparatory layers or your final painting. Linen has a luxurious feel when it is properly prepared. Try a couple varieties of linen before you make an investment in a large blanket or roll. And start with small canvases to get familiar with its working properties before scaling up. Let us know how it goes – [email protected] or 800-959-6543.

Great article Greg! Thank you! Very informative and can tell it will help me a lot next time I work with linen.
Happy to hear it Chrisiane! Get in touch next time your starting some linen surfaces and we can discuss your projects. Happy to keep up with your work!
Very best,
Greg
This is a super thorough article, thank you. Sometimes I see painting paintings done directly on the fabric. Any comments about that?
Hello Bridget,
Thanks! You can paint with acrylic directly onto linen or other types of fabric without issue. The only considerations are about creating different tension in the fabric and leaving exposed raw linen to environmental contaminants. When you paint onto the raw linen, the areas that have paint will shrink and lock into a slightly different configuration than the adjacent raw fabric areas. If the paint is thin, then it may not cause any issues. But with slightly thicker applications, the fabric can get distorted and dimples etc can develop making the fabric look bumpy. If you wanted to avoid this, we have Fluid Matte Medium or Matte Medium, which can be used directly onto the raw material to set up even tension across the entire surface without making much change in the way the fabric looks. So, it still looks like raw fabric, but performs like a surface prepared with an acrylic ground. Of course this would reduce the absorbency of the surface and limit the potential for some stain-like applications, but we can discuss that if you are interested. Using a clear ground can also help with the exposed raw fabric issue. Over the long run, raw fabric is difficult to clean once grease, dust and dirt begin to settle onto/into the surface. Having even a thin layer of acrylic will keep contaminants at the surface and allow for more effective cleaning. Cleaning acrylic has its challenges too but conservators have gotten quite good at it over the years!
Take care,
Greg
I’m curious if it’s possible to “stain” raw linen with Golden fluid acrylics first, and *then* apply a PVA or Medium to prepare it for more layers with thicker applications of paint?
Hi Jordan,
If you stretch the linen as tight as possible as we described in the article, you should be able to stain to your heart’s content without the fabric going too limp. Once that is dry, then you come over top with a clear layer to size the entire surface to prepare for additional layers. Fluid Matte Medium or Matte Medium can work well for that purpose. For oil painting, we recommend at least 2 coats of Matte Medium specifically, and to add some oil binder to your paints. Take care!
Greg
Very good article! Thank you!
Thanks Gaye! Best wishes in the studio.
Greg
Based on Bridget’s comment about working on the raw linen, wouldn’t it be best to pre-stretch, then lightly prime the back of the canvas with a very thin layer of any acrylic product in order to preserve the absorbency of the front linen and prevent shrink or the aforementioned locking in of adjacent raw fabric areas, scrape off any thing coming through while wet?
Hi John,
sure, that might work. You have to have a deep enough bevel so you can get a tool between the stretcher bar and fabric for even coverage. If some product squeezes through to the front, then it could change the absorbency of those areas and make the stain or application on the front look splotchy. Even the tightest weave linen can allow product to squeeze through when its applied with a knife. Worth some testing! Thanks.
Greg
WOW, this is an incredible overview and exactly what I needed. There’s a lot of piecemeal, half-digested tips out there that left me unsure, and it was refreshing to find this thorough and authoritative overview, thank you!
Great to hear Jordan! We hope your linen experience is a success! Let us know how it goes.
Greg
Hi Greg,
Thanks for this great overview! The images are especially helpful, and I’ll be printing this out for our painting classroom at West Chester University.
Thanks again, and hope you’re well,
Kate Stewart
Sounds good Kate. Thanks for sharing with your students! Take good care!
Greg
Hi Greg,
Thank you for your article. Is there a way that you can size linen with PVA or Gac100 without staining the back or at least making a nice and even back of the linen canvas. Is that normal occurrence? I am trying to build a nice and archival canvas but I always fail with nice, looking from the back of it 🙂Thank you if you have thoughts on it and the way to help. I’ve been looking around but couldn’t find anything related to this topic.