Introduction
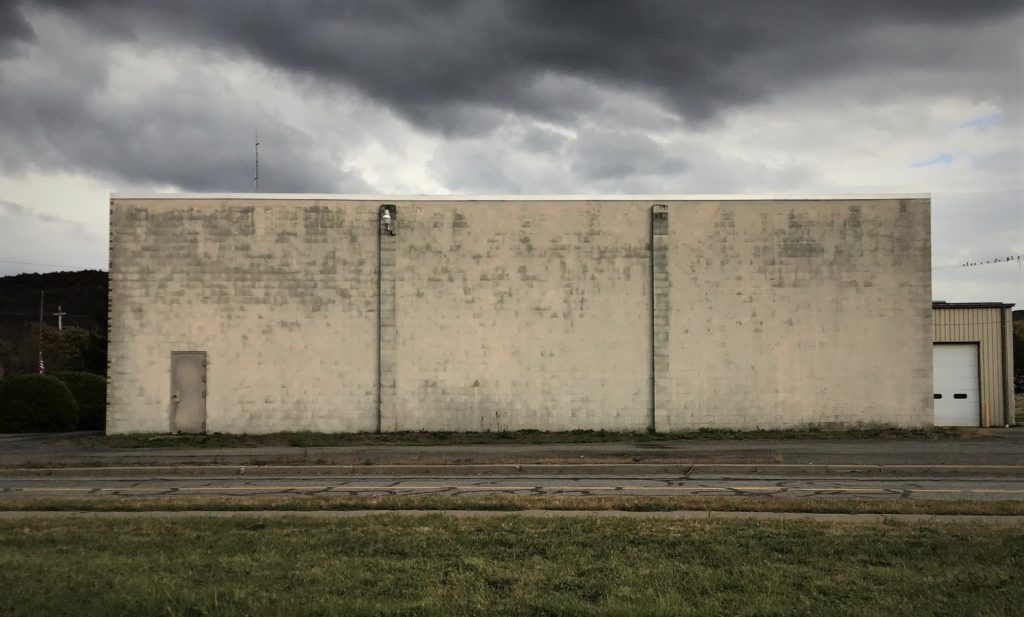
The creation of a mural should begin long before ladders, scaffolding, and cherry-pickers are on site. Although we have amassed extensive information about mural painting, the conversation about how to go about estimating products could use some expansion. When preparing to paint a mural, the creation of a maquette helps ensure the appropriate amount of paint and other supplies are at the ready. We will use this tool to calculate how much paint to have on hand for a given mural.
Most commercially available products are sold in quarts and gallons at various locations and are relatively easy to pick up more if you run out. However, large containers of artist paints are not so easy to procure and this runs the risk of costly delays in project completion.
On the other hand, you do not want to buy too much paint, either. Overestimating paint amounts eats directly into your budget, including the artist’s profit margin! So how does one accurately approximate paint amounts?
Enter: The “Maquette”
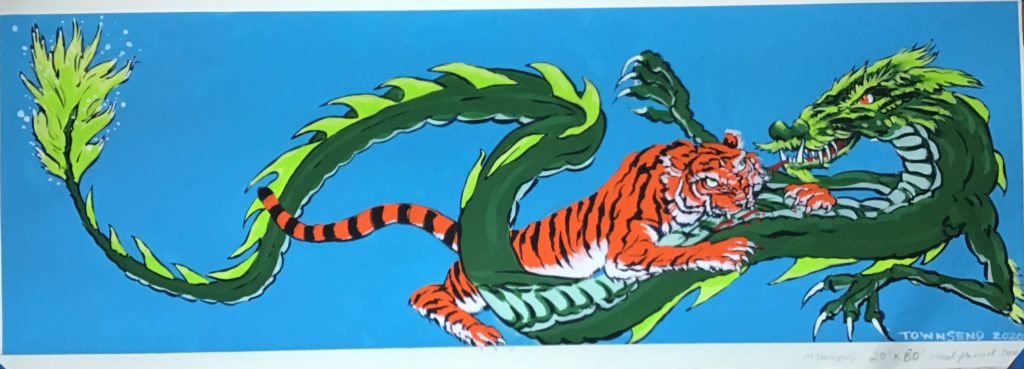
The French word “Maquette” translates as “scale model”. It is created during the conceptual phase of a work of art to aid in image design and in turn, used to obtain client approval for a proposed mural. This to-scale reference further aids with paint estimation. A common scale ratio for a modest project would be 1 square inch on the maquette represents 1 square foot on the wall. This ratio is changed as needed for larger works. A maquette does not need to be highly detailed to be effective.
Although a computer rendering can facilitate this process, a hand-painted rendering increases the accuracy of estimated paint amounts. Some of the colors will be the paint right out of the container and some will be blends. Therefore, when you create blends, try to keep the mixing ratio on hand and written down. When we get to adding up all of the base colors, this will be important information. For example, you might make a light sky blue, a light pastel green, and a light cloud gray. Colors such as these are mostly Titanium White and the base colors around 5 to 15% of the mixture. If you have not checked it out yet, try the GOLDEN Virtual Paint MXR to get your ratios set, even if you mix by eye. There’s even a way to select just the recommended exterior colors as your palette.
The Grid
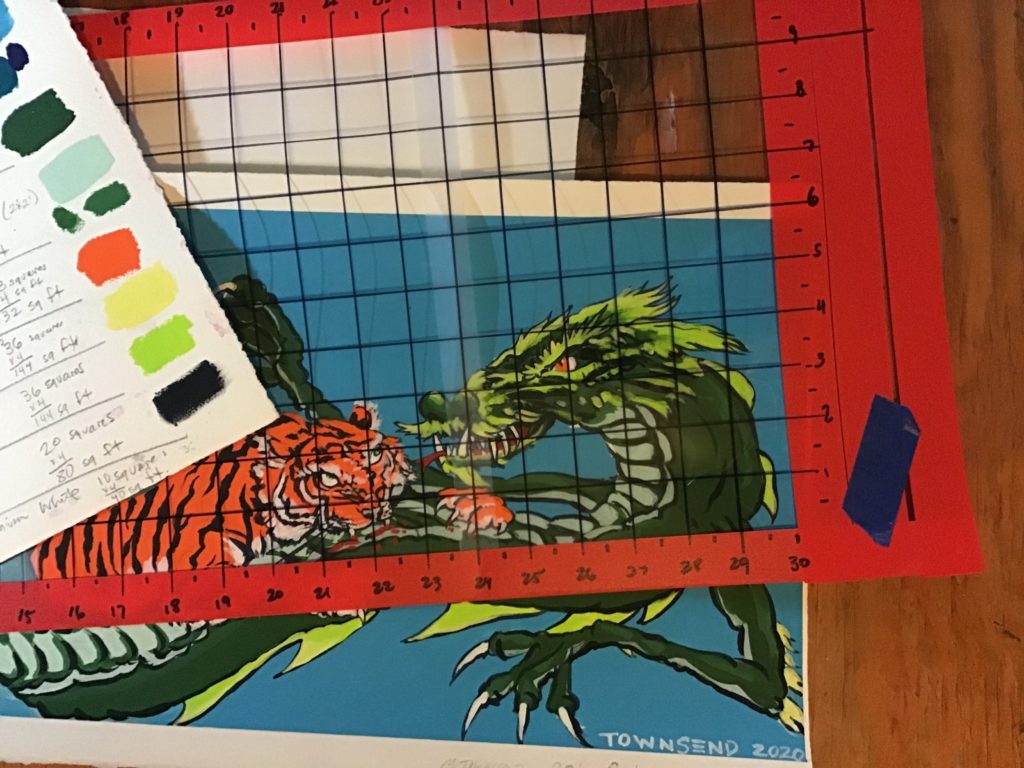
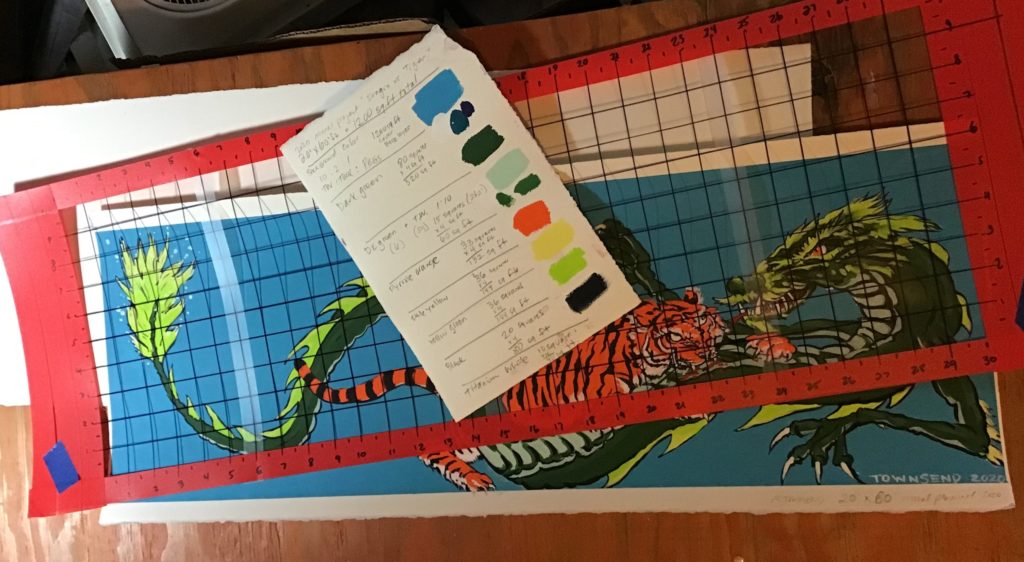
The concept of gridding a design to change scale is often taught in art classes to create coordinates. While this certainly is useful when deciding on a layout for a mural, gridding additionally serves to tally up the amounts of paint needed. You can draw the scale directly over the painting, but my preference is to use a mylar sheet to create the grid. This can be important if there are last minute changes to the design and you can also reuse the grid overlays for future projects. For this project, we made our grid at a scale of 1/2″ = 2′.
Add It Up
Now we are ready to figure out our paint amounts. Squares of the same (or similar) color are counted and tallied. For a simple design, you may list the color names as “Sky Blue”, or “Portrait Purple”. Larger, and more complex designs may require identification of zones, such as “Light Sky Blue”, “Mid Sky Blue” and “Deep Space Blue”. You can draw zones directly on the maquette or create an additional mylar overlay to define color spaces.
The whole squares are easy, but if you have a bunch of partial squares, just try to add them up as best as you can (within reason). When in doubt, round up! If you are concerned with your accuracy level, you can add up the square feet of all the colors together and compare it to the actual mural wall space. Note: When it comes to colors that you only use sparingly, do not overthink the amounts. Bear in mind that on average, an ounce of artist paint should cover between 2 to 3 square feet, one coat!
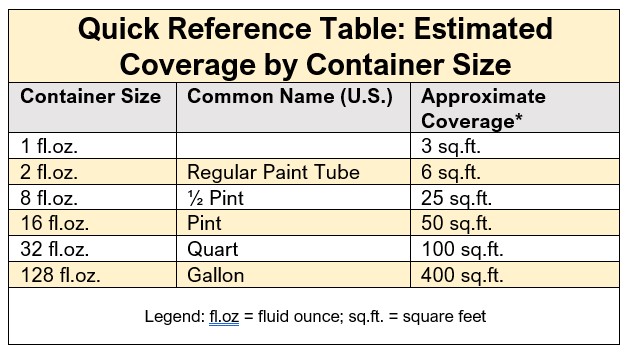
On the below worksheet, I have defined the key color fields, counted the squares (defined the square footage) of each, and broken down the mixtures into columns. It may seem a bit complex, but it is easy to get the hang of the process after doing it once or twice.
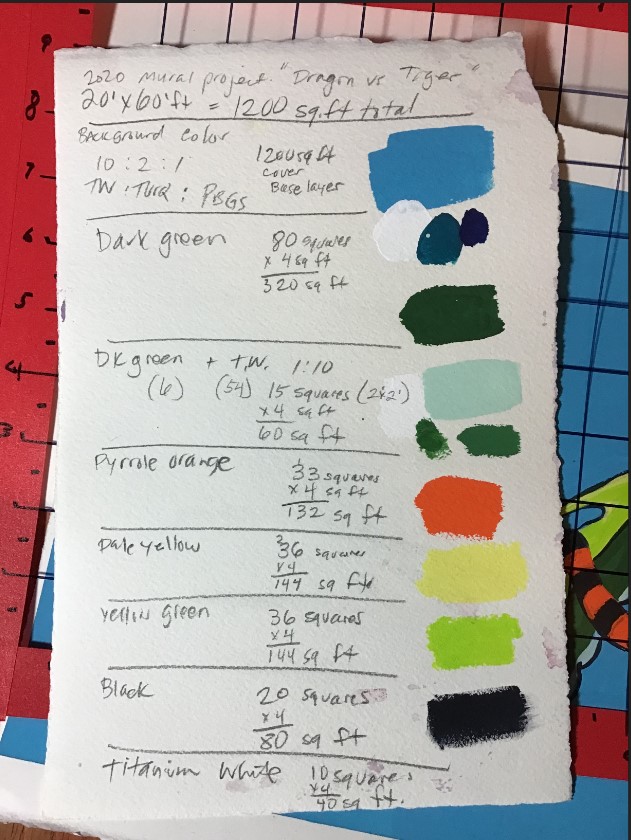
More about Product Coverage Estimation
Please keep in mind that texture, surface absorbency, product thickness, and application method can all factor into actual product coverage.
As always, if you have any questions, please contact us at [email protected], 1-800-959-6543 1-607-847-6154 (North America); or [email protected], 0049-69-348-72154 (Europe).

Great article!
Thank you, Lisa! I appreciate the kind feedback. – Mike
Really interesting article. As an enthusiastic amateur painter, I doubt I’ll be doing any murals any time soon, but I think that applying the process on a smaller scale when I’m mixing colours for large canvases will ensure I mix enough of any specific colour before I start.
Thank you.
You are welcome, Cyndie.
You might even find this useful information on a smaller scale, like when you need to mix up a unique color but want to make just enough to do the job!
– Mike
This is great information and I’m happy to have it now… I’m planning a barn mural in the spring and just started gathering Information. As always, thanks for providing such valuable process steps!
You are very welcome, Susan!
– Mike
This is great info. Thanks Mike.
Thank you, Mel!
– Mike Townsend
The murals projects I have conducted (20′ X 60′) were painted twice due to hot sun in Arizona. One wall that we did for the Phoenix Mars Mission, was painted with a complementary color scheme first, then the actual colors were applied to the complementary colors. For example for a deep space blue, this was achieved by painting with burnt umber as the undercoat and then eight layers of thalo blue with each subsequent layer of stars. The reason for the underpainting w/ complementary color was to give the top-coat a longer life, since the wall faced South. I.e. All red areas were underpainted in green etc. Plus, added a coat of semi-gloss UV varnish. The mural was finished in 2006 and I guarenteed it for 10. It is still vibrant as the day it was finished.
Thank you for your project update, Alfred!
– Mike Townsend
Thank you so much for this! I’m an amateur that has never done an outdoor mural but just got my first job piece! I wasn’t sure where to start, but this has been so helpful. I want to do a good job and make sure it lasts, so thanks again:)
You are most welcome, Juanita! Just let us know if you have any questions!
– Mike Townsend
Hello Mike ,
I have been asked to paint a portrait Mural on a very large Black wall .
Should, I prime the wall in White in order to make the colors pop ?
I will greatly appreciate your advice and or assistance
Thank You ,
Julie
Hello, Julie.
Thank you for your question. Depending on the way you like to work and the mural design, you could block areas in with White first, and then apply the pure color over top. This would be best with more transparent colors, such as the Quinacridone Violet. It can also be helpful to simply mix the paint with white and then apply the pastel-hued tint directly over the black. If you want a deeper, more vibrant color, you can apply the full-strength color over these lighter layers as needed.
-Mike Townsend