GOLDEN Color Pouring Medium Matte (CPM Matte) is a very new and exciting product for 2019. Unlike most acrylic mediums that develop an initial “skin” when drying, this medium avoids skinning over and therefore is quite resistant to “crazing”. The added benefit is this process allows for air bubbles and tool marks to readily disappear.
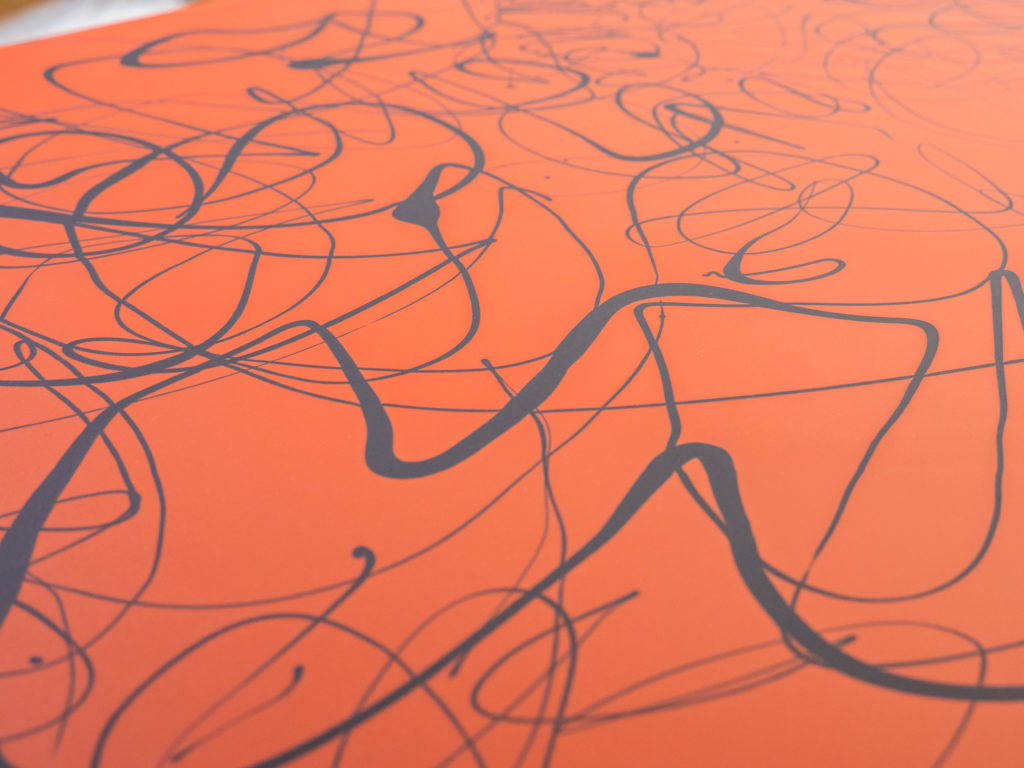
In regards to pouring, craze-resistance is important and practical, and it allows more freedom while painting. CPM Matte levels well, creating smooth, uniform paint layers. It can be blended with Heavy Body, Fluid, or High Flow Acrylics as desired, although starting with relatively low levels of paint (around 10% color) until you gain some experience with the product and its mannerisms is encouraged. The Color Pouring Medium Product Information Sheet has many suggestions to help get you started in the right direction.
Just because it’s designed as a “pouring medium” doesn’t necessarily mean that pouring is the only thing you can do with it or that you can only use CPM Matte in an artwork. There are other uses that make CPM Matte a handy tool to keep in the studio, even if pouring isn’t your thing. You can certainly still use brushes and tools to apply mixtures. Below are but a few of the other ways you can work with it.
Creating Color Fields
Translucent, ethereal color fields are easy to create with CPM Matte and a small addition of acrylic paint. 1-5% paint amounts are great for generating glazes that are both brush stroke free and smooth to the touch. Tone previous paint layers or establish hazy backgrounds. You may brush or blade (or pour, of course) relatively generous layers and watch the tool marks dissipate as the layer relaxes. The glossy wet surface will first level smoothly, and then dry completely matte and flat.
Using CPM Matte with Iridescent and Interference Colors
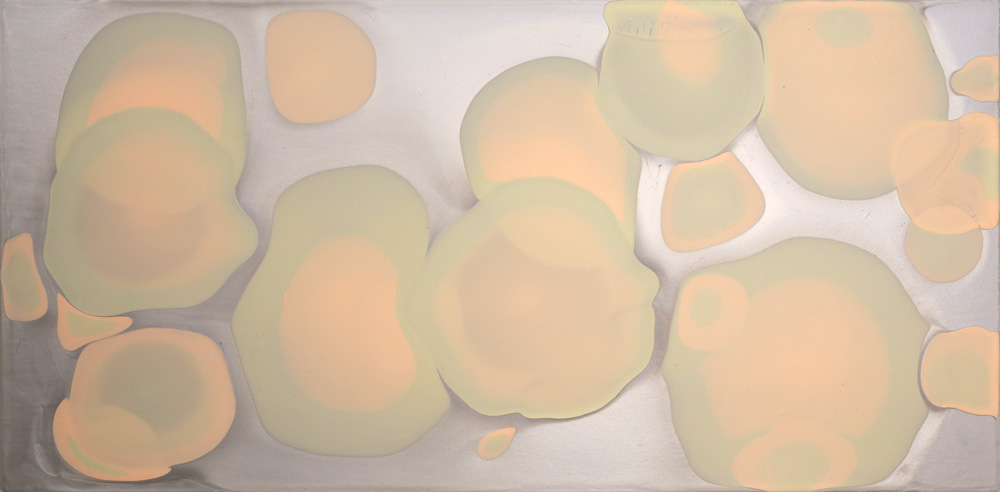
Almost by accident we discovered that combining mica pigment based paints with this product yielded stunningly beautiful effects. Often the pairing of reflective pigments with matte medium results in disappointment. Try Interference Violet over Black Gesso, or Iridescent Silver over a gray base.
Blend with Color Pouring Medium Gloss to adjust Sheen and Consistency
If the CPM Matte dries too flat – both in terms of sheen and depth – for your taste, you can modify the medium with Color Pouring Medium Gloss (CPM Gloss). In order to add depth without necessarily creating a glossy paint layer, mix 7 parts CPM Matte with 3 parts CPM Gloss.
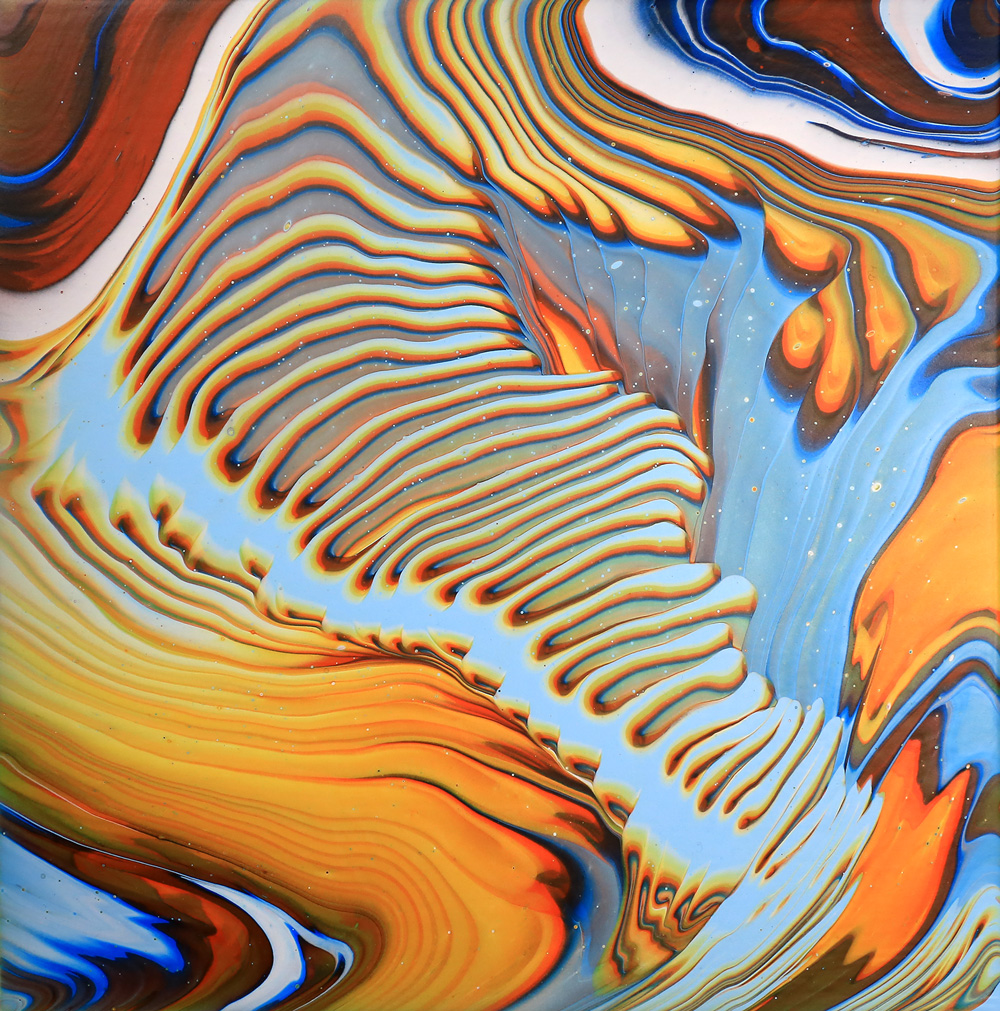
There’s a handy mixing table that lists what each mixture will dry to in our Product Information Sheet. These blends may then be applied as desired with brush, blade and of course right from the mixing container!
Additionally, if you find the CPM Matte dries too thin for you, add the CPM Gloss to reduce the amount of shrinking. These combinations also aid the CPM Gloss’ flow and leveling, so experiment with how various mixtures behave and not just on the dried finish.
Mix with Gesso to create a Leveling Gesso!
If you abhor sanding primed surfaces (like me) to achieve a smooth gesso coat then give this next application a try: Mix GOLDEN Black or White Gesso with the CPM Matte at 1:1 and apply a relatively generous layer and then lay it flat to dry. The result should be a smooth, flat finish ready for painting. It is important to note that smoother substrates (hardboard, M.D.O. plywood, etc) result in a more uniform Gesso/CPM Matte layer.
This blend will not smooth out texture like canvas weave when it dries. You’ll need to create a smooth surface first and then use the mixture, or you can apply the CPM Gloss first and then cover with the CPM Matte/Gesso mixture. Allow these primer coats plenty of time to dry well (3 days is ideal) prior to painting.
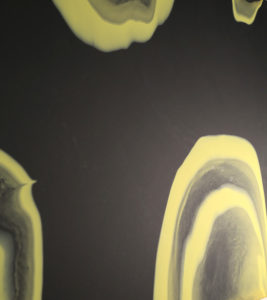
Some Cautionary Guidelines
We do a wide array of testing of each product we create here at Golden Artist Colors. Aside from tests to confirm the robustness of the product as a professional artist tool, we further engage in applications testing to push the boundaries of what the products are capable of doing for the artist. As one may suspect, we can’t possibly test every single way one might use a new product. Besides, what fun would it be if we didn’t allow our customers the chance to experience the frontier themselves?
However, while testing the Color Pouring Medium Matte, we observed some application anomalies we did want to bring to light to insure artists are aware of them and suggest ways to reduce them (or make them!). It is always valuable when experimenting yourself to test your applications before embarking on important projects.
Multiple applications of CPM Matte over highly absorbent surfaces may “mud-crack”
Unsealed supports such as crescent board readily absorb water and other additives in the medium. This may result in “mud-cracking” if the layers are built up thickly. Slow drying, thick puddles of CPM Matte mixtures can develop bubbles under the fresh pour. This is more likely to happen on stretched canvases because the weight of the wet product bows the canvas and creates thick paint pools in the center.
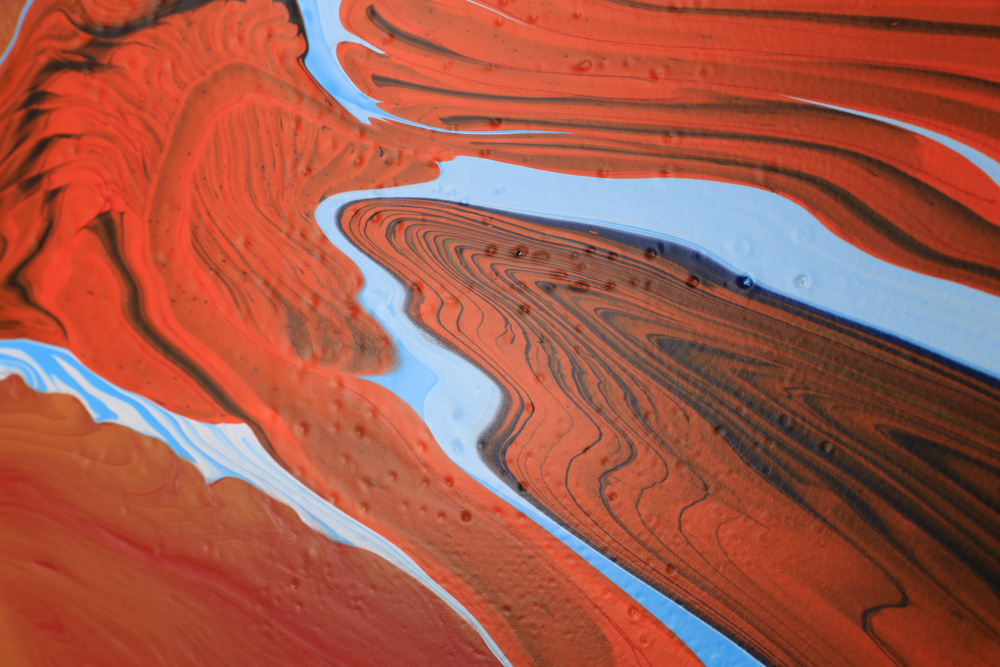
To reduce both mud-cracks and bubbles:
- Use a layer or two of thin glossy acrylic to seal the substrate surface before the buildup of CPM Matte layers.
- Work on a level painting surface. Slight angles will cause the paint to continue to move and create thick edges that dry slower than the rest of the pour.
- Thick layers dry more slowly than thinner ones, and in turn are more likely to facilitate the generation of surface defects.
- Tilt the wet pours to “stretch” the product into a thinner pour.
- Avoid heavy pours unless the excess can flow over the edge later on.
- Try to limit the number of layers, but if you plan to do many pours on one painting, keep them thin.
- Support stretched canvases with underlying panels to reduce thick central pools.
- Thick layers dry more slowly than thinner ones, and in turn are more likely to facilitate the generation of surface defects.
- Allow reasonable drying time between layers of CPMs and before moving onto other types of painting products.
Conclusion
Color Pouring Medium Matte offers some amazing benefits for the artist. Uniform, matte layers free of tool marks has been an elusive research goal for a while. We hope you’ll try this product out and show us new ways to use it. Be sure to visit the new Just Paint Experience which will highlight using this product along with sister product: Color Pouring Medium Gloss.
As always, if you have any questions, comment below. Otherwise, contact us at [email protected]

Hej Michael,
thanks for presenting the new Color Pouring Medium Matt.
How are the new Color Pouring Mediums compared to gac800?
BR Michael
I like the idea that this medium is “self leveling” is very interesting. As an artist on a limited budget the 20:1 ratio sound great except that the cost for a gallon of the medium is not cost efficient to use 20:1. So then the article shows different lesser ratios. If I followed the information sheet correctly the only difference in say 3:1 verses 20:1 is the gloss???
Please Note the link https://goldenhub.goldenpaints.com/storage/uploads/pigment-density-of-golden-artist-colors.pdf did not work for me.
Hello Wanda.
Thank you for your comments. I will ask our IT Department to take a look at the Pigment Density pdf to see if they can understand why it is not working for you. Perhaps you could try viewing the document with a different browser and see if that helps.
Regarding the ratio of paint to medium, paint typically costs more than mediums due to expensive pigments and the high pigment levels in our paints. In the case of the 20:1 CPM Matte to paint, this was done to create translucent, glaze-like color layers. You can use a much higher percentage of paint if you desire. We created a previous article that discusses the threshold of paint to medium, which does vary between product lines. If you over add the paint into the pouring medium, the medium is not going to be as effective in how it levels and in the dried glossiness, depending on the type of paint used.
– Mike Townsend
Hi Michael,
How did you get an acrylic medium that doesn’t form a skin? Does it go tacky and then less tacky until totally dry?
Does that compromise the paint film?
Richard
Hello Richard.
Thank you for your comments. The acrylic medium does form a film but it doesn’t happen initially as most acrylic mediums will. There is enough water and other evaporates in the CPM Matte to allow the layer to shrink and thicken until it starts to form a paint film towards the end of the process. Therefore, it remains wet and workable for quite some time, up until it becomes too thick to have any movement. Soon afterwards the layer dries and becomes matte.
– Mike Townsend
Golden is such a great company.
Thanks for your nonstop help to the artistic community.
I am wondering if the glossy color pouring medium can be used as the initial sealer on panels to prevent discoloration. I have been using the gloss medium but find it difficult not to leave brush strokes, which then require sanding and many layers of gesso to cover. I prefer to work on a very smooth surface! Is this appropriate for that use?
Hello Peggy.
Thanks for your questions. The CPM Gloss isn’t a great sealer for panels against SID, at least it is not as effective as the Gloss Medium in the testing we conducted. You may be able to improve the leveling and uniformity of the Gloss Medium by adding water (suggested max amount would be 2:1 medium to water). This will flow much easier and level more before it dries. It will also mean it dries to a thinner layer as well. Apply at least two or three coats of this and let dry. The CPM Matte can then be used with the Gesso, and brushed on with much better leveling. But as I’m sure you have seen, if there is physical texture from the brush strokes in the Gloss Medium, they will show through no matter how evenly the Gesso layer is. If that doesn’t help out, please contact us at [email protected] so we can get more in depth with this.
– Mike Townsend
Hi Michael, I was wondering If you know the tool that was used to do the black drip lines in the first photo? I have been looking for something that drizzles consistent lines for some time now. Thank you! Great article as well, I always appreciate what you all do for the community.
Hello Gage.
Thank you for your questions and your kind words. The tool used to create the drizzled lines was an ordinary plastic spoon. It loads up the paint really nicely, allowing for fairly long linework. The other important tool is the Color Pouring Medium Matte. It has the right consistency to achieve the color flow.
– Mike Townsend
Was wondering if the Gesso and CPM matte mixture would be suitable for sealing cradled board for use alcohol ink?
Hello Sally.
Thanks for your questions.
We have not done any testing with alcohol inks on the surface of the CPM Matte/Gesso mixture but it would be highly absorbent and not allow for the “tide lines” that many alcohol ink artists like to achieve on surfaces such as Yupo paper and glazed tile. The CPM Gloss and Gesso might work much better for this purpose.
– Mike Townsend
Hi
I think I’ve just messed up on a commission ☹️. I put on a “last layer” of CPM matte, but it was too thick and dried unevenly. How can I salvage it? What would happen if I sanded it?
Hello Joyce.
I’m so sorry to hear about this happening to you. First, allow the painting to dry thoroughly to improve the chances of saving the work. Sanding the surface may help, but this is a very thin product when dry, so you may inadvertently sand through the paint layers below. But if you try to sand it be sure to wear the proper dust mask. The surface is likely to be sensitive, but apply a very thin layer of the Isolation Coat to seal the surface. contact us if you have any further questions at [email protected] and if you have photos of the surface that would be very helpful.
– Mike Townsend
Thanks for the article! I read from a non-Golden site that GAC 800 and Golden’s CPM are (basically) the same. Are they? Or how are they different?
Hello, Pam.
Thanks for your questions. At the moment, the GAC 800 and the Color Pouring Medium Gloss are currently based on the same resin, but we anticipate improving the Pouring Medium over time. At present, the two products will perform similarly and a person who has GAC 800 currently can continue to use it.
– Mike Townsend
Hi I am a beginner to acrylic, I have used liquin on my oil paints for a gloss finish. What should I use for acrylic?
Hello Sidharth.
Thank you for contacting us with your questions.
There are many gloss acrylic gels and mediums that can be added, or applied over acrylic paint layers to increase gloss. I would suggest starting with applying the GOLDEN Isolation Coat product, which will increase gloss. If you like that look, then apply the Polymer Varnish Gloss to finish the painting. These products are applied at the end of the painting process, as sheen isn’t important while painting, as you can always adjust sheen at the end.
– Mike Townsend
Inspiring! How did the blobs of color and the shadows come about in the section “Using CPM Matte with Iridescent and Interference Colors”? Was paint dropped in to make the blobs, and do layers account for the shadows, or are the effects due to other processes?
Thanks!
Hello, Donna.
I applied a base layer of Color Pouring Medium Matte that was mixed with our Fluid Iridescent Silver Acrylic, then while wet, the Titan Pale colors were poured onto it. All paints are mixed more or less at a 10 parts medium to 1 part paint ratio. Give it a try! – Mike Townsend
Thank you, Michael. I think it’s worth a try 🙂
Can you paint oils over this?
Hello, Tracey.
Thank you for commenting on our articles. It looks like you are doing some deep research about these subjects. I asked Greg Watson to comment on the questions you raised about oil painting, Zinc White, etc., and I’ll group these questions and the other pouring questions from your questions to Greg.
Yes, you can use the Color Pouring Mediums under oil paints. Ideally, adding Gesso or Paint would be good, and allow them to cure for at least 3-7 days before going in with oil paints. Greg will speak more about the use of oils over acrylics, but overall, the concerns are lessened if you add some extra linseed oil or an alkyd medium like Gamblin’s Galkyd in with the paints.
You can get the lacy cells just by misting the acrylic pours with 90% isopropyl alcohol. Use a fine mist bottle to get the fine lace. Colors with a lot of Titanium White added over darker colors work well for this technique. Aviod the use of silicone, as it can migrate to the surface and very likely could cause adhesion issues with the oil paints.
In regards to pouring using a lot of paint, that is true, but realize that you can make paint mixtures that are 90% Color Pouring Medium and only 10% color when you pour, as well as when you pour the puddle out onto the panel or canvas, be sure to tape the edge and tilt the pour to stretch it towards the panel edges. After the pour has covered the entire panel, THEN remove the tape and you should not have a lot of lost paint (like I usually see in the many YouTube pouring videos). After you remove the tape, give it a couple of minutes, then mist the alcohol, and then leave it to dry or tilt or otherwise manipulate the pour to achieve the desired effects. – Mike Townsend
Thanks Mike! What a great response time you guys have:) I found a youtube artist use very thin paint over dried paint and then put saran wrap over it to get an ice effect. Linda Celestian “Ice Ice Baby” in case you are curious. She is using far less paint and it all seems to be useful vs wasteful. She said she used your airbrush medium. That was many years ago. Didn’t you replace that medium? What would you recommend I use with end goal of painting over it will oil. I am resigned to the fact that I will add oil so matter what I do just because I am painting over acrylic. I also asked a similar question on Greg’s post before I saw that you had responded. Thanks so much.
You are welcome, Tracey. Pouring is a technique, and many paint materials can be used. Airbrush Medium is still being made. You are thinking about the Airbrush Colors and/or the Airbrush Transparent Extender. These have been reformulated and are now called “High FLow Acrylics” and “High Flow Medium”. There are many more colors now, and we wanted to reach a wider audience without the intimidating “Airbrush” moniker. But, Linda is using the Airbrush Medium as her base. Both would work for this technique, but the Airbrush Medium will dry much slower, which does not seem to be needed for this application. You can use Fluid Acrylics or High Flow Acrylics. The main thing is that nice thin viscosity so that it comes off freely from the saran wrap. Give it a try and let me know how it turns out! – Mike Townsend
Hi Tracey,
Sorry not to answer completely. If you were to paint oils over acrylic pours, you would want to add binder or oil medium to your oil paints. Because pours tend to be glossy and thicker, additions of about 10% or mora are recommended. If you are using glazes that are primarily oil binder with transparent color, that should be fine as far as we know.
Thanks,
Greg
Thank you to the entire team at justpaint.org for making all the information available.
I’ve started experimenting with CPMg, pouring over 6mil plastic as my base. My goal is to create smooth surface skins that can be used as-is, cut and pasted on substrates, or painted on directly with fluid and heavy body acrylics.
In my first attempt, I poured only CPM without additives and encountered bubbles. My pour was too thick, and agitating the surface with a palette knife caused more bubbles. How can I guide the puddle by hand into shapes with better control? I’ve seen artists tilt the substrate, but I’m looking for additional techniques.
For my second attempt, I used a 1:1 Gesso and CPM mixture on the 6mil plastic, but bubbles appeared again. I’ve learned about letting the mixture sit for 24 hours to settle bubbles. Any tips on achieving a thinner pour? Is using airbrush medium or GAC 100 a good idea, and if so, what ratio would you recommend?
Lastly, what substrate do you recommend for making skins? I’m currently using 6mm plastic, but the folds concern me. I appreciate your insights and look forward to your reply. Happy painting!
Hello Jordan,
Bubbles can be a reality for acrylics and it is often related to viscosity. If your pour is thick, it will not allow bubbles to raise to the surface and release as easily. You could try using more of the Pouring Medium in your mixtures to thin down the paints. With the Gesso application, a 1:1 is a good start, but we often recommend using even a 10:1 ratio of Pouring Medium to Paint. This will lower the risk of crazing and be thin enough for bubbles to release. Letting mixtures sit over night can be helpful as well. Avoid using products like Airbrush Medium as this would slow down drying when applied this thickly, which could take a really long time. Airbrush Medium also doesn’t contain much binder as it is more of an additive for spraying Fluid Acrylics. GAC 100 is not designed to be pourable as it can increase the risk for crazing. The addition of water can thin the pour, but also increase the risk for crazing as well. You could get around this slightly if you mix your Color or Gesso with GAC 100 or High Flow Medium, which is our thinnest medium and then using the Pouring Medium 10:1 with that mixture. You may need to test on a small scale to see what works for you.
As far as tools, it can be tricky since the use of a tool can generate foam or bubbles due to friction or disturbing the surface. Tilting can be a nice way to “stretch” out the pour as well. To have a smooth skin glass works really well on a smaller scale. We have also had great success using a sheet of High Density Polyethylene Plastic (HDPE). We have an actual table we made with this material that we use for making skins.
If you have more questions let us know at [email protected]
Scott
This wasn’t mentioned, but CPM can also help when you squirt it on a canvas you’re ready to throw out a window.
I became very frustrated trying to get a specific gradient yesterday. I’d mixed some OPEN gel with my heavy body paints and was spraying them (and later the entire canvas) liberally with a mixture of distilled water and OPEN Thinner, but the paint was still getting “grabby”. I had several ounces of CPM in a squirt bottle in may desk, was feeling desperate and just wanted to get rid of the rough areas. So I squirted a healthy amount of it down the center of my 8″ x8″ canvas.
It worked. Not all of the brushstrokes are gone, but there are definitely fewer. (Nothing was wrong with the gel, CPM, or Thinner, it was me. I haven’t painted in years. Along with using way too much paint, I’ve never painted a gradiated background with an arch.)
Diane,
Thank you for this hilarious and insightful comment. We’re glad to hear it all ended well!
Indeed, gradients can be one of the most challenging applications for a painter. Color Pouring Medium might be a useful tool in the kit for such moments. Since water is the fastest-drying component in your mixture, we recommend switching some of it out with more CPM (or the purpose-made slow-drying OPEN Medium) and OPEN Thinner.
Welcome back to the canvas and best of luck on the next (and the next)!