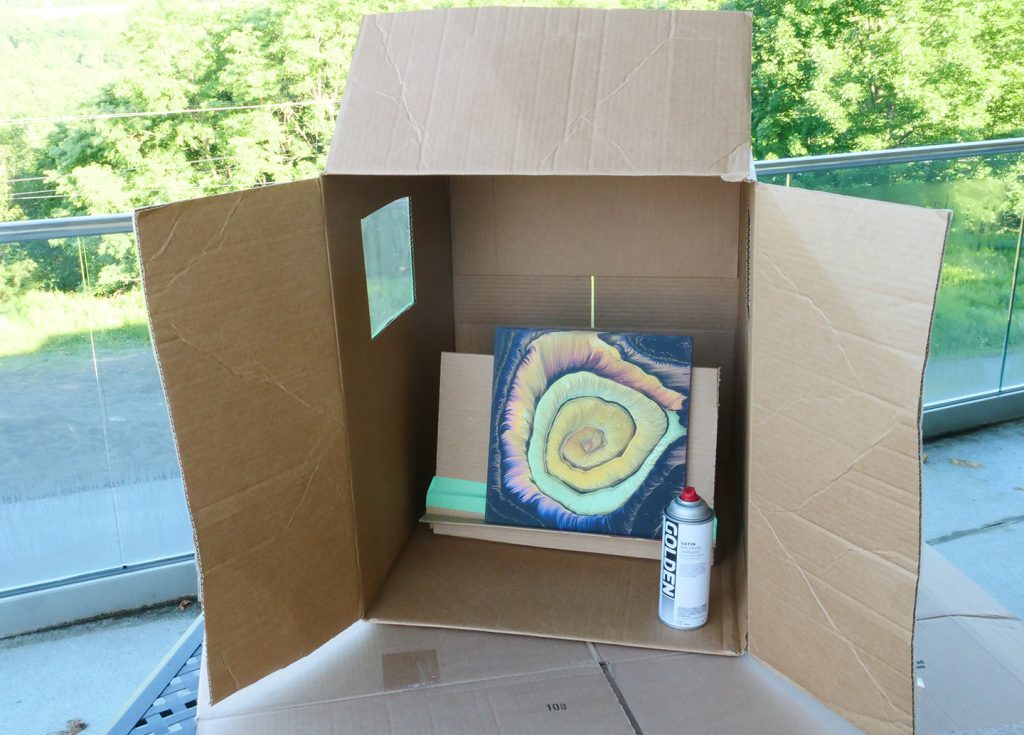
Why Spray Varnish Outside?
Although we created the GOLDEN Archival Spray Varnish to make the varnishing process as easy as possible, many artists lack a dedicated interior location for spraying products, much less using solvents. The logical choice is to move the operation outside. However, spraying out in the open creates new challenges to be addressed, including temperature, wind, rain, and dust. Fashioning a temporary spray booth for exterior use is a practical solution helping minimize exposure to solvents and airborne varnish particles (known as “overspray”). It also creates a shield against spray direction-altering winds and direct sunlight. We will review the most important environmental factors and provide instruction on how to create your own temporary spray booth.
What is a “Spray Booth”?
A dedicated spray booth is an important space for anyone that does a fair amount of spraying of art materials such as fixatives, varnish, paints, mediums and even primers and gesso. The booth evacuates the spray mist and solvents through ductwork to keep both from entering the rest of the studio. A spray booth also helps reduce contaminants such as airborne dust and should be large enough to accommodate the kind of objects to be sprayed. They can also be costly and need to be properly constructed, ensuring they work properly and provide adequate lighting on the painting surface.
A temporary, exterior spray booth is more low-tech, as it doesn’t need face shields, ducts, fans, or motors. You bring it outside when you need to varnish a painting or two. They can be constructed out of low-cost materials and stored away flat until needed again, or broken down, making a new booth when the need arises again. The key is to make one that suits your needs and keep the process simple.
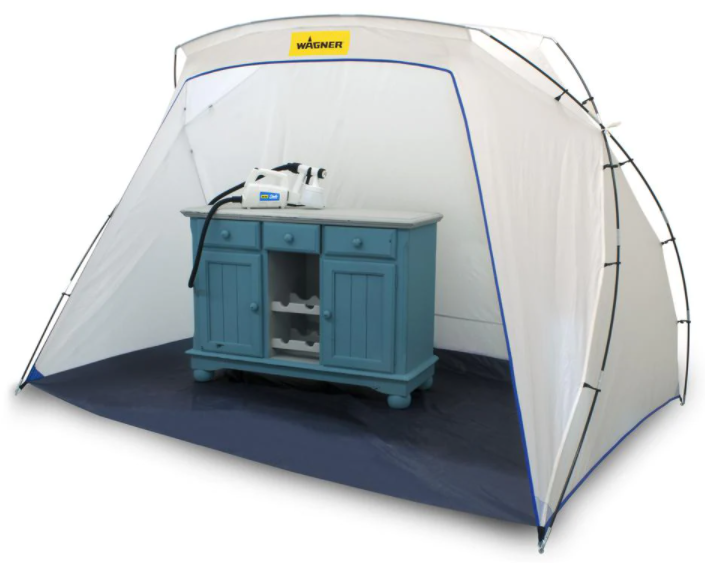
Yes, there are commercial spray booths available in a wide array of options. They range from simple “spray shelters” (see image below) to elaborate tents and even inflatable vehicle-sized models. Commercial spray booths range from $30 to $3000. It may be helpful to try a temporary booth first to learn if you need a more elaborate booth in the future. That said, this article will focus on a simple, easy-to-construct spray booth made from common household materials and intended for modest artworks.
Before Spraying Starts, Be Mindful of the Elements and the Environment
Spraying outside is not a substitute for safety. Remember, the solvents, propellants, and particles are going somewhere. Even if most of the product lands on the intended surface, there will still be some overspray and of course, solvents to contend with. Overspray can drift onto windows and car surfaces.
Additionally, the exterior environment will add some curveballs to the process. Wind can alter the direction of the spray. Dust and insects can attach themselves to the drying varnish surface. Direct sunlight increases the painting surface temperature, contributing to an uneven coat. A spray booth provides some shelter against these matters, but one factor that your temporary spray booth cannot help with is temperature.
Temperature Range – An ambient temperature range between 18°C (64°F) to 23°C (73°F) is ideal for applying painting materials, but not always possible to achieve, especially outdoors! However, it does give a target range to aim for as you prepare to do some spraying. As you move away from the ideal, be mindful of how far you do drift. Both directions have their own concerns:
- Warm Temperature – On hot days, stay in the shadows and spray early in the morning and later in the afternoon. As you approach the mid 80’s(F) and beyond, varnish can start to dry unevenly. This is especially true with the sun bearing down directly on the artwork, due to rapid evaporation as water or solvents try to escape. Water/solvent moves away from the direction of heat. In hot temperatures, Archival Varnish may partially dry mid-air, resulting in spiderweb-like strands on the painting surface. And make sure the aerosol cans are not left in the sun either, as they can explode from pressure if they get hot enough.
- Cold Temperature – The minimum “film-formation temperature” (the lowest temperature that the polymers are able to properly join together) for most acrylic products is 49F. Note this means temperature of the artwork, not the air temperature, has to be warmer than 49F. Really though, you are by far better to wait for a warmer day in the high 50’s to low 60’s while the products are becoming touch dry. If you must spray in cold temperatures, allow the spray mist to dissipate and bring the work inside to finish curing (assuming the solvent off-gassing won’t be an issue inside). It is also worth mentioning that products tend to spray better at room temperature warm, so you may want to store the aerosol cans inside until just before you begin spraying.
Wind – This might be the main reason to use a temporary spray booth. A gentle breeze can be helpful, but stronger winds cause uneven spray patterns and might be carrying pollen, dust, and other contaminants that always seem to land right on what is being sprayed. The booth will greatly help with wind, but stronger gusts might flip over your spray booth and the painting, so it’s best to wait for things to calm down.
Airborne Contaminates – If you suffer from allergies, you probably know when pollen season is in your region. A quick check of the surface of a recently washed vehicle also reveals how dusty the area can become. Dust particles and even bugs seem to be drawn to the wet varnish layer, so if it’s buggy and dusty, be sure your booth design takes these factors into account.
Rain and Moisture – We assume that most people will not be tempted to try spraying products while it’s raining, but sometimes you have to do what you have to do. If you must varnish when it’s drizzling, overcast or just threatening to rain, cover up the spray booth table with a canopy or – even better – a screen tent. That said, we would really suggest waiting the storm out.
Be equally mindful of humidity and dew that can form during the night, as these can slow drying or may even create issues for the type of product you are spraying. For example, some varnishes and protective clear coats can become “cloudy” or develop a “blush” due to high humidity that may not clear up later. Be sure to read up on your products and follow what the weather is going to be doing on the days you plan to spray.
Planning and Constructing the Spray Booth
Remember, we are not going to discuss constructing an elaborate or permanent spray booth in this article. If this is something you would like to pursue, let us know in the comment section at the end of this article, or contact our Health and Safety Department to go over your needs and situation. Otherwise, let’s get to constructing the booth!
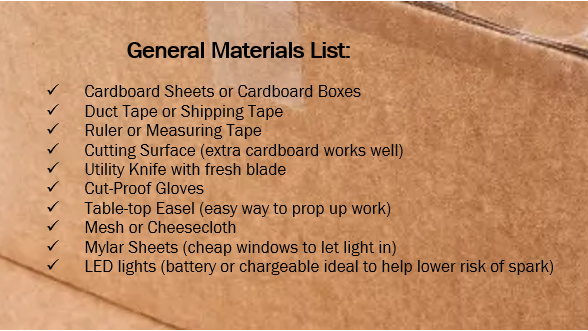
Sizing Up the Booth – Measure of the artwork to spray. The interior of the spray booth should be large enough to allow for the artwork to fit inside, with at least several extra inches on all sides to allow for proper spray technique. The bottom edge of the painting should also be raised up for this reason.
Locate a Box that accommodates the painting – Easy is best, so you might be able to simply locate a solid cardboard box of adequate size and move on to accessorizing your booth. However, if necessary, construct the booth from cardboard sheets, tape and framing materials if it works best suits your needs.
Accessorize – There are several items beyond cardboard and tape you can use to improve your modest booth:
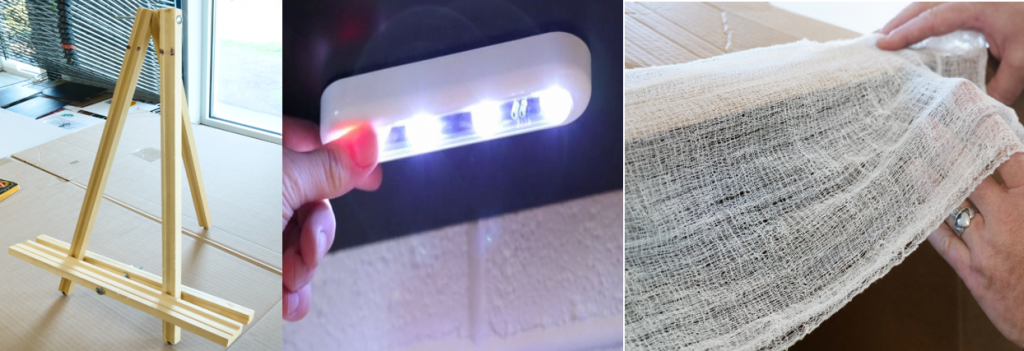
Easel – A small, tabletop easel makes it easy to prop the artwork up so you can achieve the proper spray distance and technique. You can also make a cardboard “wedge” to rest your work upon. Be sure to raise the work up a bit to facilitate a uniform spray coat.
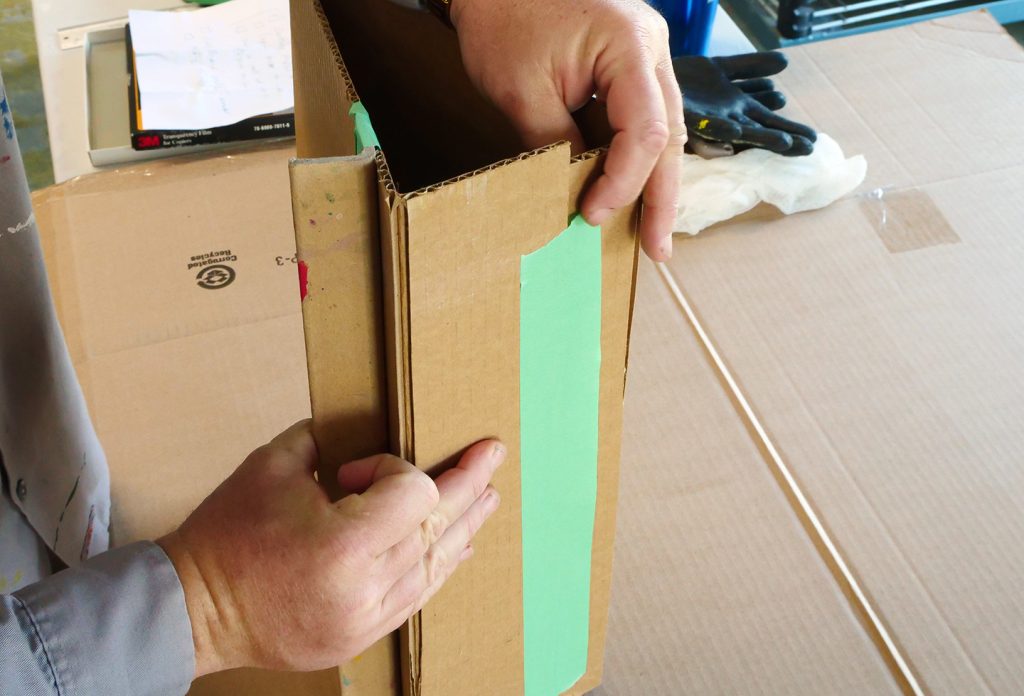
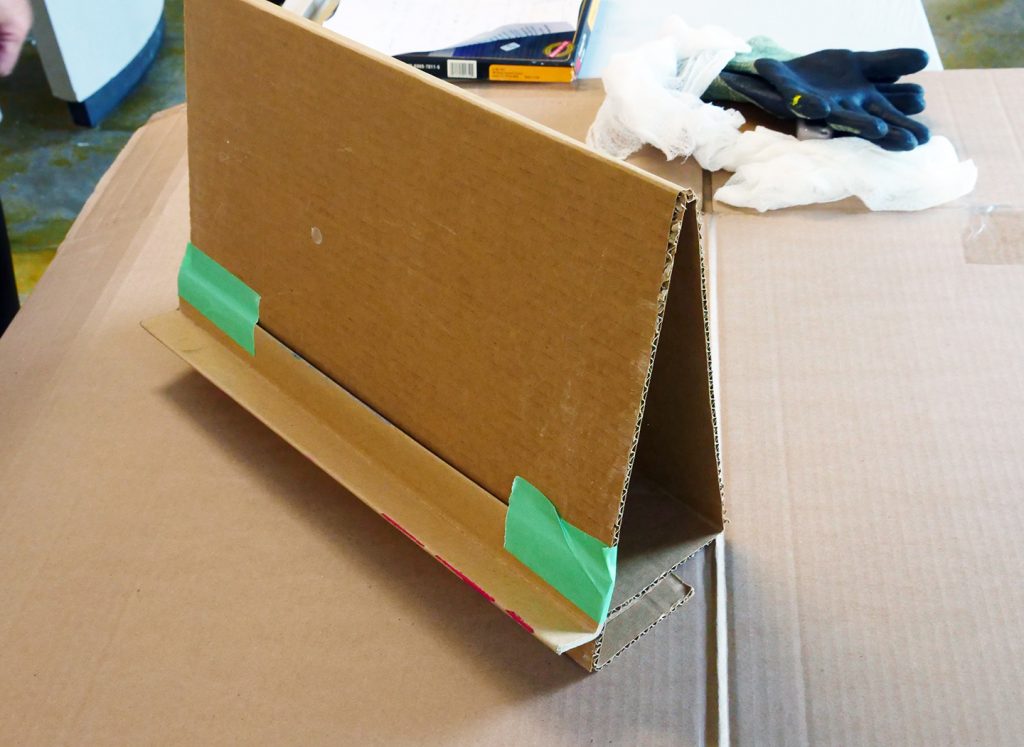
We discourage spraying downward onto a painting unless you have no other choice. Review our Archival Varnish Information Sheet for additional information.
Let There be Light! – Being able to see the artwork’s surface while you spray is critical for success. If you don’t have a location where there is great natural light inside the box, you have two options. You can cut some holes out on the top and sides and then cover them with clear mylar sheets, or protector sheets and tape them in place .
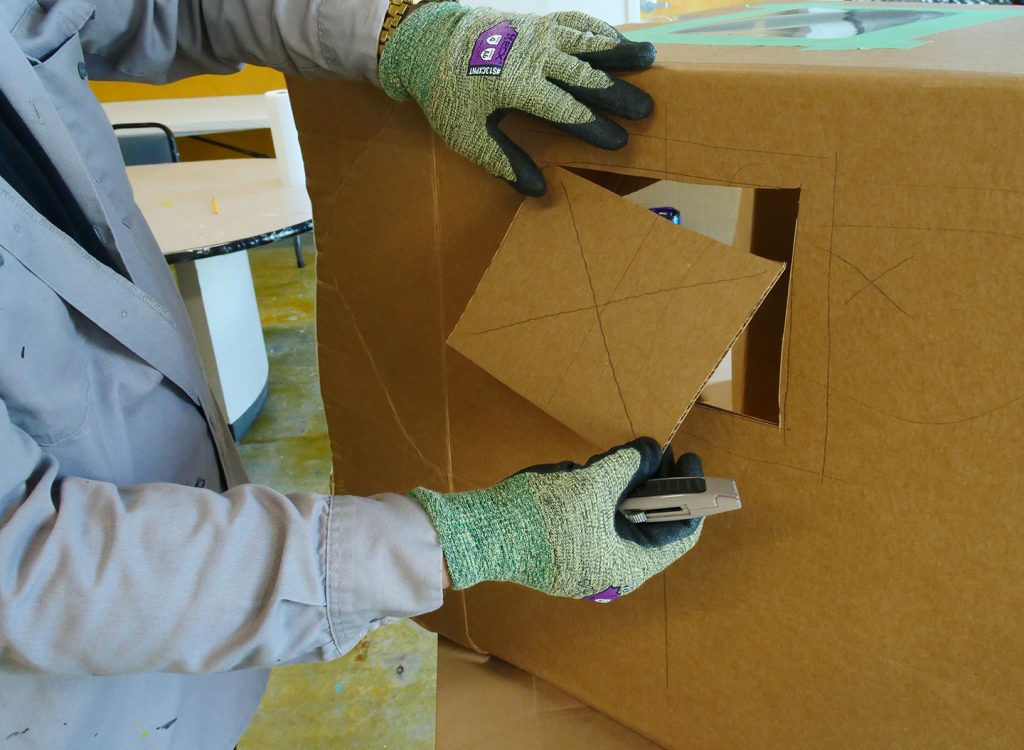
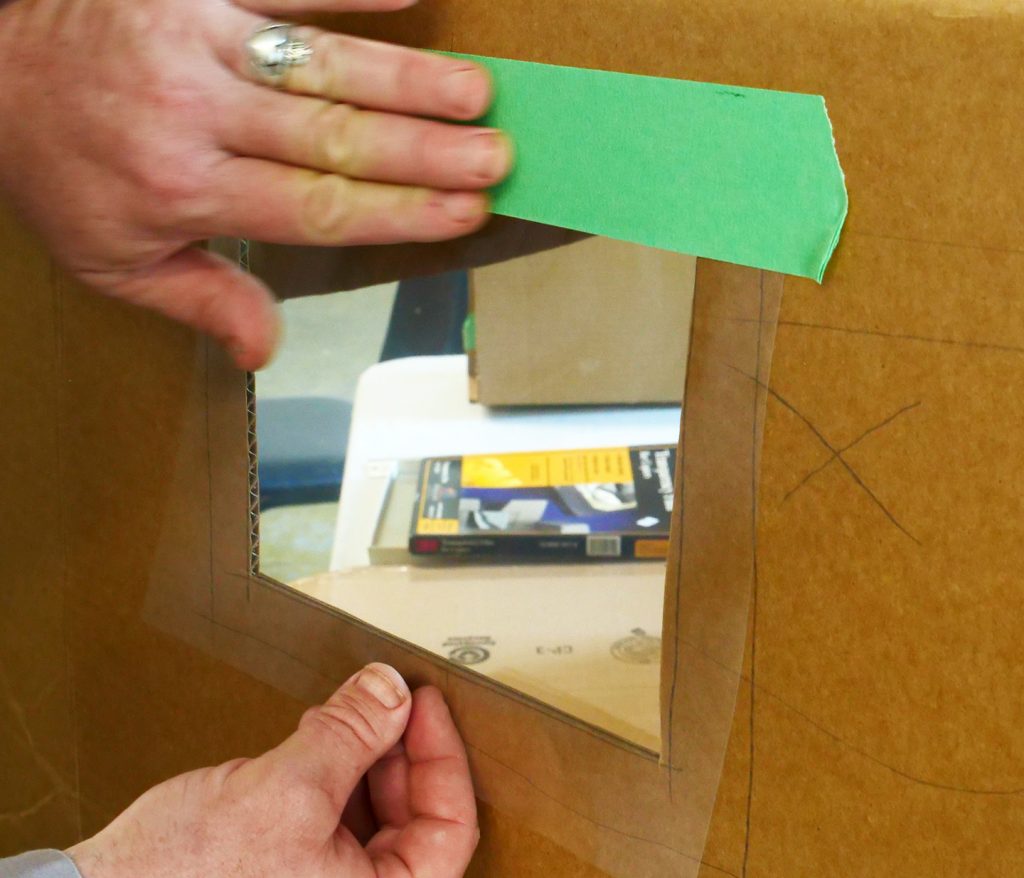
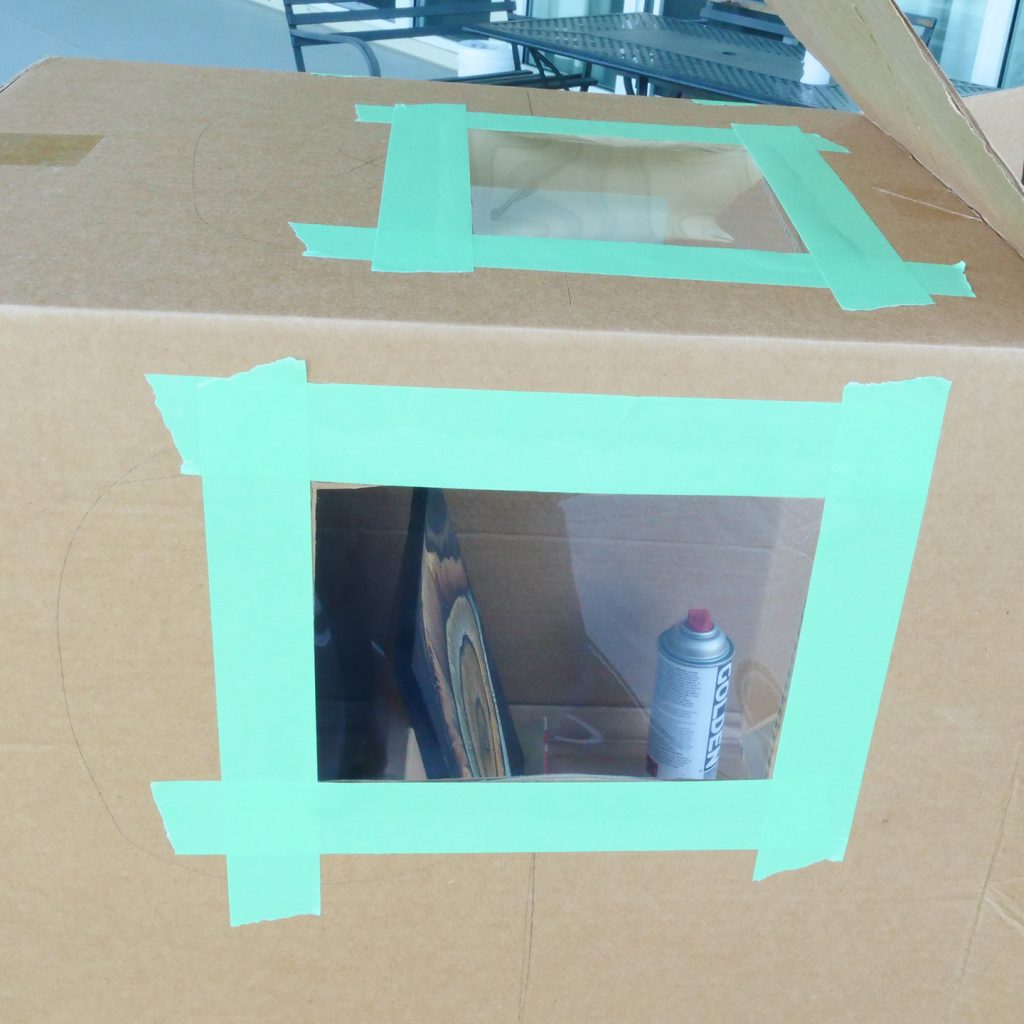
If that doesn’t provide enough light, then set up some artificial lights behind you, or you can get some battery-powered LED lights that can be stuck almost anywhere (see image).
Fine Mesh or Cheesecloth – After spraying, close up or cover the front side to reduce contamination, or if easier, tape an open-weave fabric such as cheesecloth [image] and drape over the front after spraying. Otherwise, simply close the box flaps and allow the varnish time to dry.
Once the solvent and spray mists have dissipated and the surface is reasonably dry, you may bring the artwork back inside. If you don’t plan on spraying anything else anytime soon, break down the booth and recycle it, or fold it flat and store it until the next time you need to spray.
Comment below if you have any questions or ideas to help improve on this concept, or contact us at [email protected]
Mike Townsend
About Michael Townsend
View all posts by Michael Townsend -->Subscribe
Subscribe to the newsletter today!

I have a shed in my backyard and realized I could use that.
Hello Miriam.
Yes! That’s a great idea. You may still want to create the cardboard booth to use in the shed, as those spaces can be quite dusty.
– Mike Townsend
Really helpful idea! Thanks a lot for this. I always wear a mask and etc. but felt bad about the spray spreading out into the air around us. At least this way the spray particles will be somewhat contained.
You are most welcome, Nancy. I’m glad you found this article useful.
– Mike Townsend
Very interesting and a nice idea. Must confess I just take things out into the garden!
What is the best way to spray an acrylic canvas?
Up and down?
Side to side?
If sides are painted do you spray later?
How long to wait before adding a 2 nd varnish coat?
Can you paint on a high gloss varnish first let dry and add a coat of spray varnish?
Thank you
Hello, Francine.
Thank you for the plethora of poignant questions. I’ll answer them each briefly, and also provide some links for you to peruse.
Spraying Varnish should be done while the artwork is vertical or close to vertical. The direction is somewhat important but should be taken in the context of each individual work. For example, if you have a tall, yet narrow artwork, then choose the shorter, left to right application and overlap as seen in this video:
Spray edges first (usually while it is on a table so you can easily see the edge and spray at a proper angle. Then, put the work vertically so you can spray the front side. Time between coats is relative to many factors. Usually, though, Archival Spray Varnish coats can be applied within the hour. Yes, you can brush a coat of MSA Varnish Gloss, allow to dry (at least 6 hours) and then continue with Archival Spray Varnish layers as desired. I hope that helps. Please contact us directly at [email protected] if you have any other questions. – Mike Townsend
Thanks for the ideas on the subject of spray booths. I was going to add the element of bugs, but then read read your cheese cloth solution. Why is it that those darn insects are so attracted to spray paint?